OpenBOM SSO
An Administrator’s Guideline for Configuring Single Sign On (SSO) for OpenBOM
This document is written for OpenBOM Company Administrators to implement Single Sign On (SSO) functions with either Microsoft Azure or Okta SSO providers.
The company admin MUST create the user’s account in OpenBOM manually. This means that if an administrator adds a user to Azure AD or Okta, he must also add the user to the OpenBOM team. For more details, see the section on Users auto-sync below.
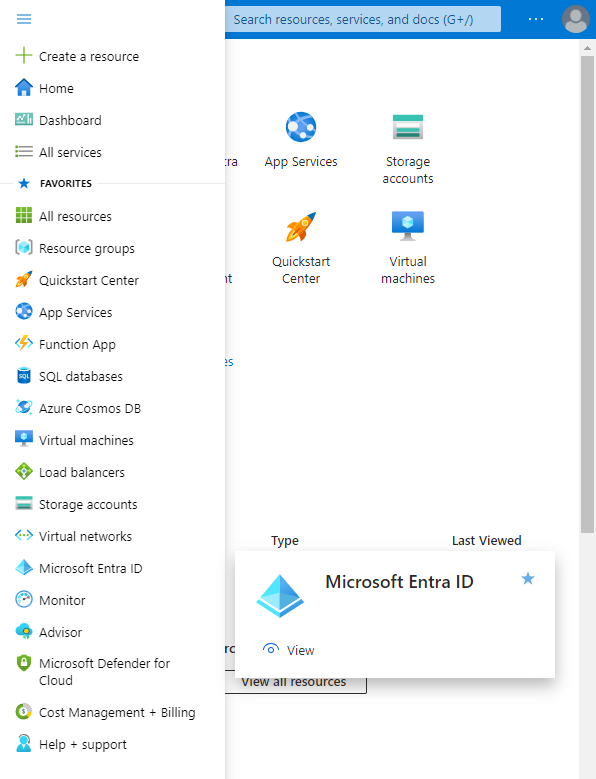
1.Sign in to the Microsoft Azure portal. Click the menu icon at the top left corner to open the left side navigation pane.
2. Select Microsoft Entra ID in the navigation pane.
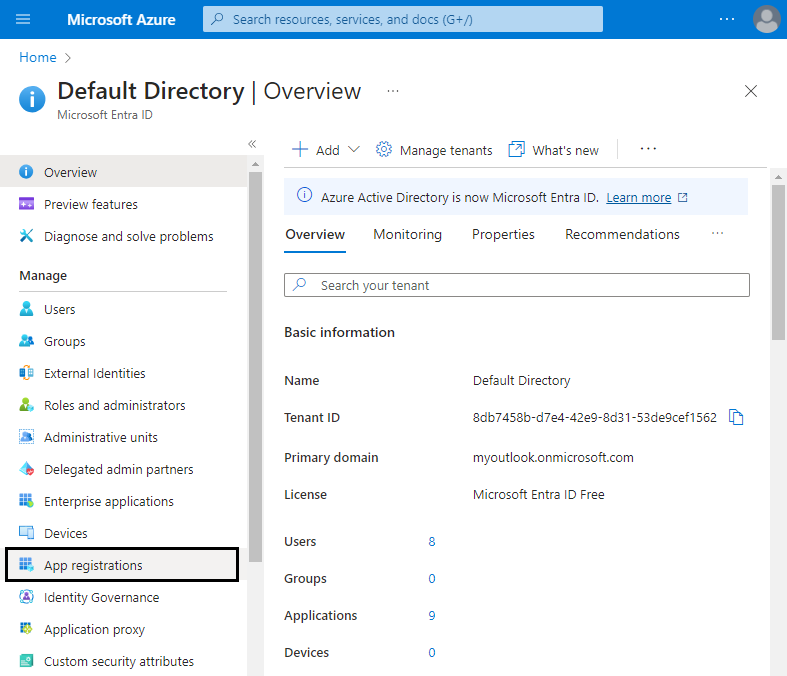
3. Select App registrations in the new navigation pane that opens on the left.
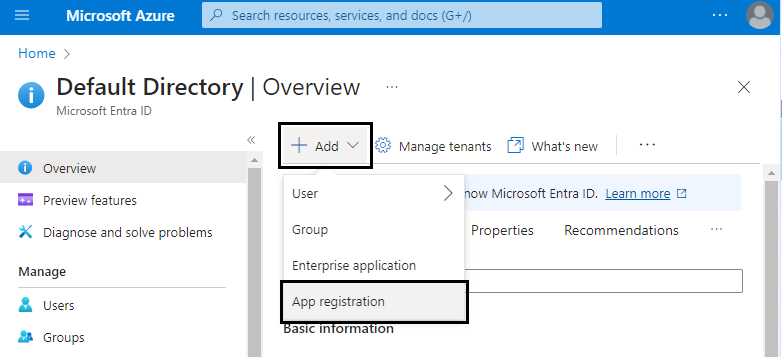
4. Add new registration of application by clicking Add → App registration.
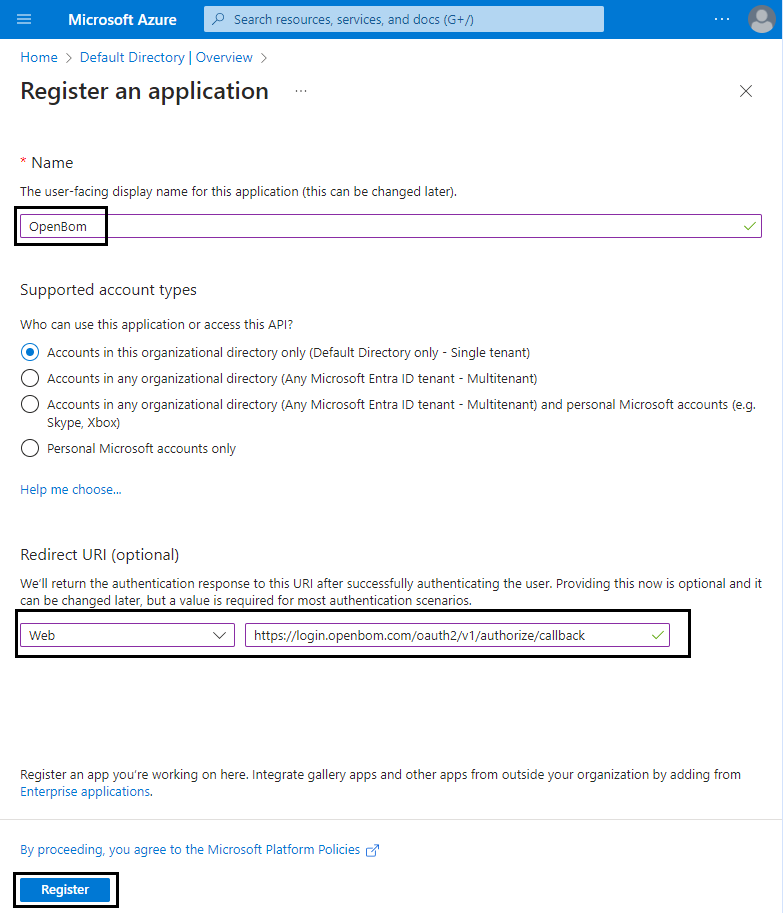
5. Register a new application
Set name to OpenBom, select Redirect URL to Web and set value to https://login.openbom.com/oauth2/v1/authorize/callback, and click Register.
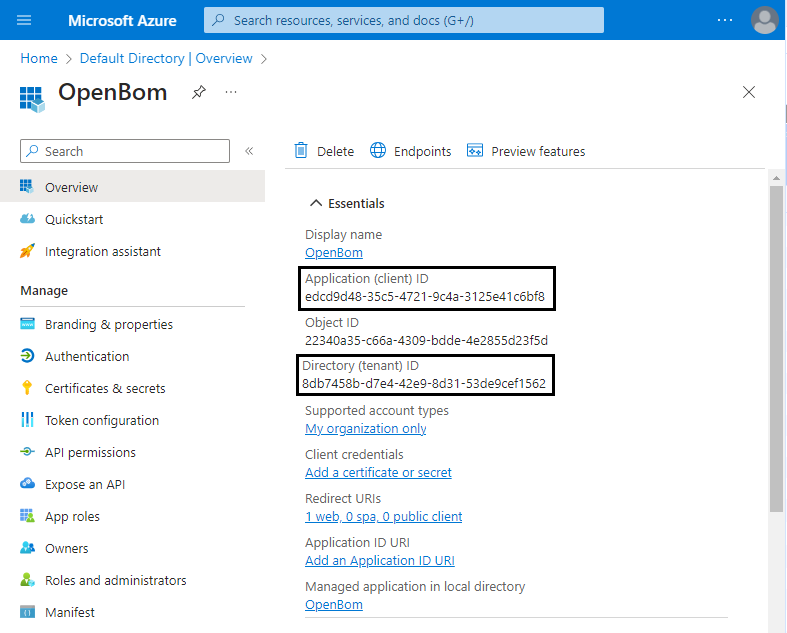
6. On the opened page with the registered application, save the values of Application (client) ID and Directory (tenant) ID.
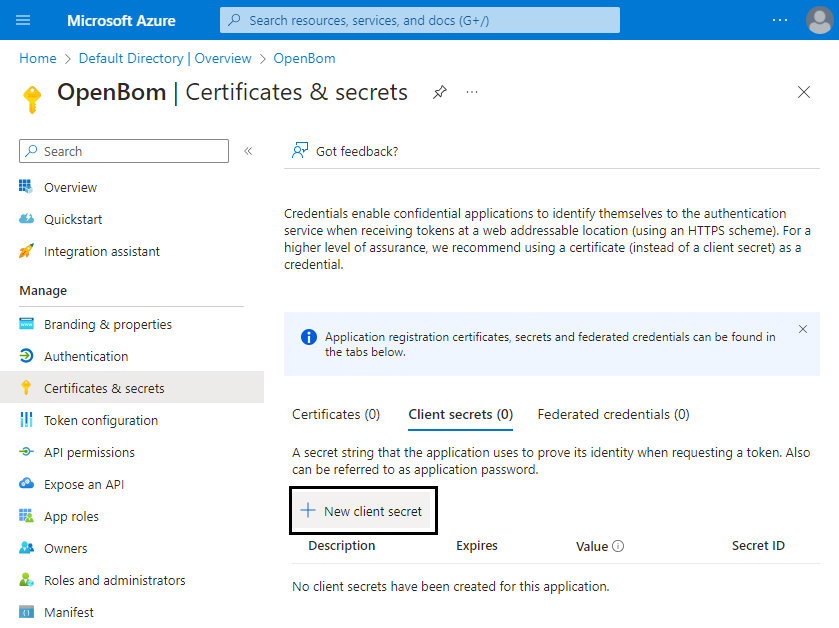
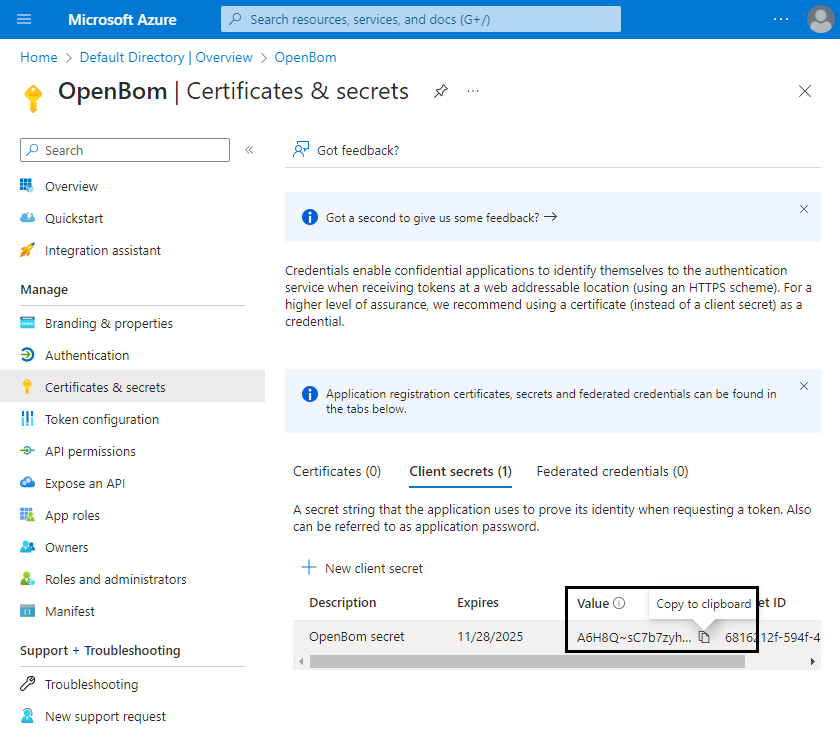
7. Select Certificates & secrets in the navigation pane to add Client Secret, and click New client secret.
8. Add Client secret.
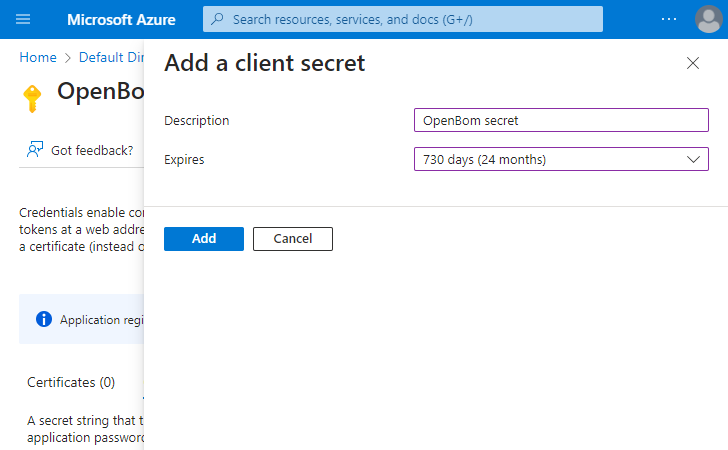
9. Save value of added Client Secret.
10. To allow users synchronization between Azure AD and OpenBOM, open API permissions in the navigation pane and add a pemission User.Read.All. OpenBom is uses only fields mail and accountEnabled from User profile in Azure AD.
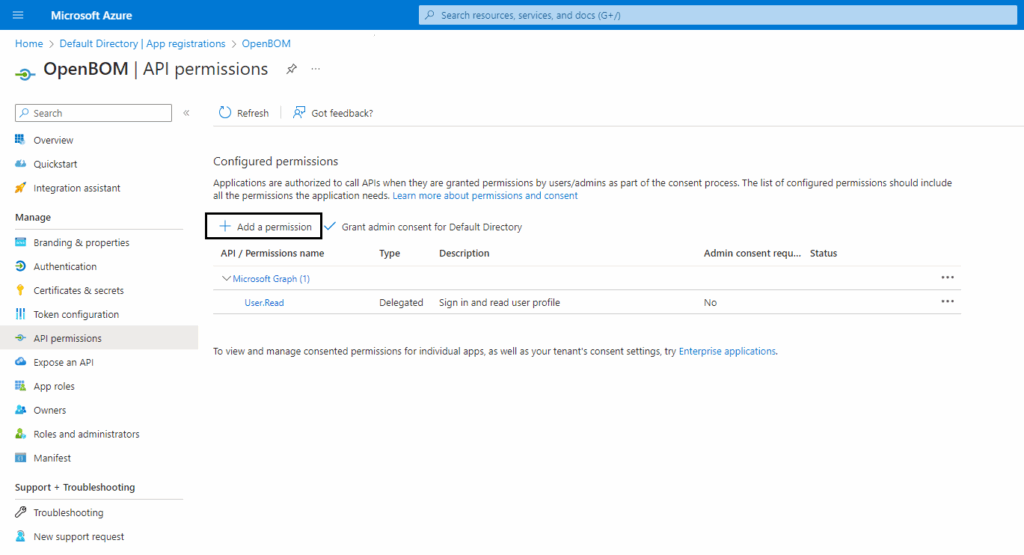
Click Add a permission
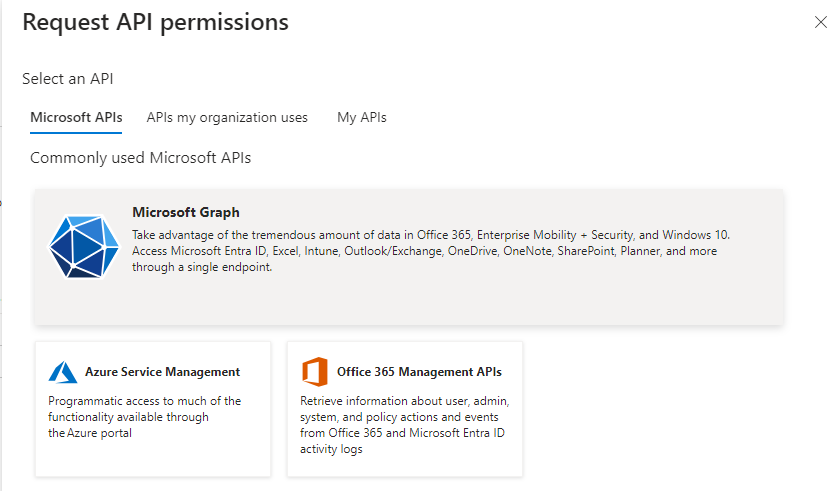
Select Microsoft Graph
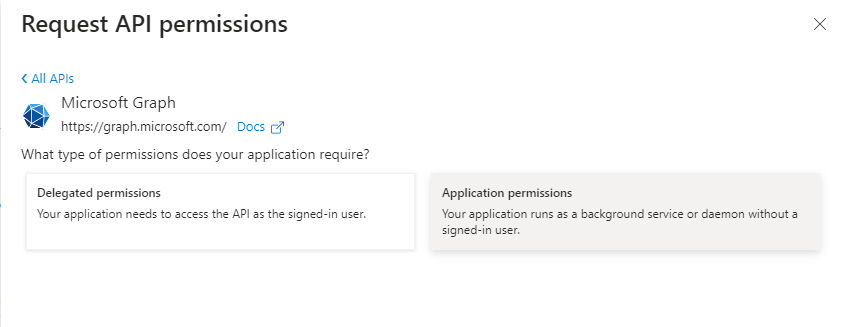
Select Application permissions
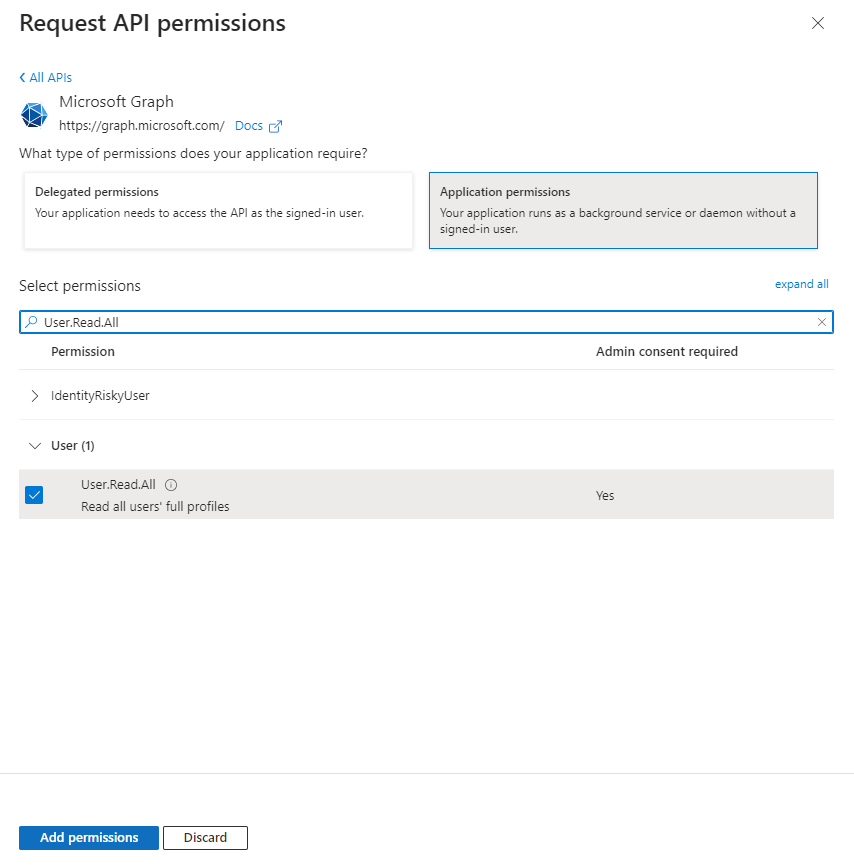
Add Users.Read.All permission
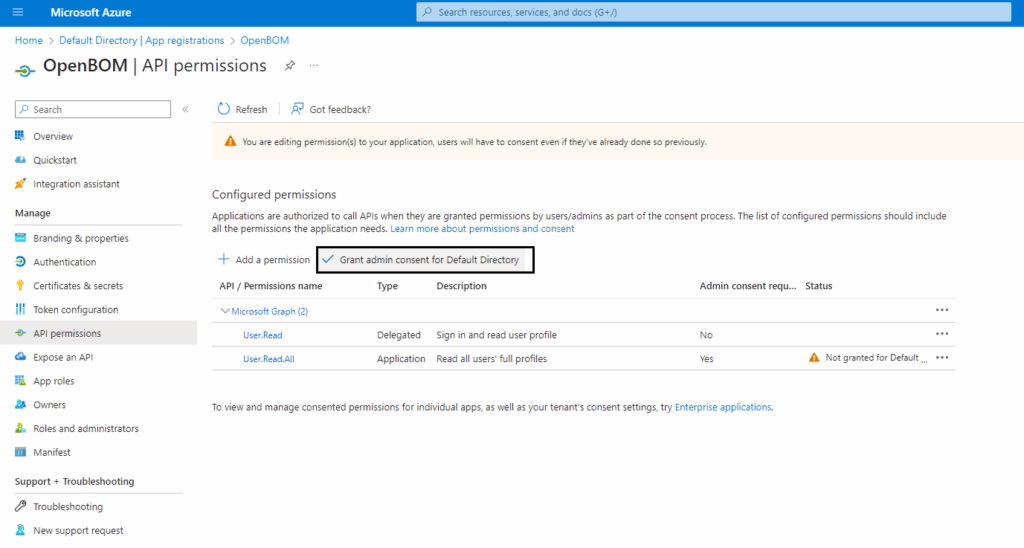
Select Grant admin consent for Directory

Confirm granting
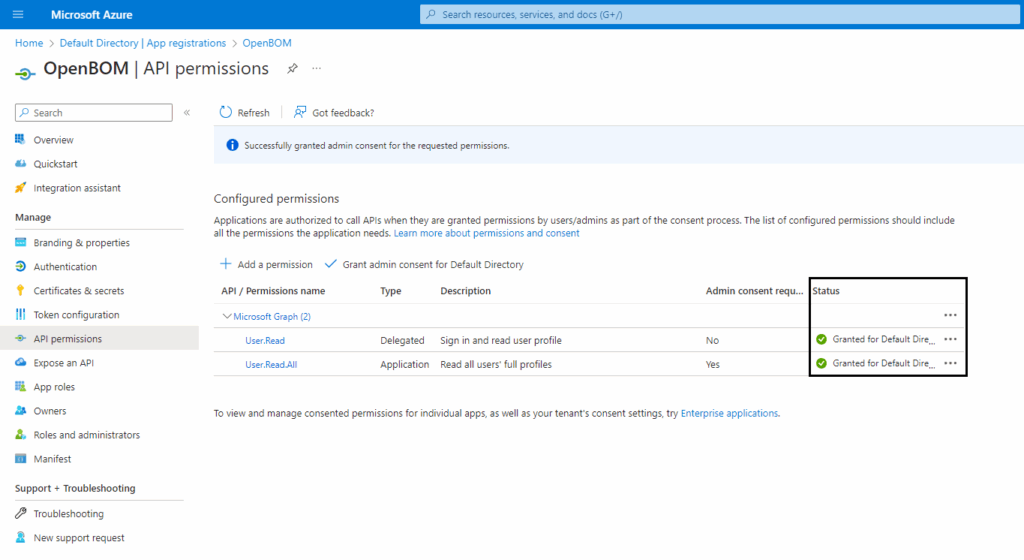
Verify that status is granted
3. Company admin now has additional row Single Sign On. Click Configure SSO button.
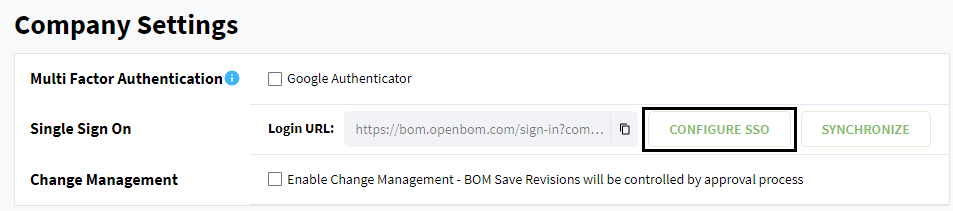
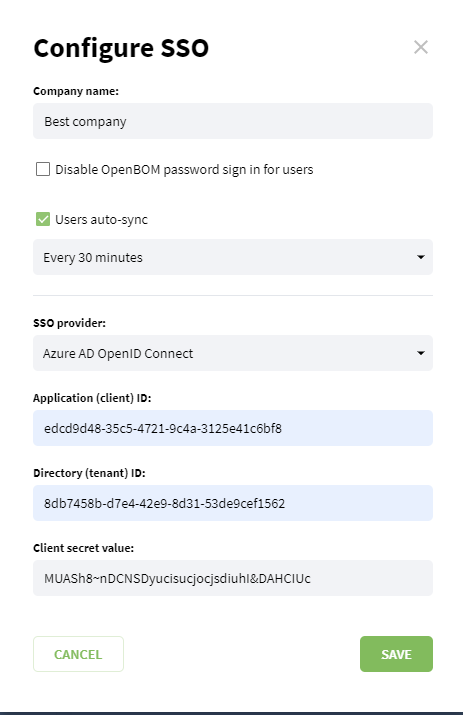
4. Enter values saved on the Step 6 and Step 9 of Azure configuration, and save configuration. Additionally put name of your company to Company name field.
5. Copy Login URL for your company where you will have possibility to login with Single Sign On.
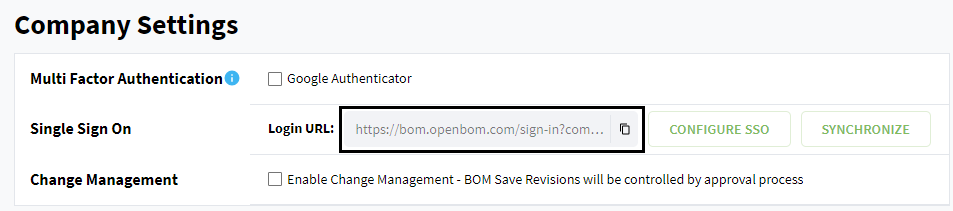
6. Logout from OpenBOM and open Login URL from previous step. Example of link:
https://bom.openbom.com/sign-in?company=946cef84-5e84-3bd3-6cef-120e843bd356
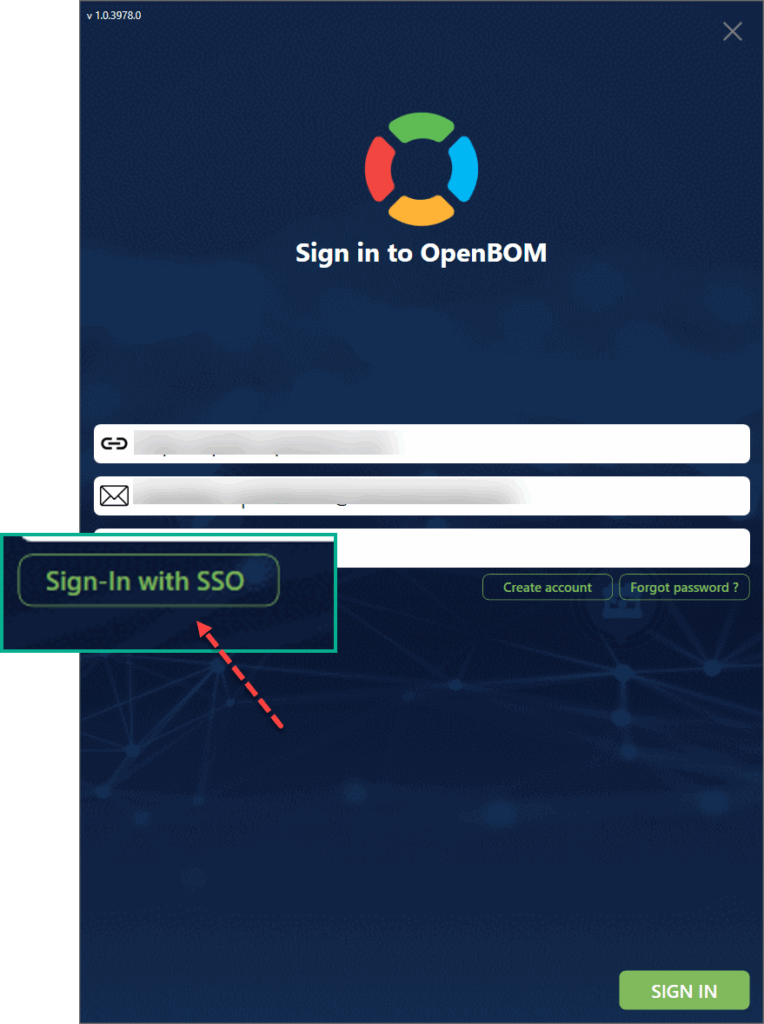
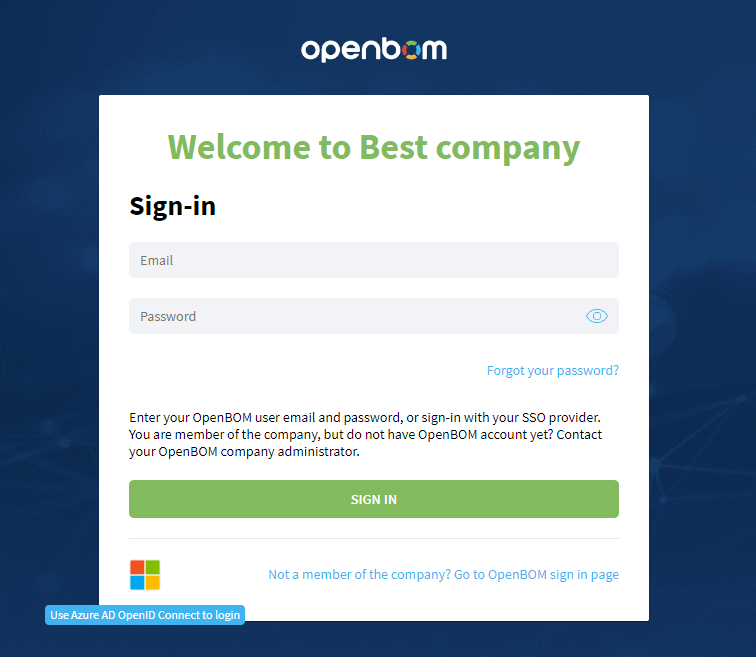
7. Now you should see your company name and also Microsoft button to Single Sign On. Click on it to sign-in with Microsoft account from your Azure AD.
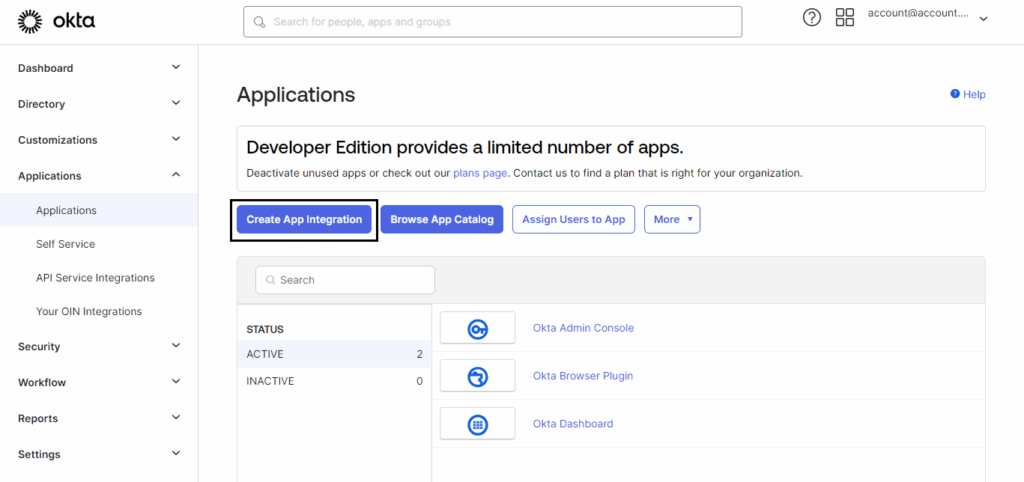
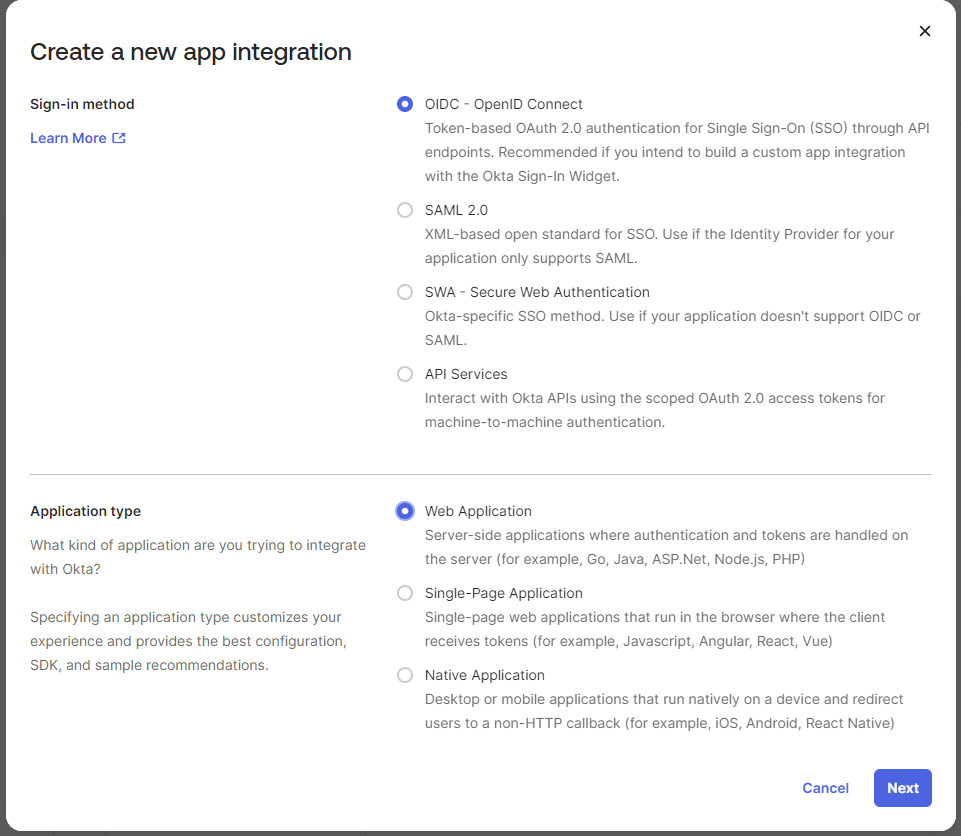
2. Select the OIDC Sign-in method and the Web application Application type
3. On the configuration page:
a. Put value https://login.openbom.com/oauth2/v1/authorize/callback to Sign-in redirect URIs.
b. Put value https://bom.openbom.com to Sign-out redirect URIs.
c. Additionally, select the assignment mode for the application.
d. Click Save.
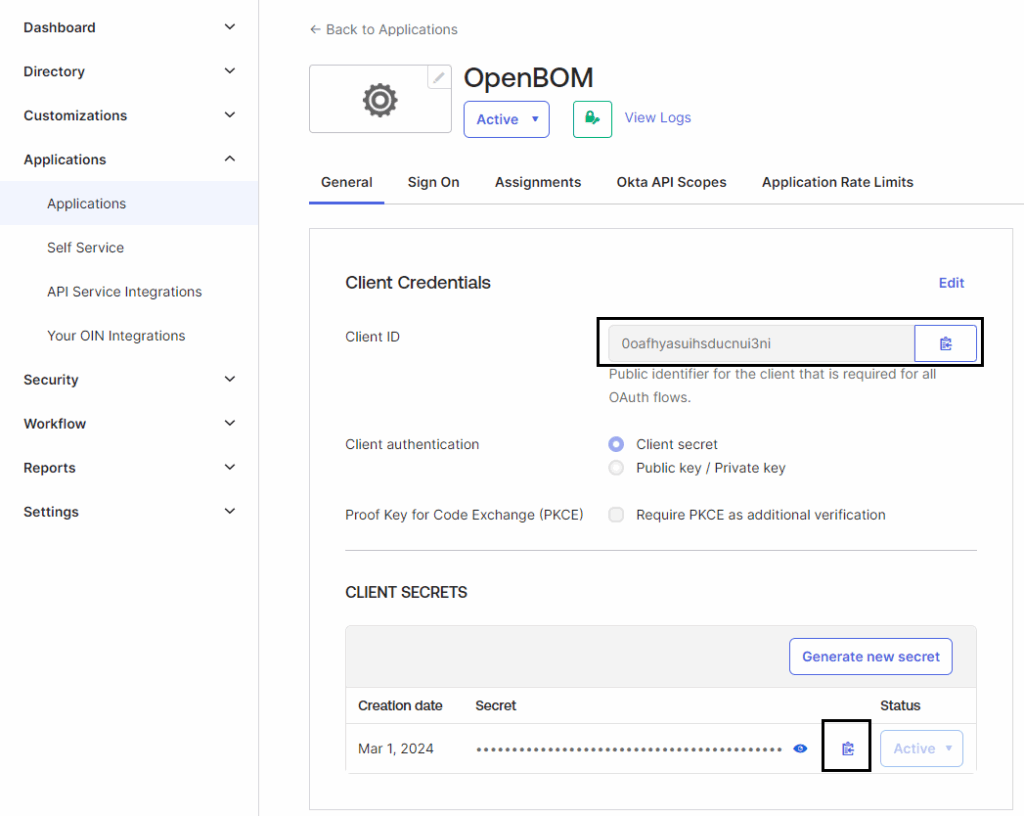
4. On the General tab of Create Application, copy the value of Client ID and Client Secret
5. Additionally, get your Okta issuer URL like: http://dev-12345678.okta.com. It will be used later in the configuration in OpenBOM.
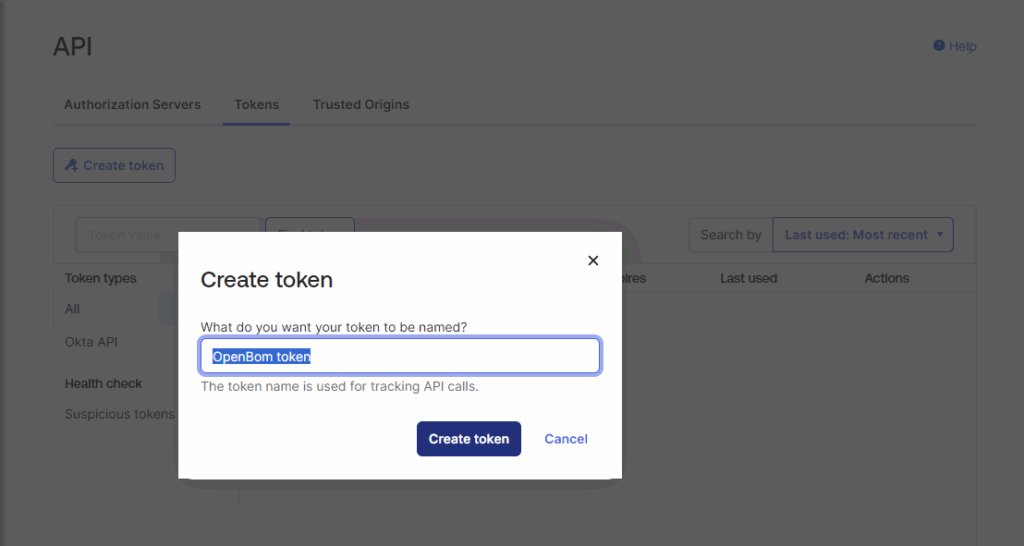
6. In case you need to synchronize users’ status between your Okta and OpenBOM – additionally should be generated API key (this is optional). Go to Security → API page. Click Create token.
Token should be generated under a user with required permissions to access users who will use OpenBOM. OpenBOM is taking only users’ emails and users’ status from the customer Okta, no other information is taken.
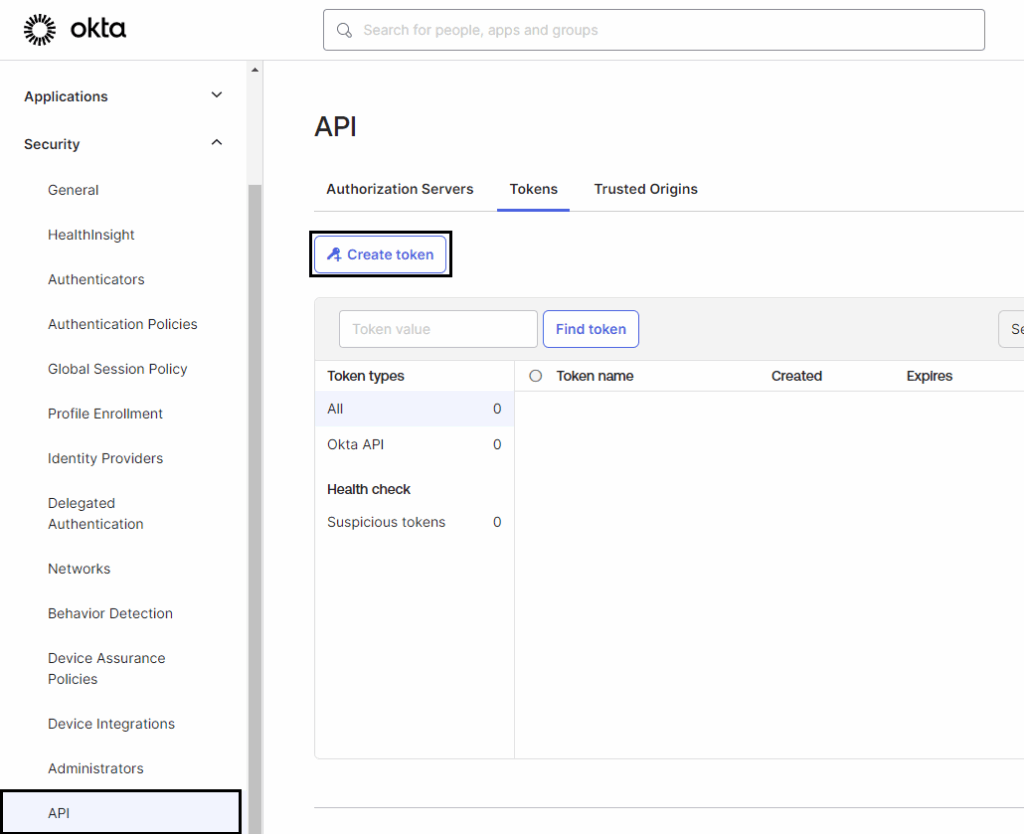
7. Enter the name for the token and click Create token
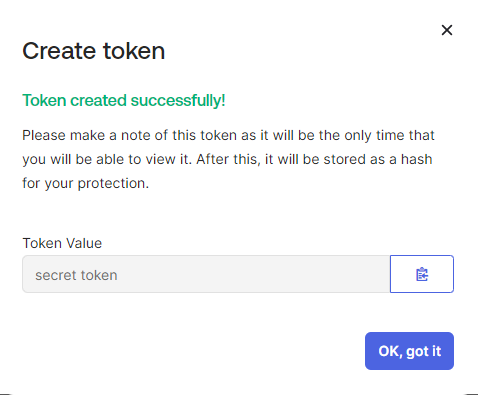
8. Save the value of the token; again, it will be used later for the configuration of SSO in OpenBOM.
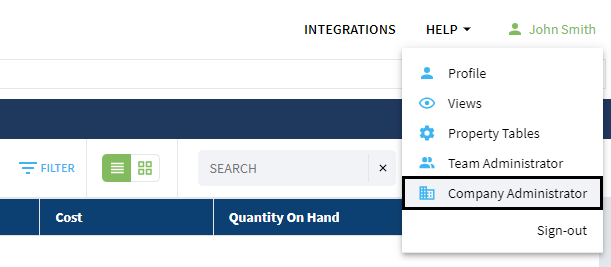
2. Open the Company Administrator page.

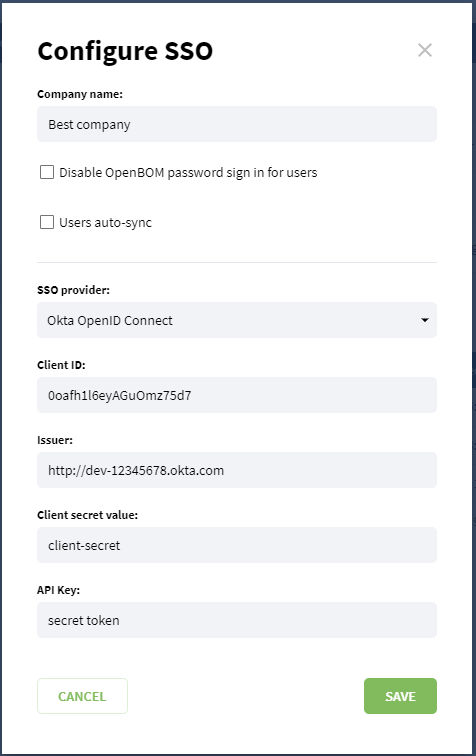
3. The company admin now has an additional option: Single Sign On. Click the Configure SSO button.

4. Enter the values saved in Step 4 and Step 8 of Okta configuration, and save the configuration. Additionally, put the name of your company in the Company name field.
5. Copy & Save the Login URL for your company. (you will need it shortly)

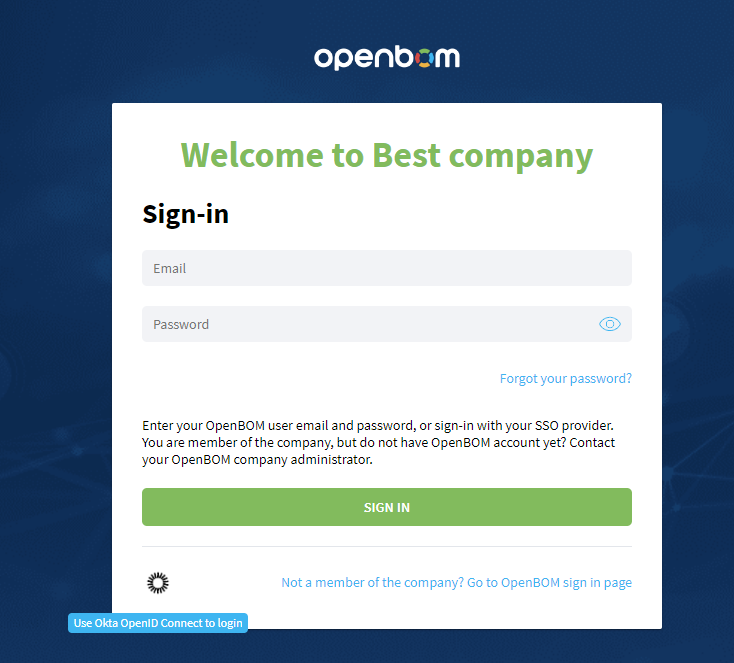
6. Logout from OpenBOM and open Login URL from the previous step. Example of link:
https://bom.openbom.com/sign-in?company=946cef84-5e84-3bd3-6cef-120e843bd356
7. Now you should see your company name and also Okta button for Single Sign On. Click on it to sign-in with your Okta account.
In Configure SSO page it can be found additional options for SSO configuration: disable password for users, and configure auto-sync for users status..
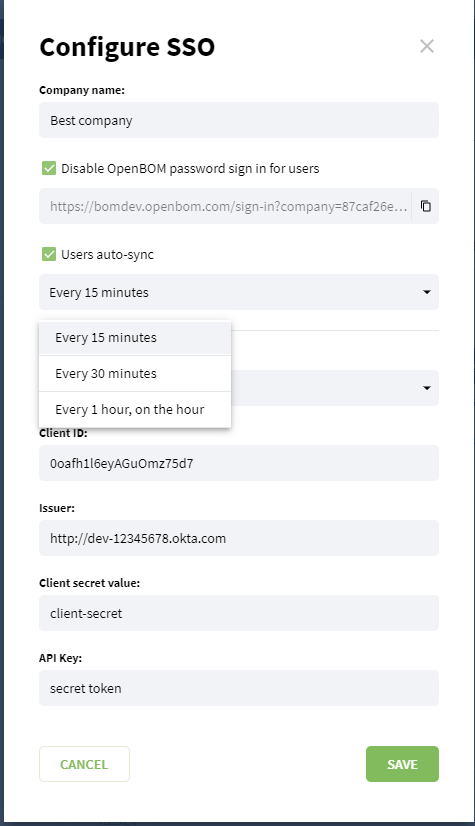
In case this flag is selected and the configuration saved – we disable users in the company login with their passwords created in OpenBOM (except OpenBOM company administrator). We delete passwords for users in the company, and users will be able login to OpenBOM only using company SSO provider (Azure AD or Okta). Company admin still will be able to log i from the URL for admins, URL for admin will be provided in configuration once the flag is enabled. Users will not be able to reset their password if the password is disabled. Once this flag is checked out and the configuration saved – users will be able to reset their password and login to OpenBOM using a newly created password by them.
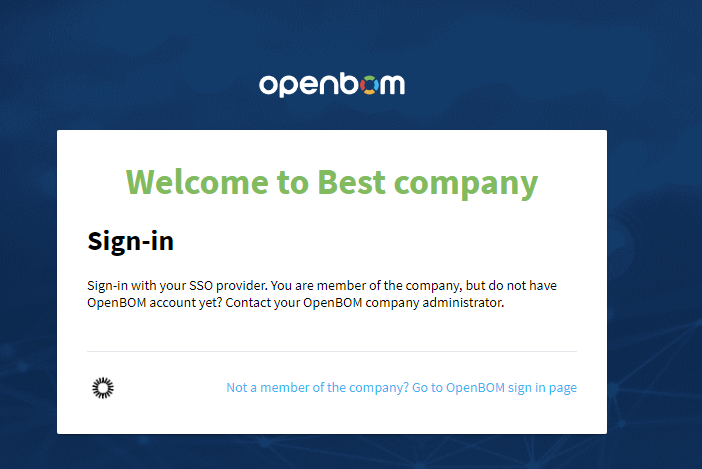
In case password is disabled for the company, users will see next sign-in company page:
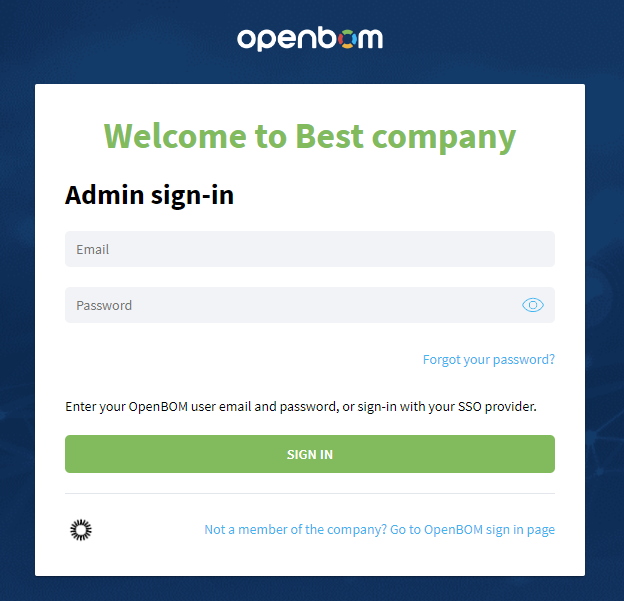
Company admin will still be able to login with password using page for admin sign-in:
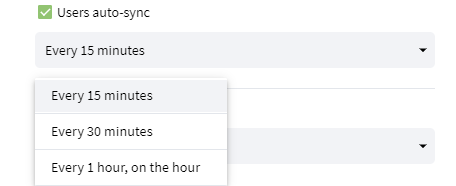
In case Users auto-sync flag is enabled, the company admin can select how often synchronization will be done. We have 3 options:
Company admin can do this operation manually in Company dashboard in OpenBOM.
During synchronization users not present or disabled in Azure AD or Okta will be disabled in OpenBOM. Users that were present in OpenBOM and were added to Azure AD or Okta after that, will be enabled in OpenBOM.
For new accounts in OpenBOM – company admin MUST create the users account in OpenBOM manually. This means that if an administrator adds a user to Azure AD or Okta, he must also add the user to the OpenBOM team.
All OpenBOM integrations and add-ins support SSO. Users’ SSO must be configured by the company admin prior to sign-in via any addin.