OpenBOM plug-ins for desktop CAD systems give you the ability to extract BOM data from your favorite CAD package. Installation of the plug-ins follows the same basic pattern, however, there are some slight differences in how you extract a BOM from each.
Installing the plug-ins for DS SOLIDWORKS®, Autodesk® Inventor™, and Siemens Solid Edge™ involve these 3 basic steps:
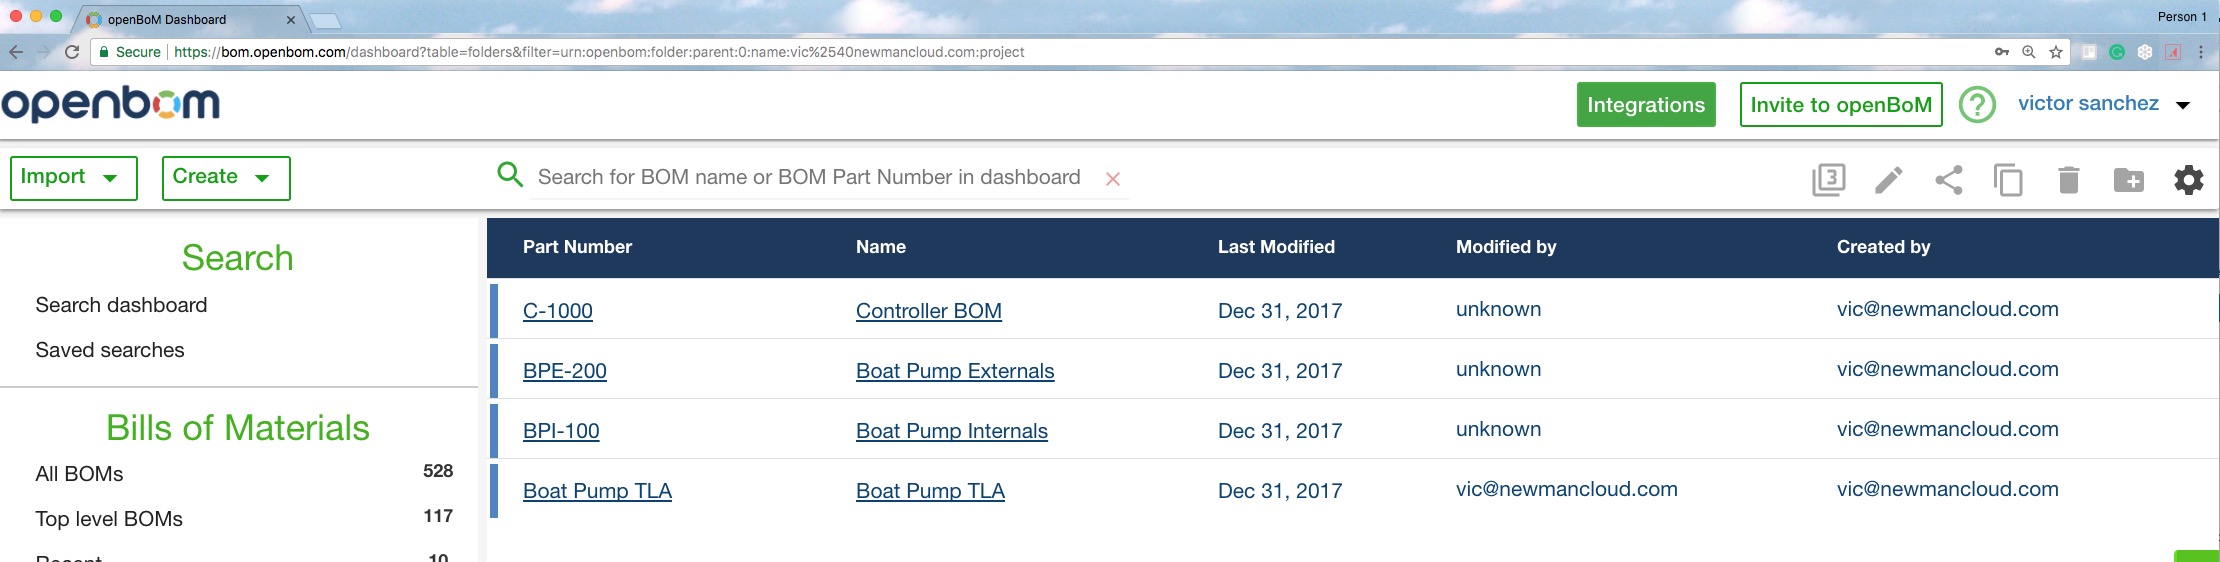
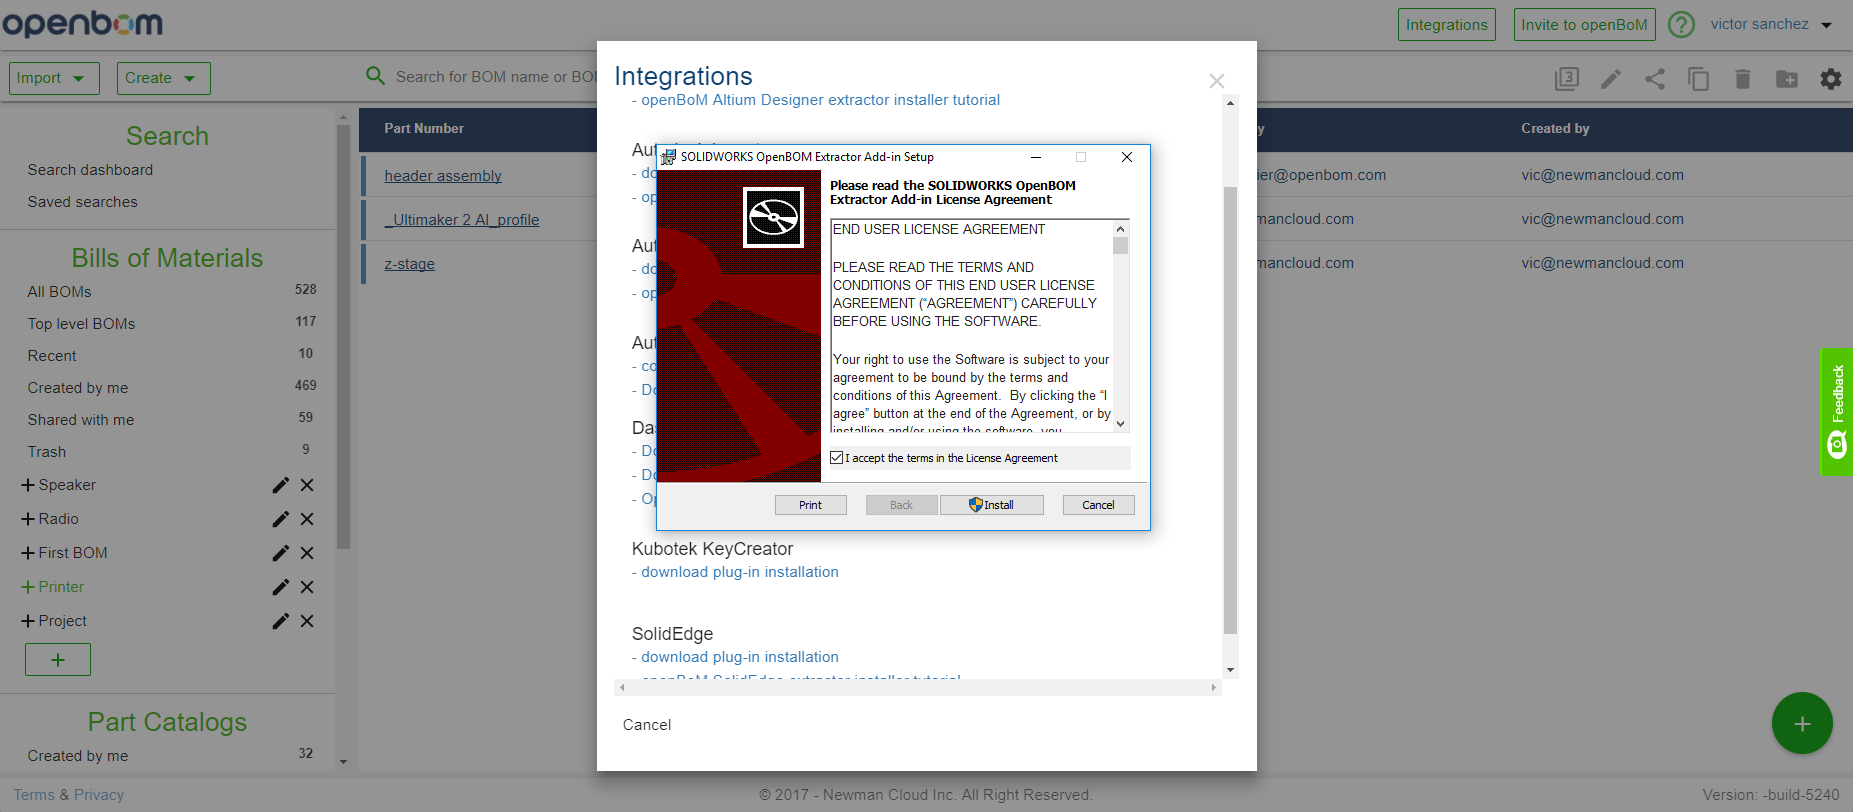
(1) From the OpenBOM Dashboard, got to the “Integrations” drop-down menu and select.
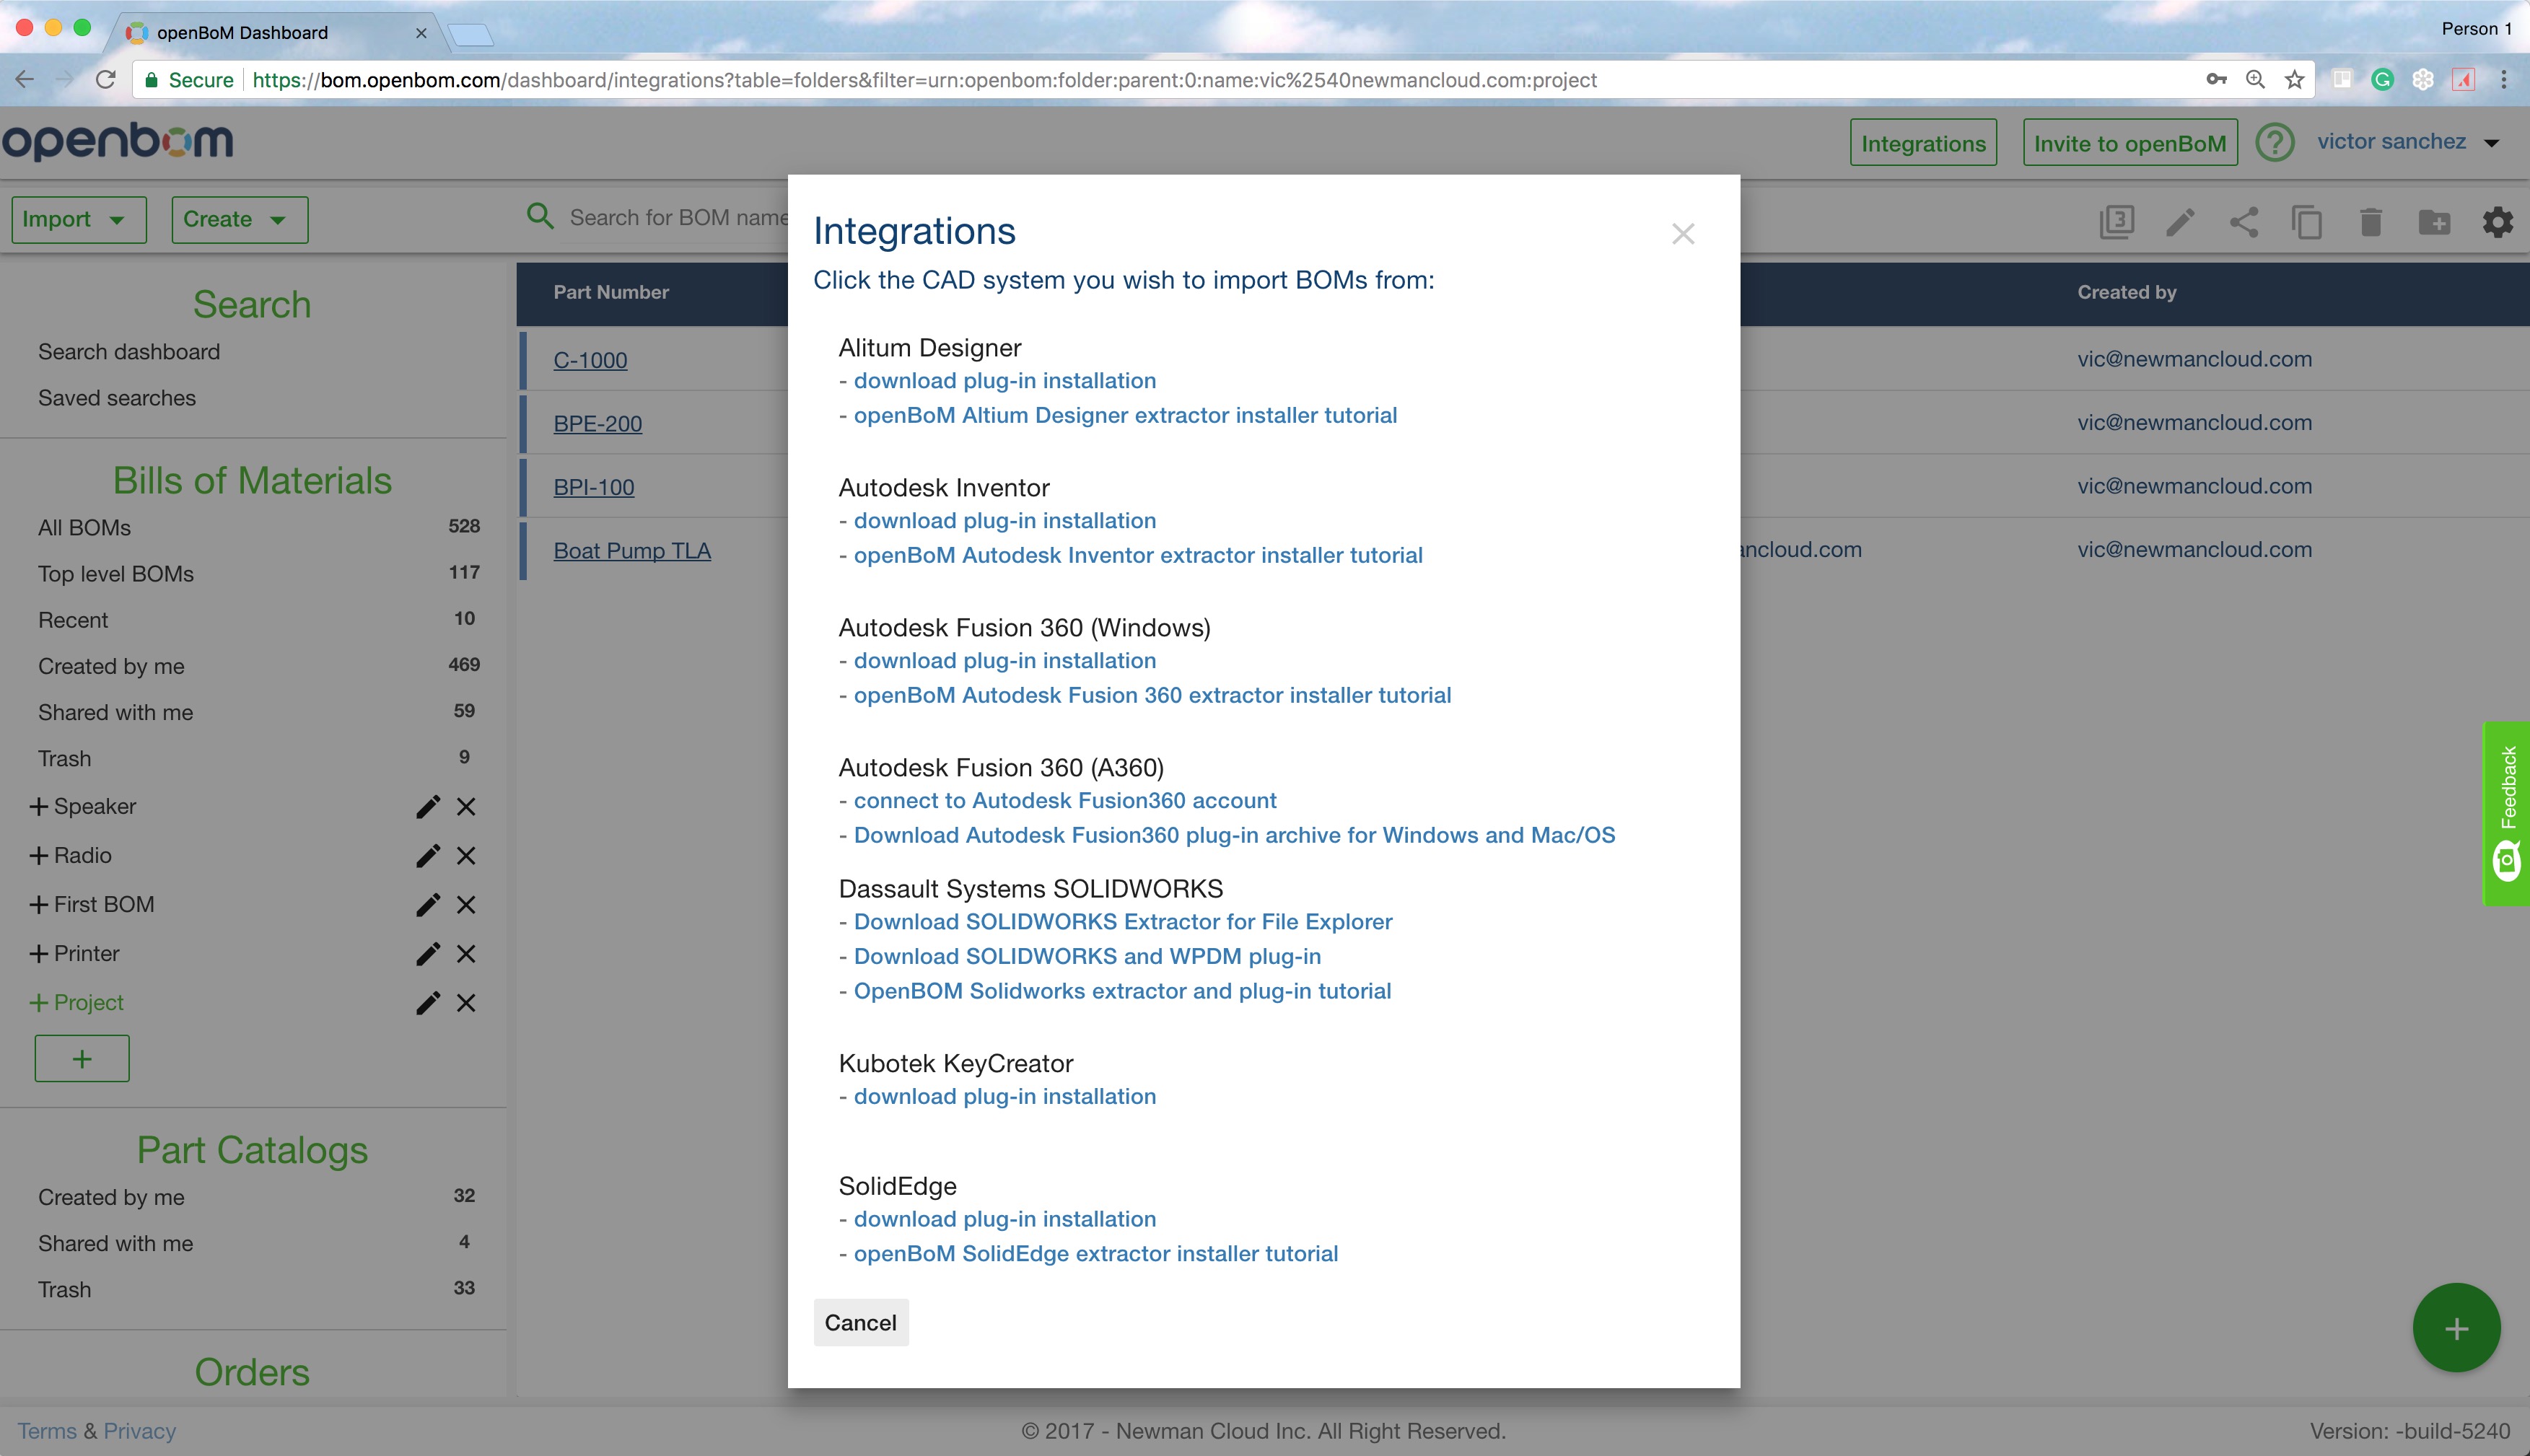
(2) Click on the desired CAD plug-in link. The plug-in will automatically download to your PC.
(3) Click the plug-in installer file and follow the Wizard instructions. Click “Finish” in the Wizard when completed.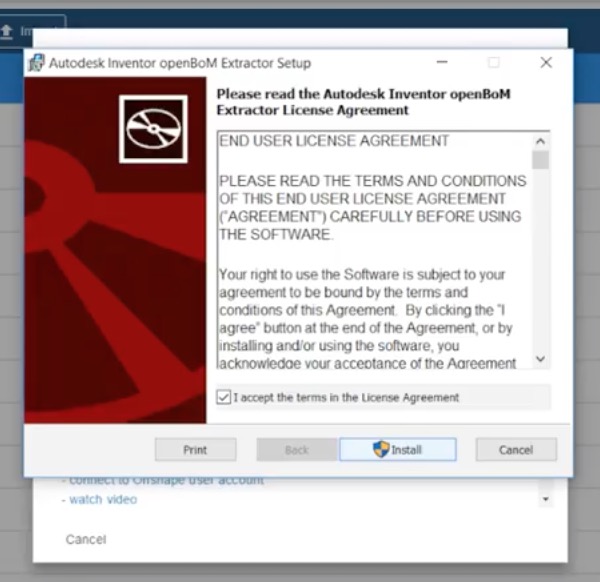
Depending on the CAD package, here’s how you extract BOM data once the plug-in has been successfully installed (scroll down to find instructions for Inventor, SOLIDWORKS, and Solid Edge).
DS SOLIDWORKS: Installing the SOLIDWORKS and WPDM plug-in
OpenBOM is a SOLIDWORKS Certified Solution Partner:

(1) Click “Download SOLIDWORKS and WPDM plug-in” from the list of plugins. Once downloaded, install the plug-in with the help of the Install wizard:
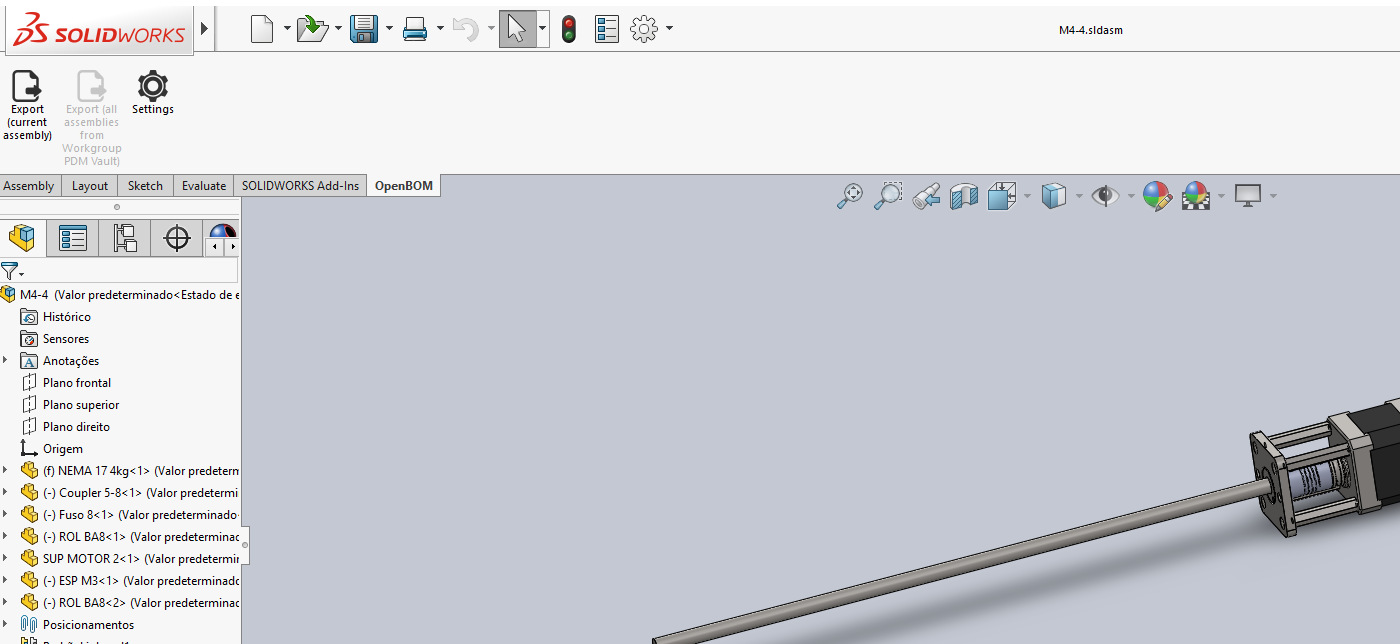
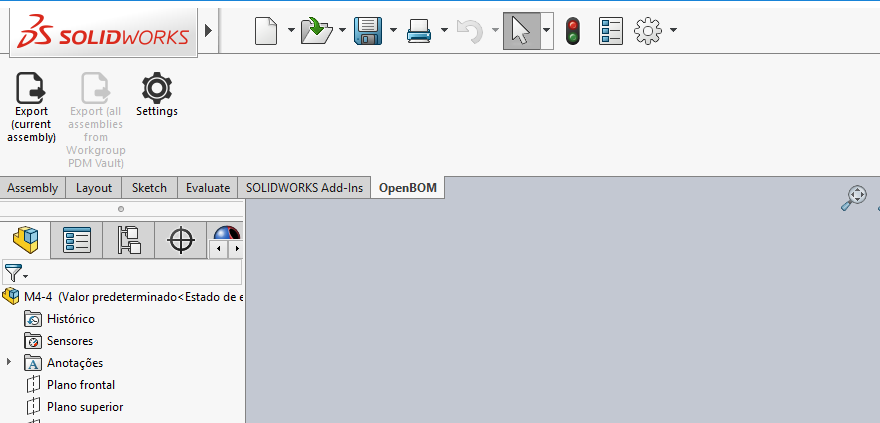
(2) Within SOLIDWORKS, the OpenBOM add-in will have been automatically installed. Click it and this is what you should see:
(3) Click the “Settings” gear icon to configure the various export options from SOLIDWORKS to OpenBOM and as desired, to cloud file storage providers. Let’s start by entering your OpenBOM login and password in the configuration dialog:
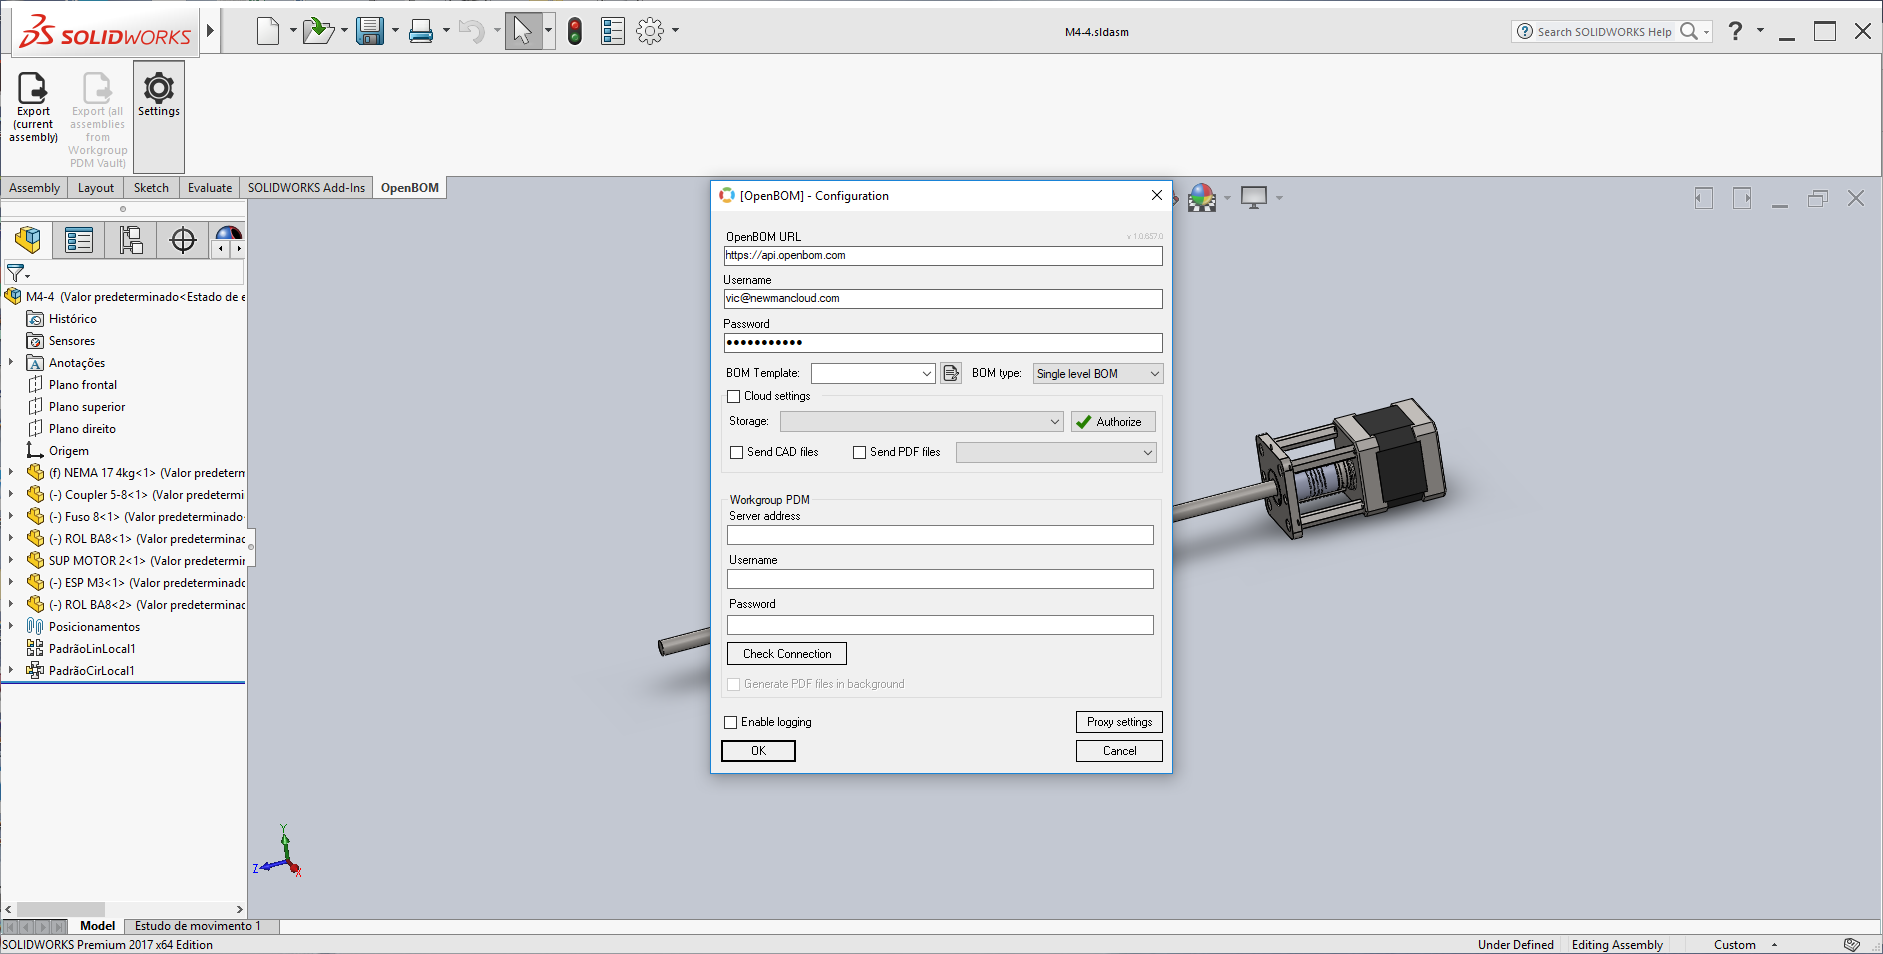
(4) Select from the various configuration options:
BOM Template: Used to create and specify what SOLIDWORKS properties to extract to the BOM. Here’s a short video if you’re interested in learning more:
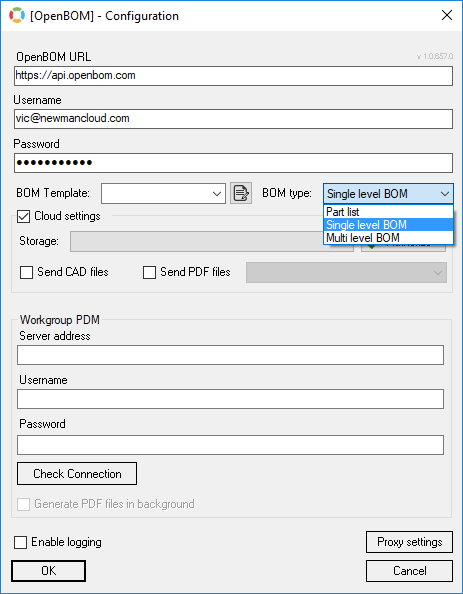
BOM type: Select the desired BOM type to extract, Part List, Single Level, and Multi Level
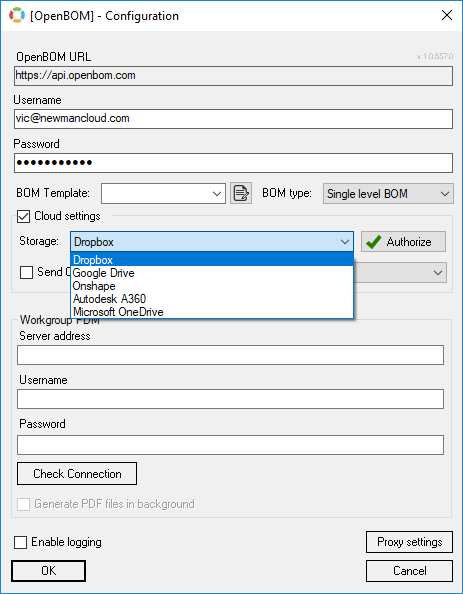
Cloud settings: Use these settings to connect items in your BOM extracted from SOLIDWORKS to one of the supported cloud file storage providers. Check “Cloud settings“. Note: if you leave “Cloud settings” unchecked, that’s perfectly okay! OpenBOM will still extract the BOM.
Choose the desired cloud file storage system you want to connect to your BOM. IMPORTANT: OpenBOM does not extract files from these file storage systems. Rather, OpenBOM exports items extracted from the CAD system, in this case SOLIDWORKS, into the chosen cloud file storage system and references them in OpenBOM via a link. Also, you need to first have an account with the desired cloud file storage system before moving on to the next step…
Once the desired cloud file storage system is selected, click “Authorize” and follow the prompts.
Once you’ve authorized OpenBOM to place BOM items in the desired cloud file storage system you can check Send CAD files to include CAD files and check Send PDF files to send a 2D or 3D PDF file.
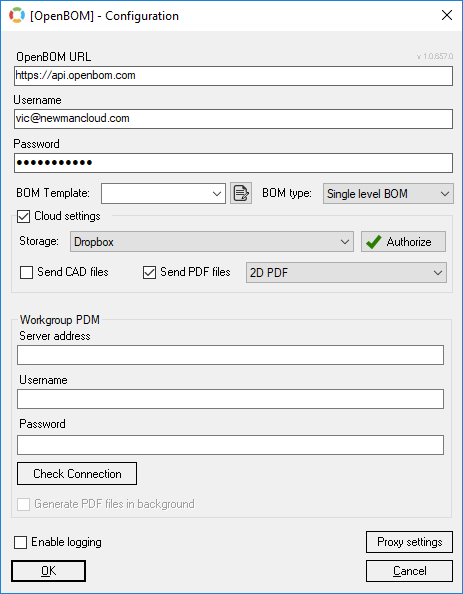
Click “OK” when done.
(5) Click “Export (current assembly)” to export your BOM from SOLIDWORKS to OpenBOM (and if selected, to the chosen cloud file storage).
(6) Here is an example, per the steps above, of how your BOM will look. Notice the links to Dropbox. The “PDF File in Dropbox” was automatically added to the BOM. Clicking any link therein will take you directly to Dropbox. Your BOM can now be shared with others.

Autodesk Inventor: installing the Inventor plug-in
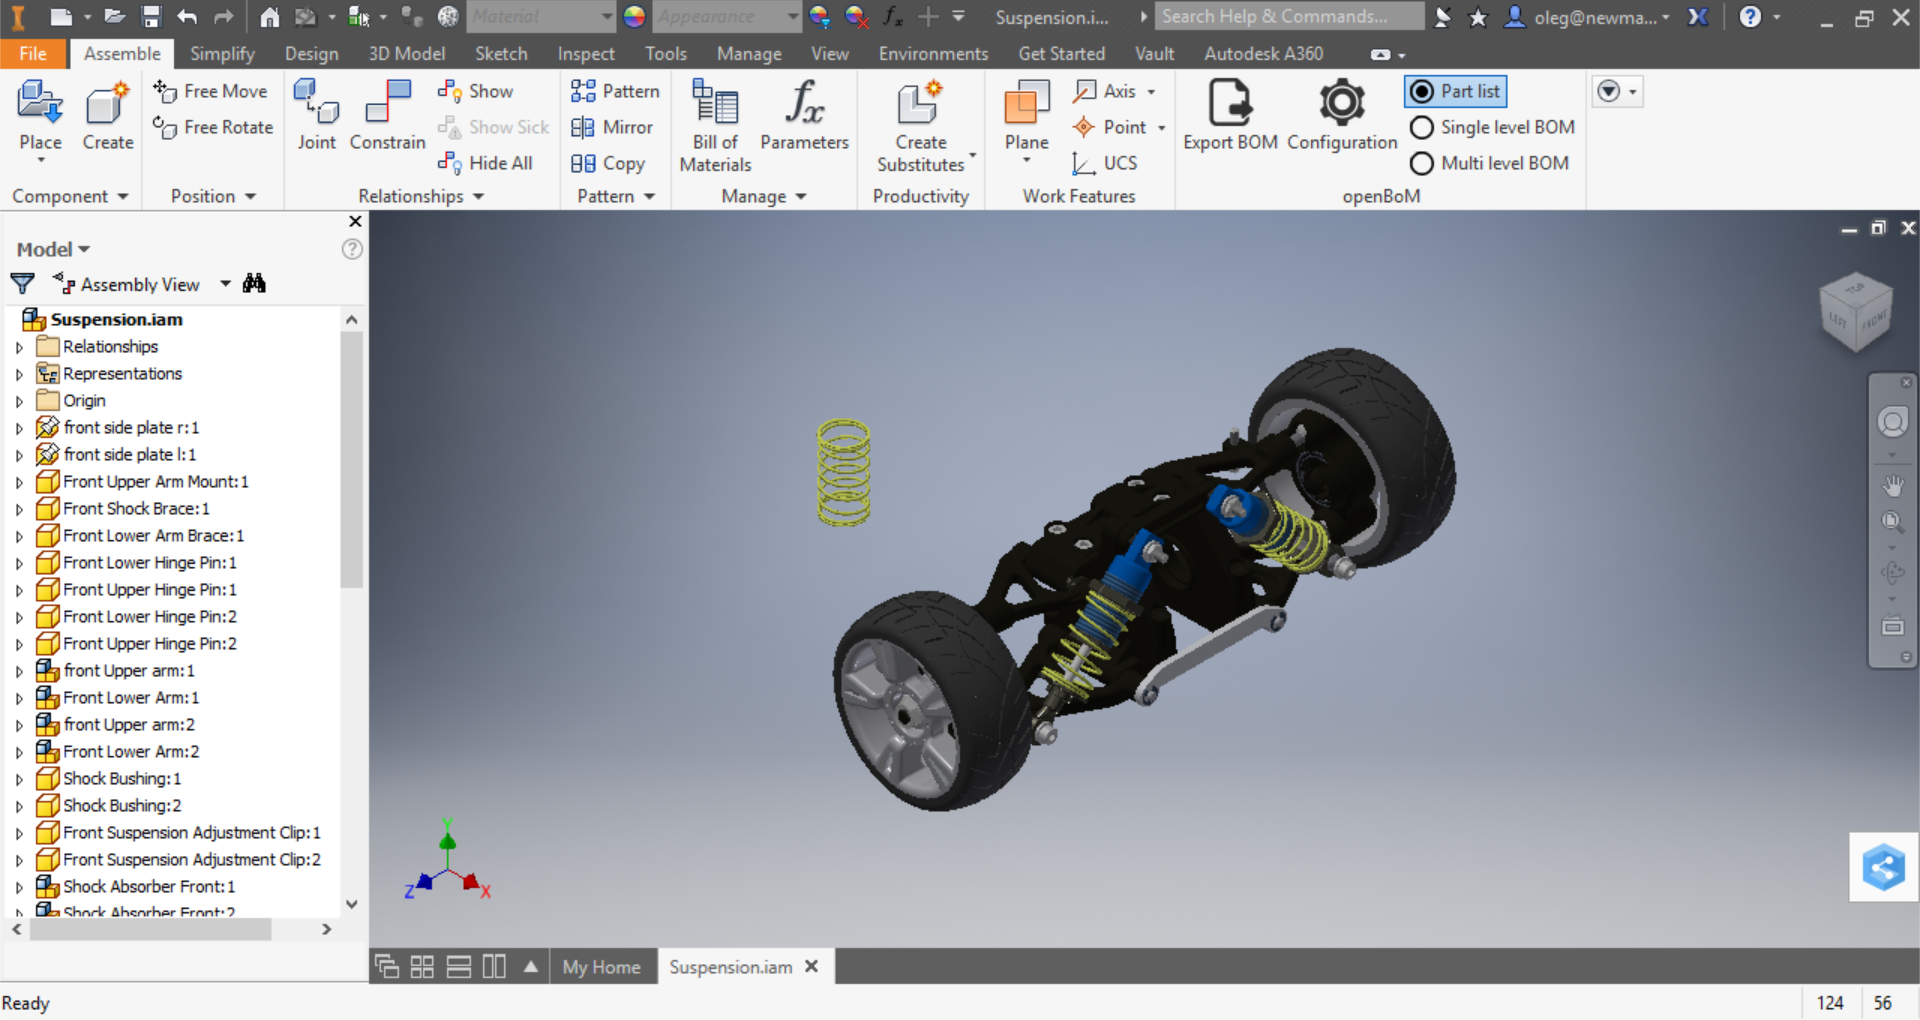
OpenBOM is an Autodesk Authorized Developer:
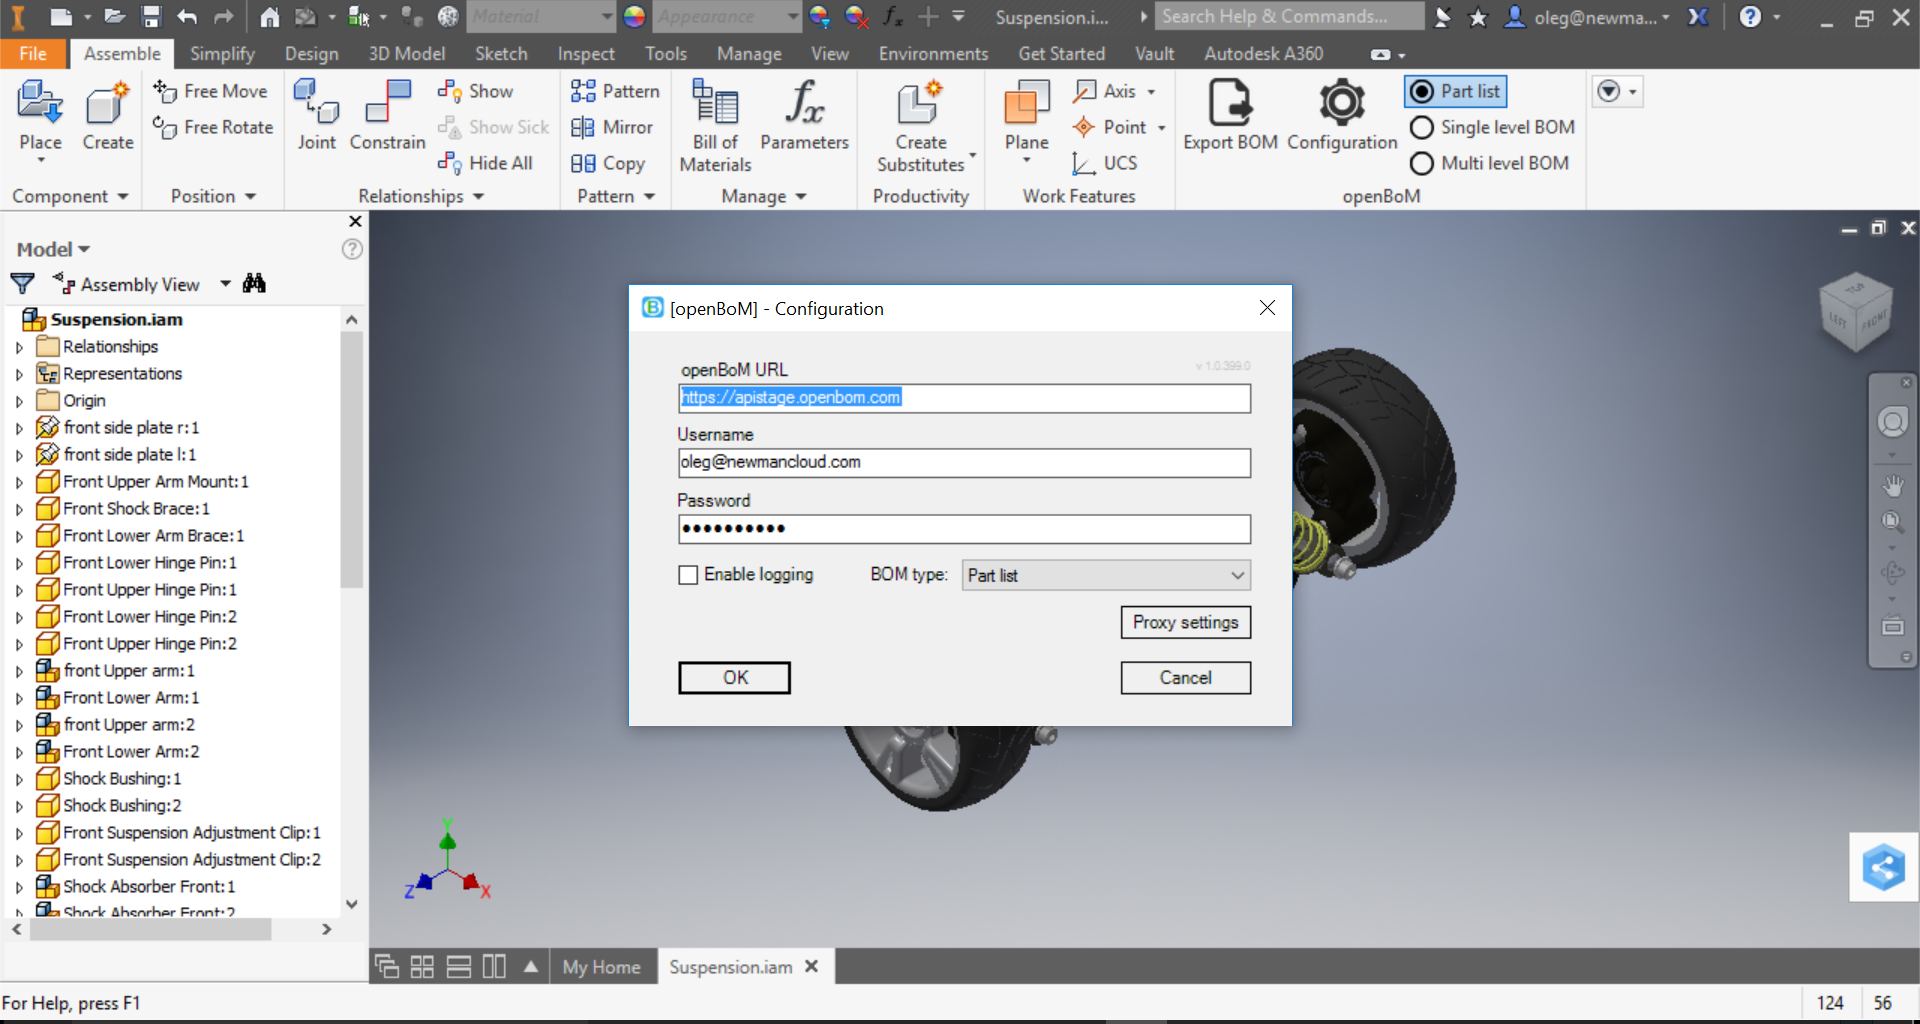
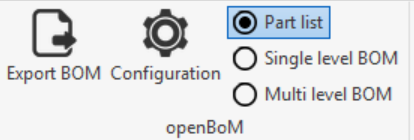
- Open an Inventor model and go to the “Assemble” toolbar. Find the openBoM toolbar and click “Configuration”. The openBoM URL will automatically be populated with the correct value. Enter your email and password used to access openBoM (should be the same as those you used to register to openBoM).

- In the openBoM section choose the desired openBoM BOM type (Part list, Single level BOM, or Multi level BOM).

- Click “Export BOM” when ready to extract a BOM to openBoM. Once extracted, click the link that appears in the modal window and the BOM will automatically open in openBoM. Make sure you are signed in! Otherwise, you will be asked to do so.

Siemens Solid Edge: Installing the Solid Edge plug-in
OpenBOM is an official Siemens PLM Solutions Partner:
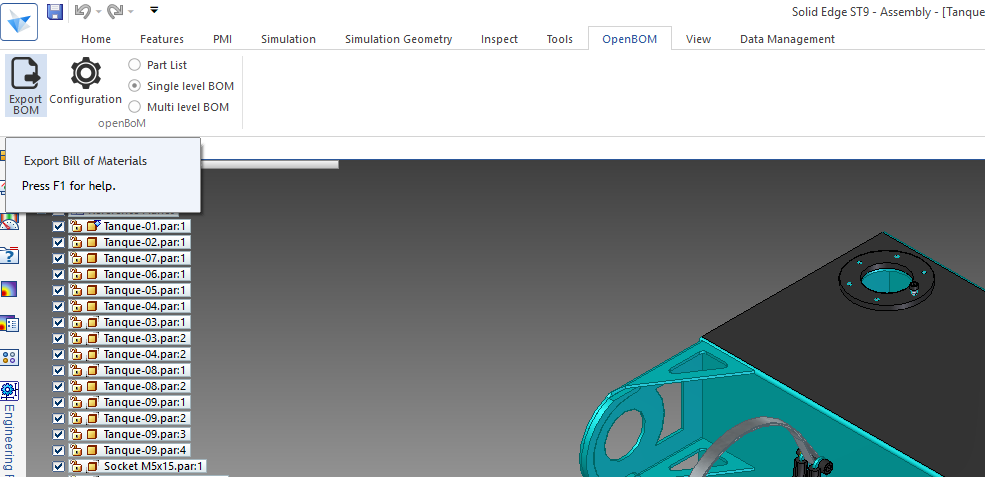
(1) Installing the Solid Edge plug-in involves the same process described at the beginning of this article. Once the plug-in is installed, start Solid Edge and go directly to the OpenBOM tab:
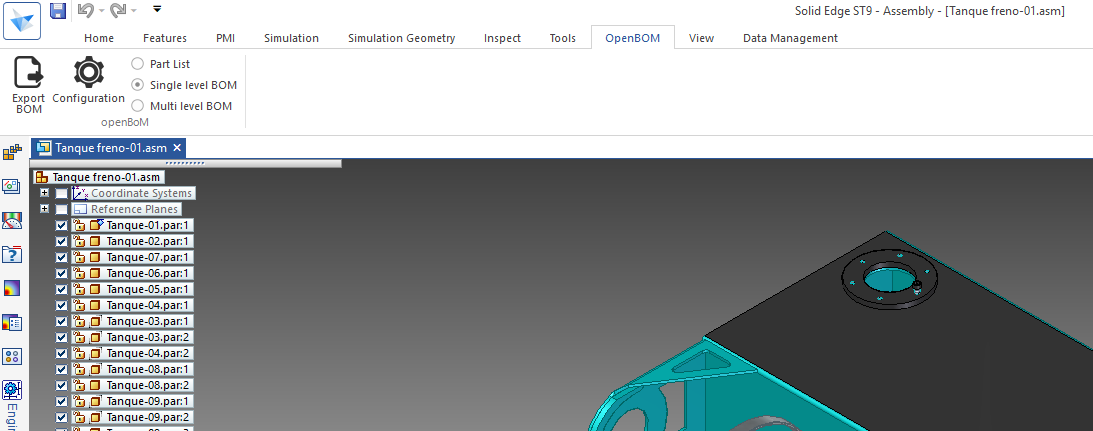
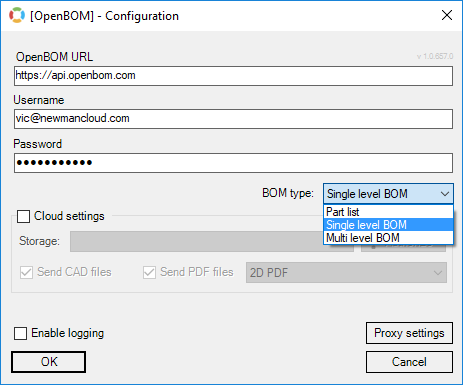
(2) Click the “Configuration” gear icon Enter your email and password used to access OpenBOM (should be the same as those you used to register to OpenBOM).

(3) Choose the desired Configuration options
BOM type: Part list, Single level BOM, or Multi level BOM.
Cloud settings: Use these settings to connect items in your BOM extracted from Solid Edge to one of the supported cloud file storage providers. Check “Cloud settings“. Note: if you leave “Cloud settings” unchecked, that’s perfectly okay! OpenBOM will still extract the BOM.
Choose the desired cloud file storage system you want to connect to your BOM. IMPORTANT: OpenBOM does not extract files from these file storage systems. Rather, OpenBOM exports items extracted from the CAD system, in this case Solid Edge, into the chosen cloud file storage system and references them in OpenBOM via a link. Also, you need to first have an account with the desired cloud file storage system before moving on to the next step…
Once the desired cloud file storage system is selected, click “Authorize” and follow the prompts.

Once you’ve authorized OpenBOM to place BOM items in the desired cloud file storage system you can check Send CAD files to include CAD files and check Send PDF files to send a 2D or 3D PDF file.
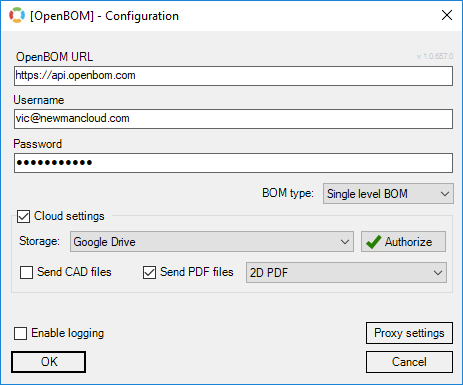
Click “OK” when done.
(5) Click “Export BOM” to export your BOM from Solid Edge to OpenBOM (and if selected, to the chosen cloud file storage).
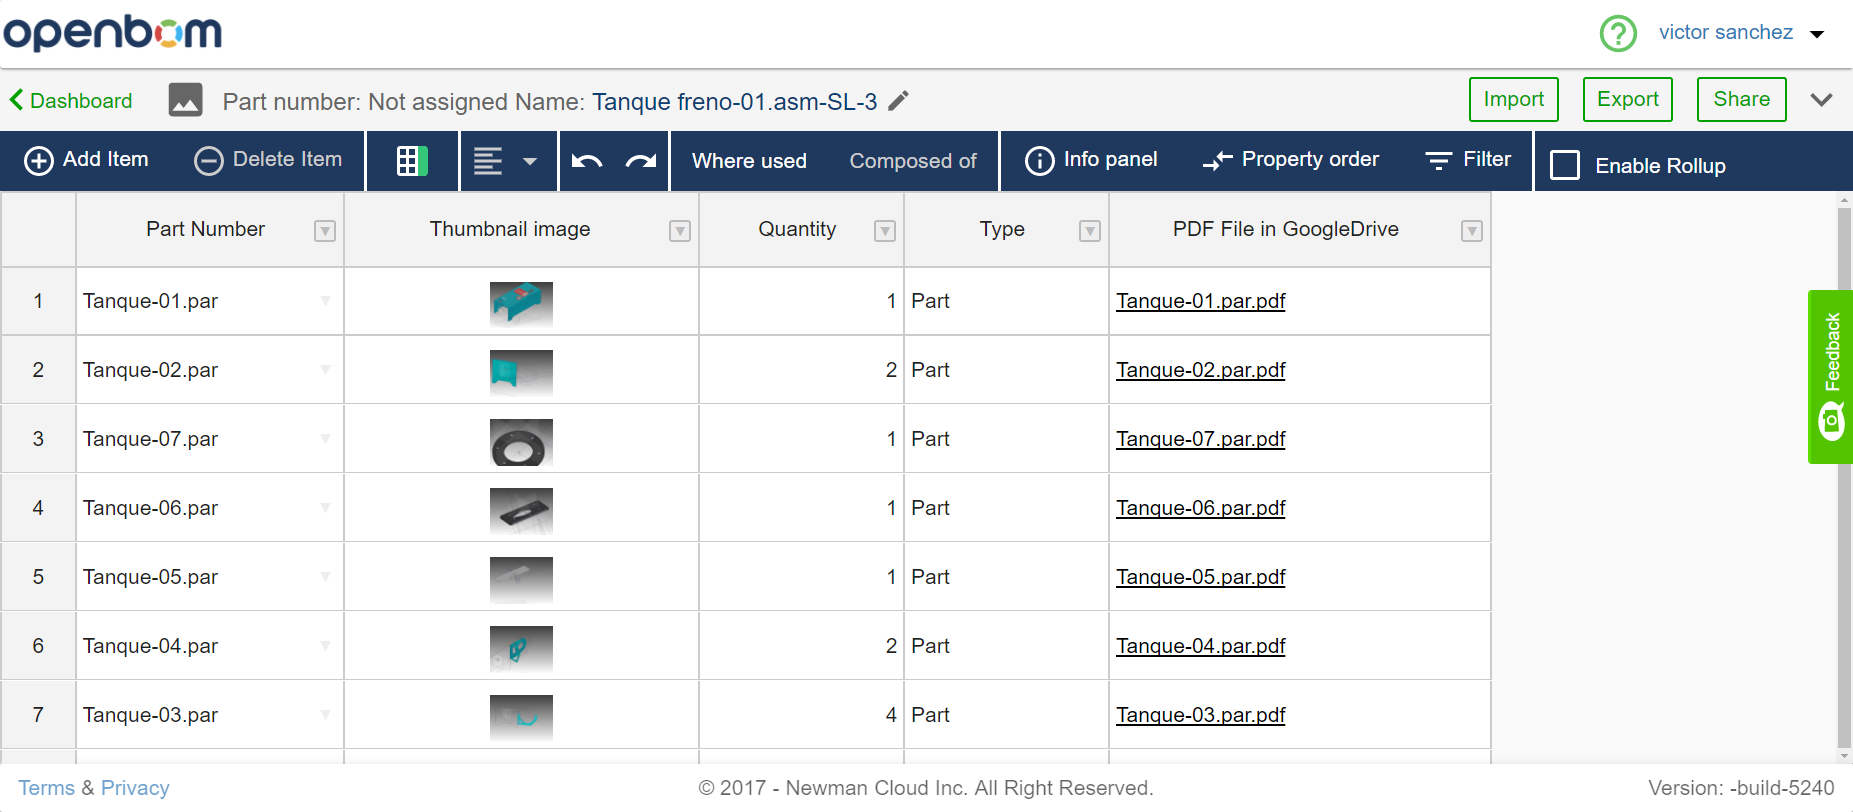
(6) Here is an example, per the steps above, of how your BOM will look. Notice the links to Google Drive. The “PDF File in GoogleDrive” was automatically added to the BOM. Clicking any link therein will take you directly to Google Drive. Your BOM can now be shared with others.