This chapter will provide an understanding of the OpenBOM user interface. More details on each section below will be available in the help for that specific topic.
Dashboard
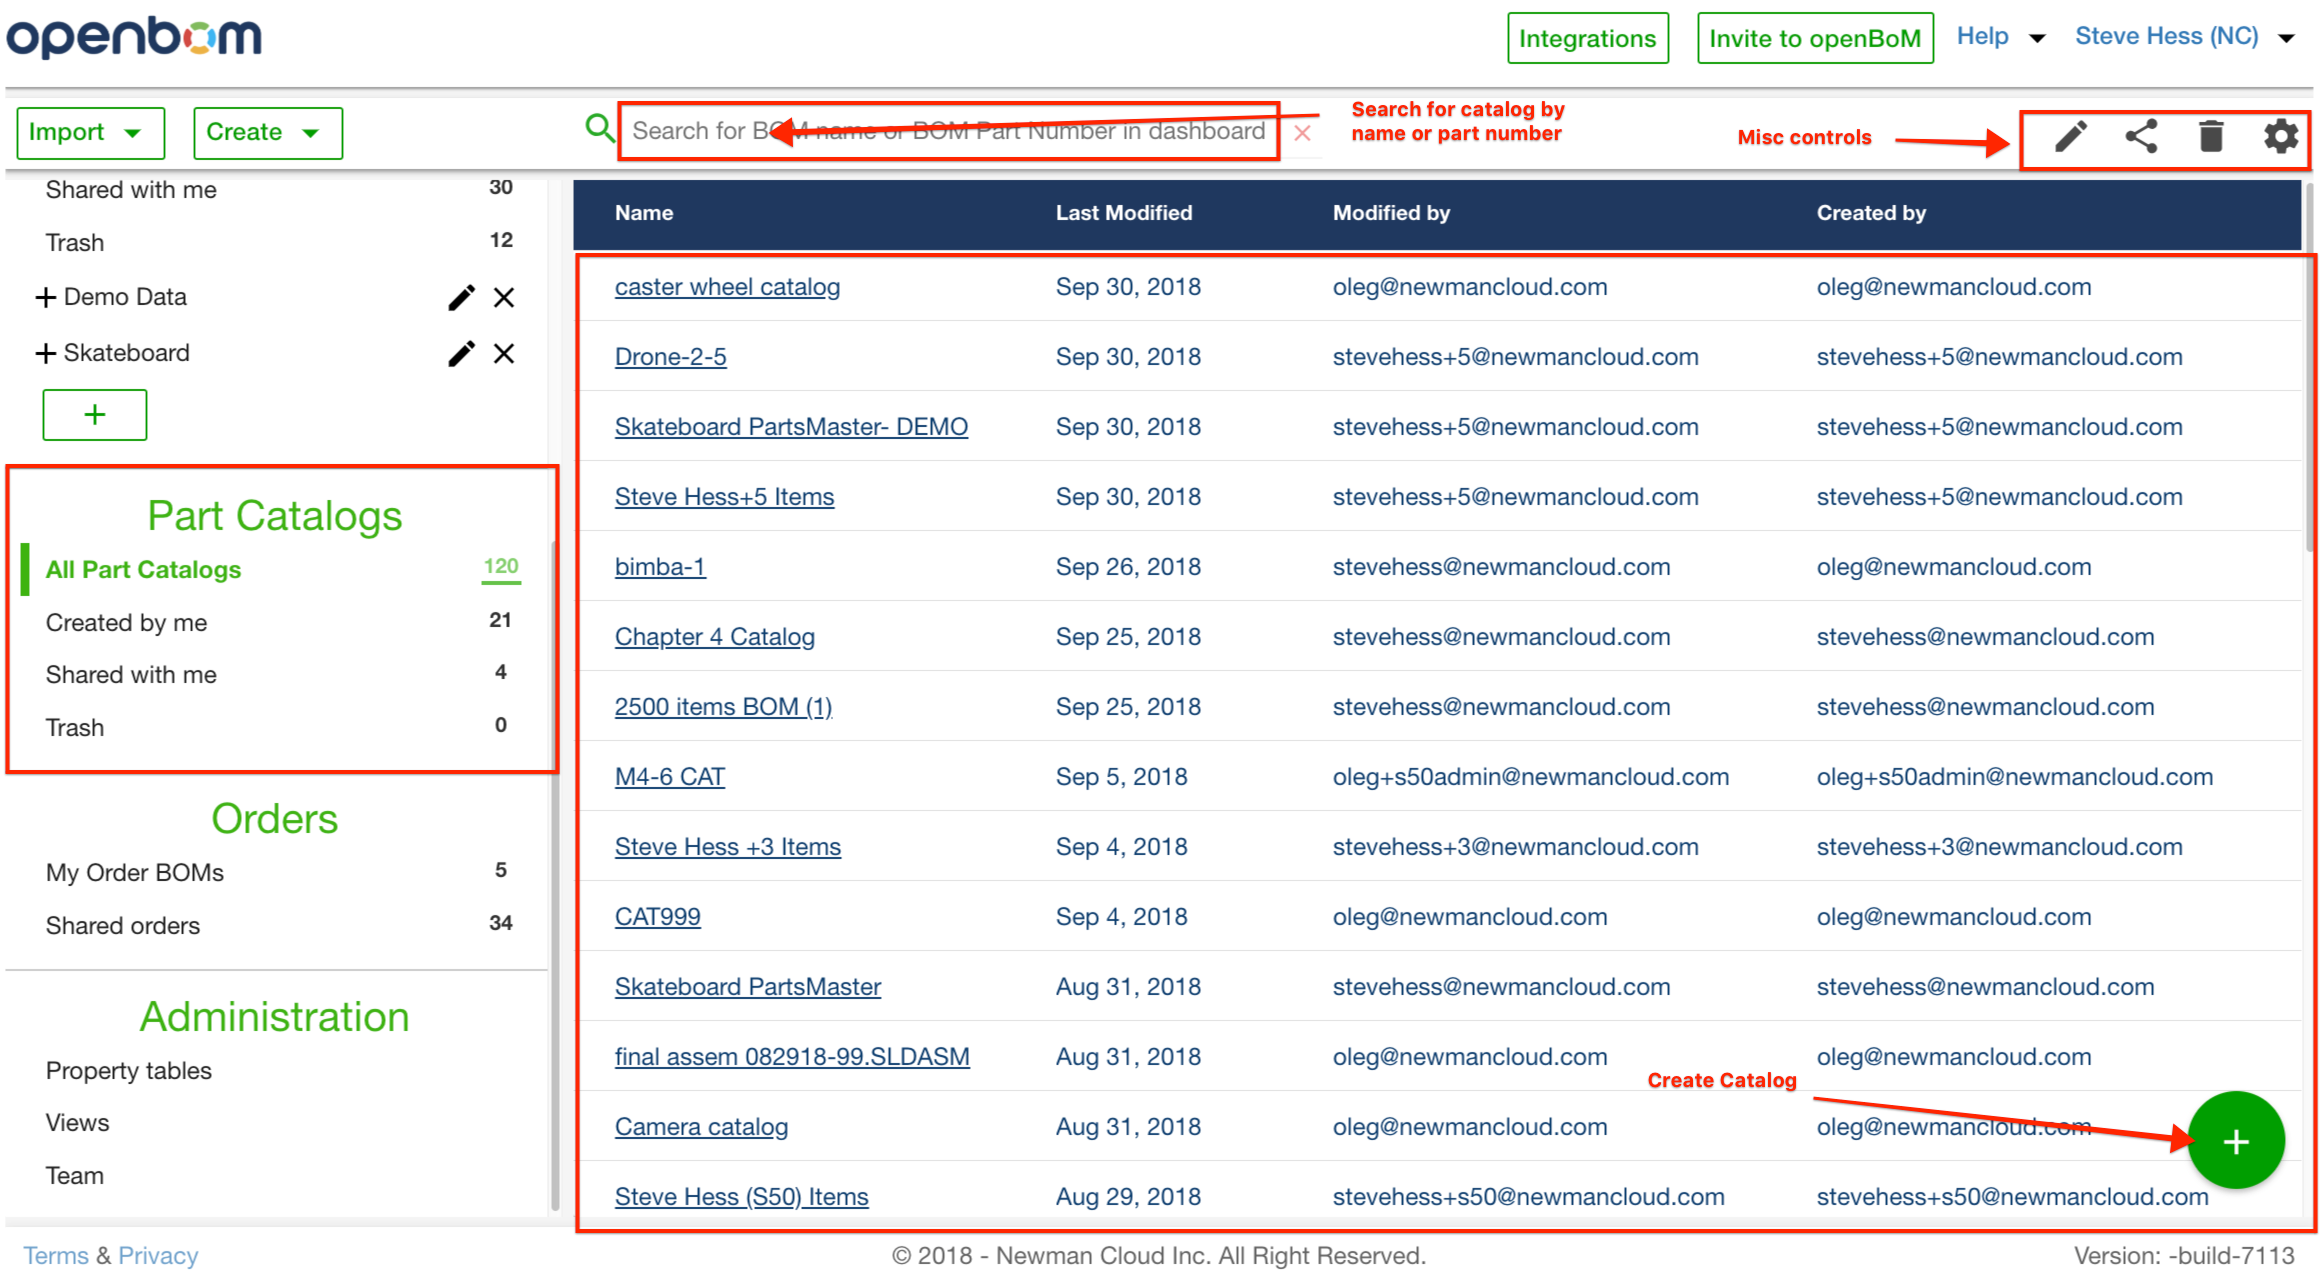
After you sign-in to OpenBOM you will see the Main OpenBOM Dashboard. This Dashboard is the primary or main OpenBOM page. The Navigation pane on the left offers access to the significant operations (Create, Import, etc) and other dashboard like BOMs, Catalogs, Trash, and more..
The panels of the dashboard at a glance:
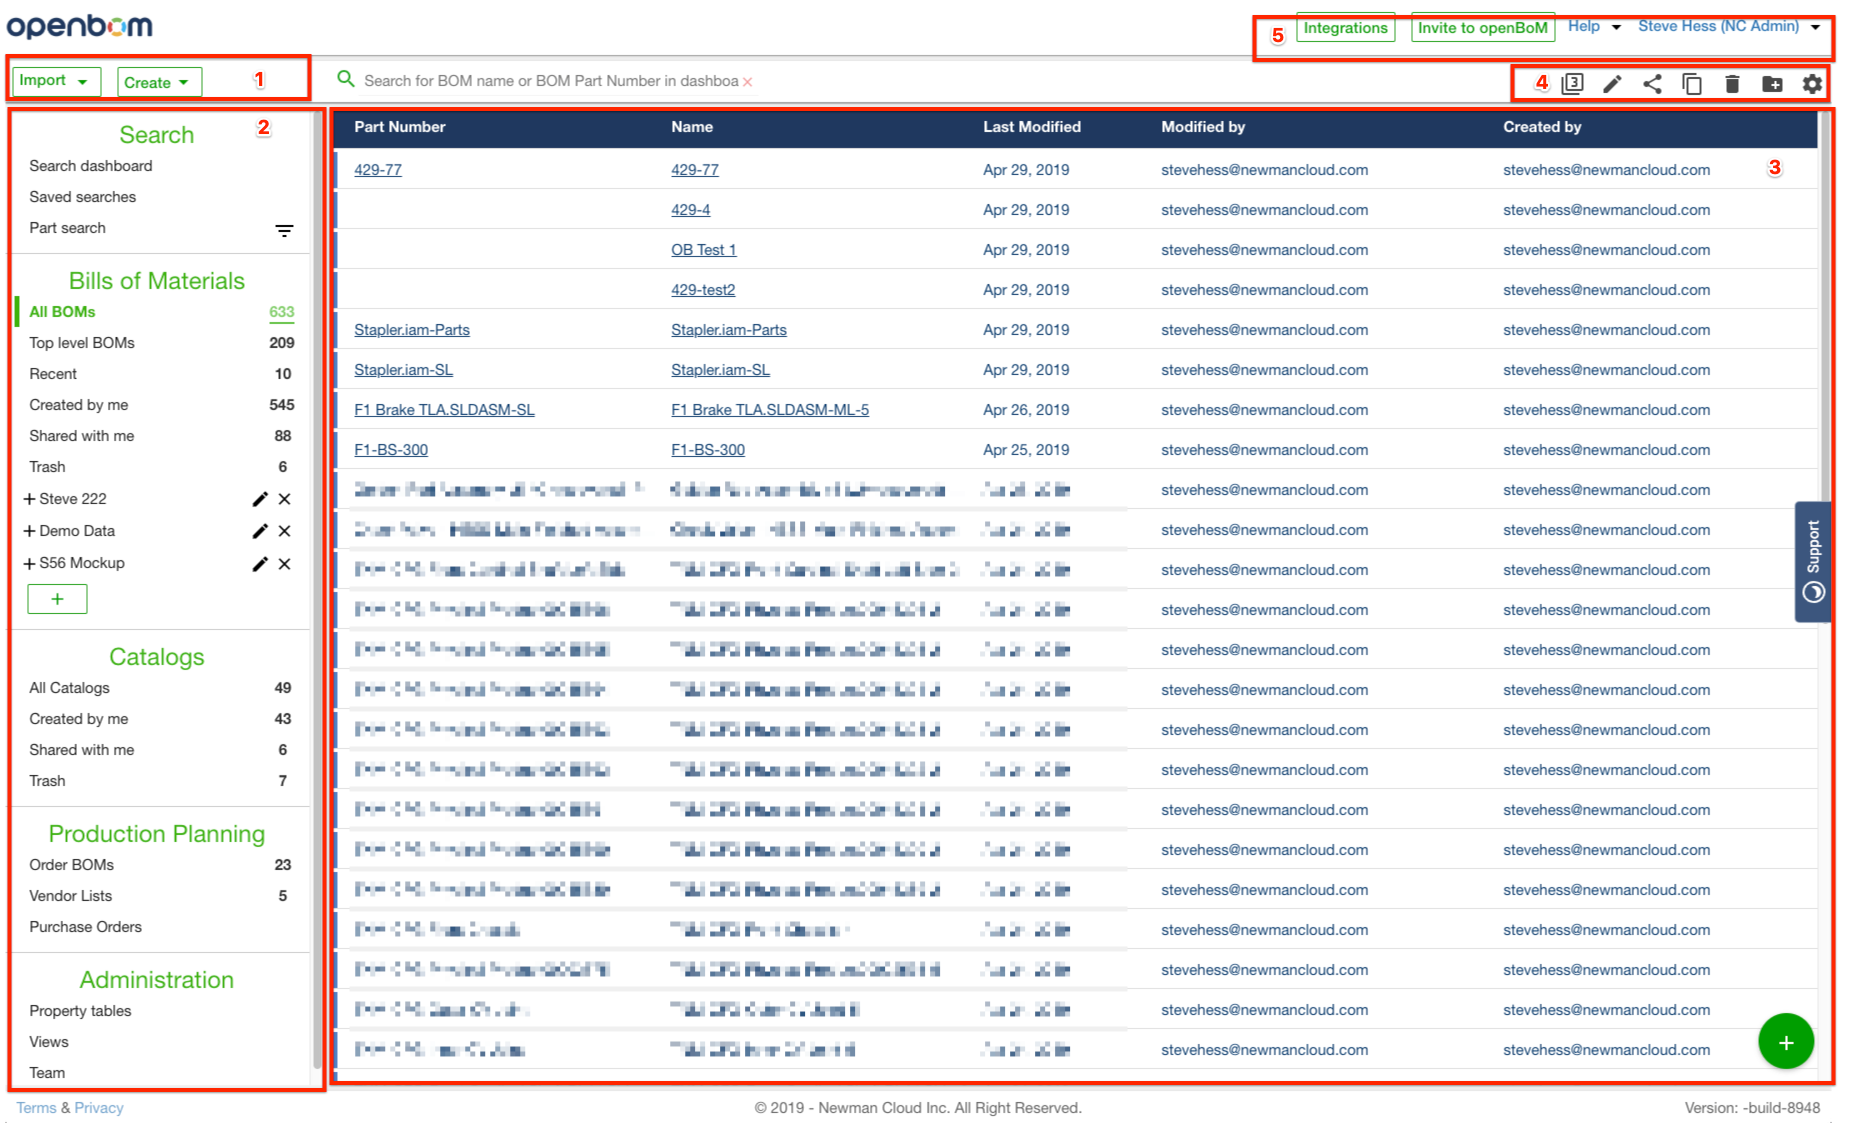
- Where BOM and Catalogs are born
- Determines what is displayed in Zone 3
- The Dashboard of things corresponding to what you have selected in Zone 2
- The various commands available on the Dashboard (see below for more details)
- Your account settings, help and more
Dashboard and menus
The Dashboard in more detail
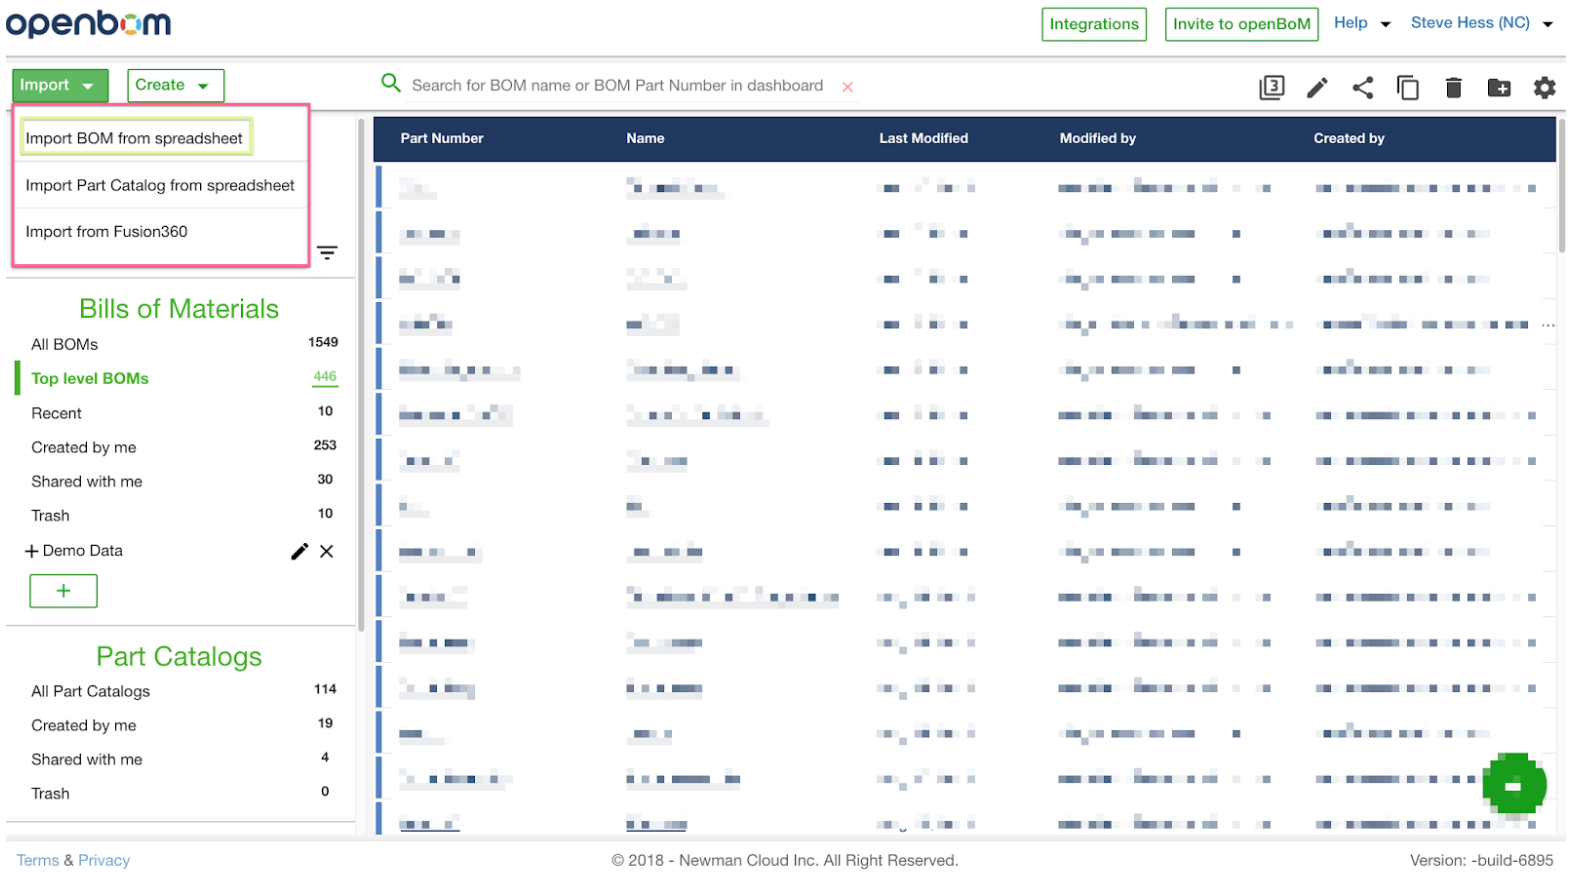
In the example below the user has asked to show only Top Level BOMs. Top-level BOMs are bills of materials that have no parent. These BOM can be a single level BOM for a product or contains sub-levels.
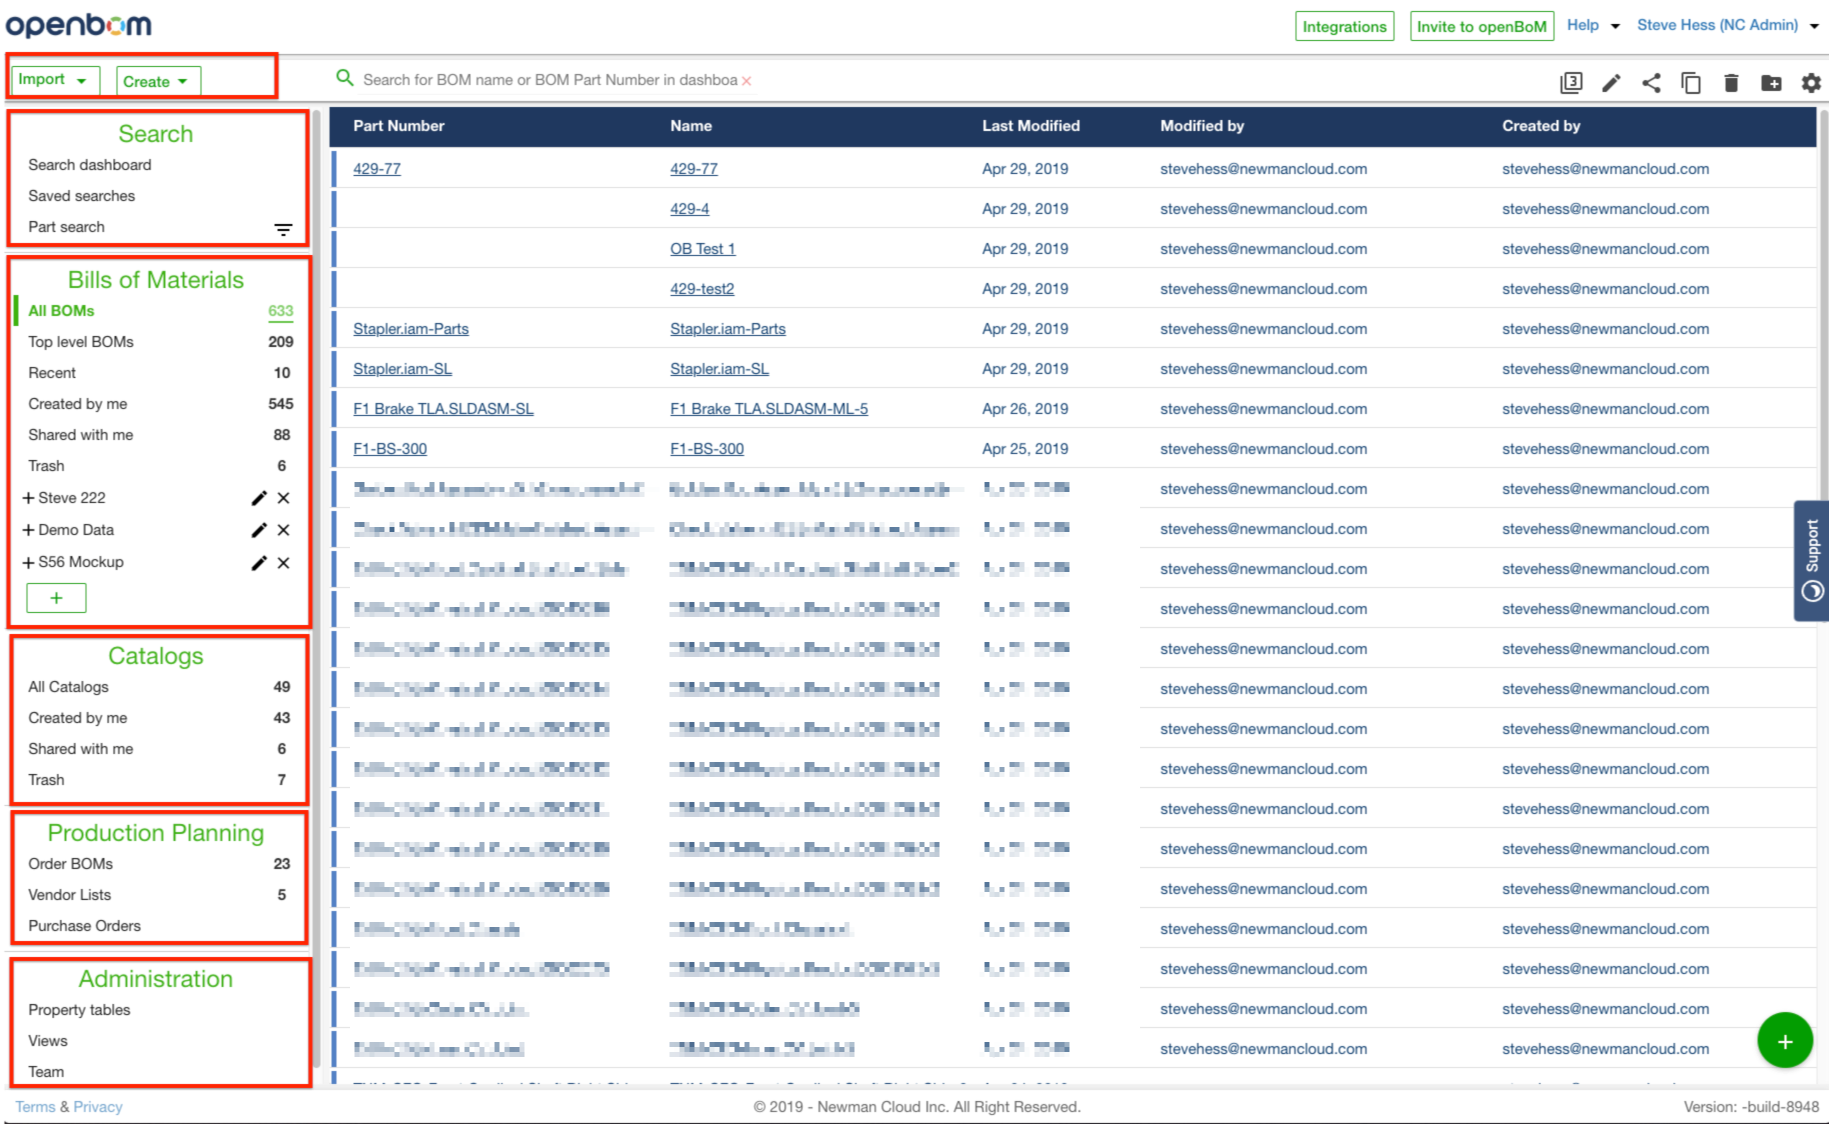
The specific panels on the left
- Import / Create BOM or Catalog
- Search
- Bill of Materials
- Catalog
- Production Planning
- Administration
Create BOM, Create Catalog
The Create menu is the starting point of OpenBOM. Use it to create a BOM or a Catalog.
Create BOM
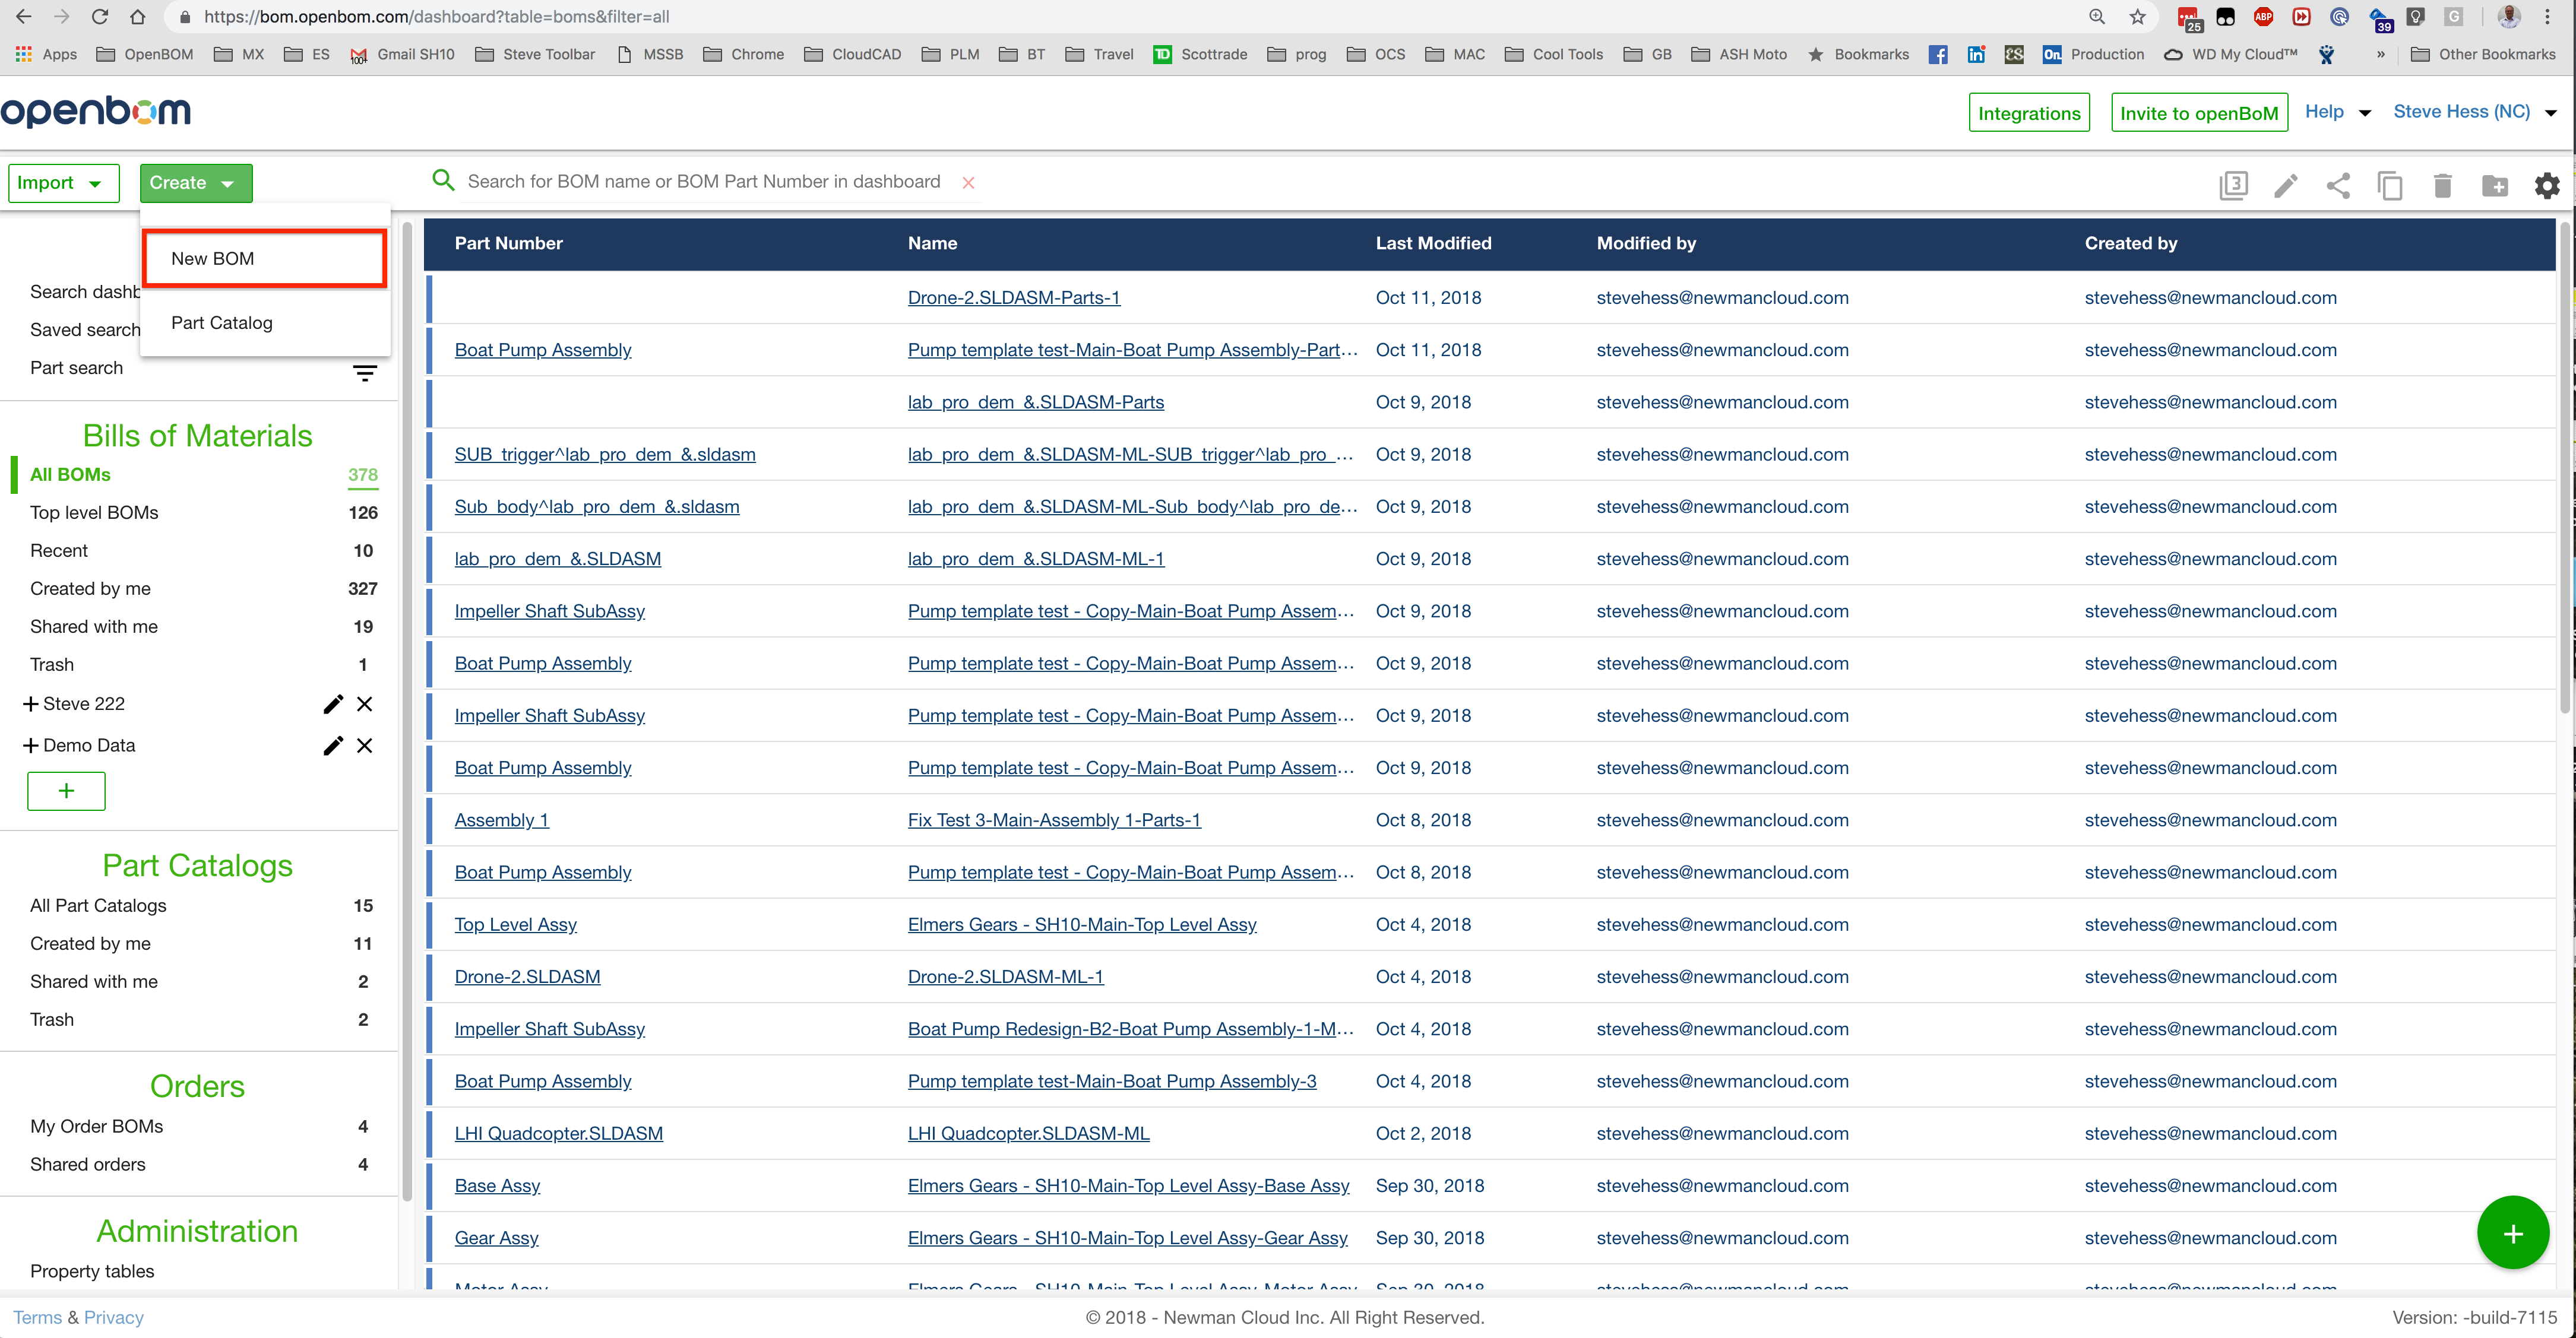
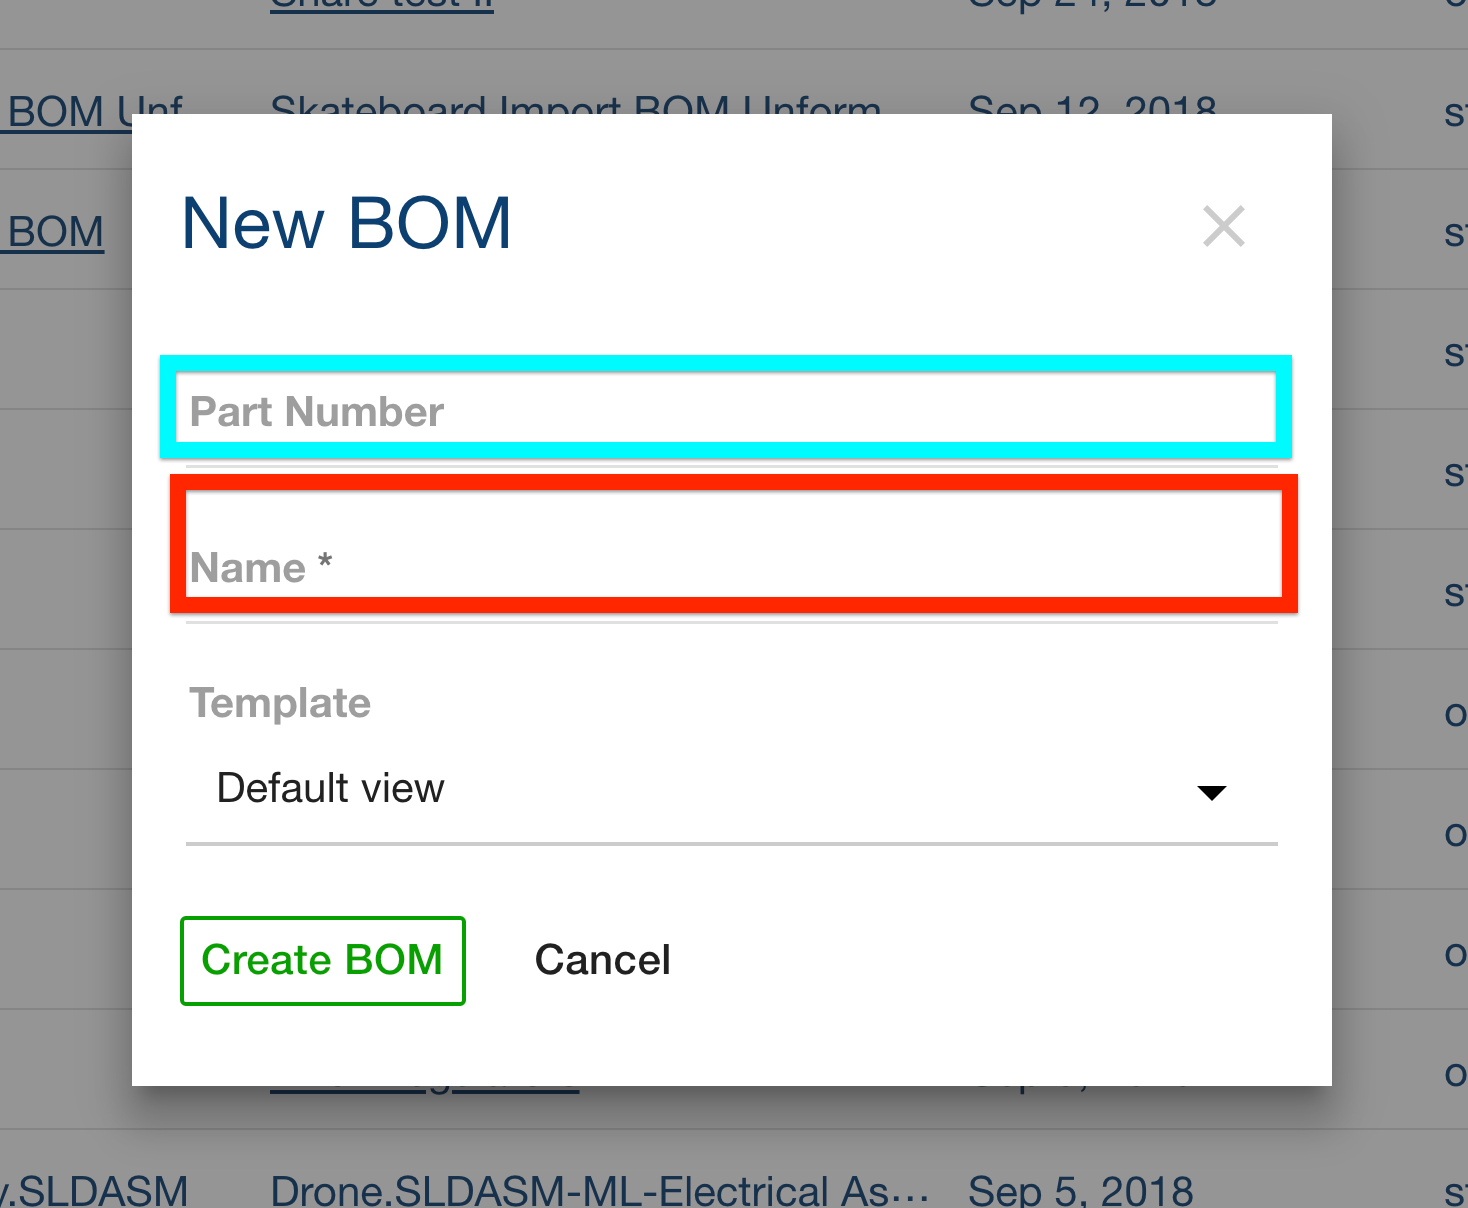
Select Create->New BOM and OpenBOM will display the Create BOM dialog as follows:
- Part Number is optional
- Name is required
- Template must be specified and defaults to “Default” (more on that in the Templates help)
You may create your own Templates and they will be listed here. This is an important way to standardize on BOM columns within your team or company.
A new BOM is created with the following list of properties (unless you create your own Template)
Create New Catalog
The Create Catalog dialog is shown below. Similar to BOM with additional inventory management controls for setting a part number sequence.
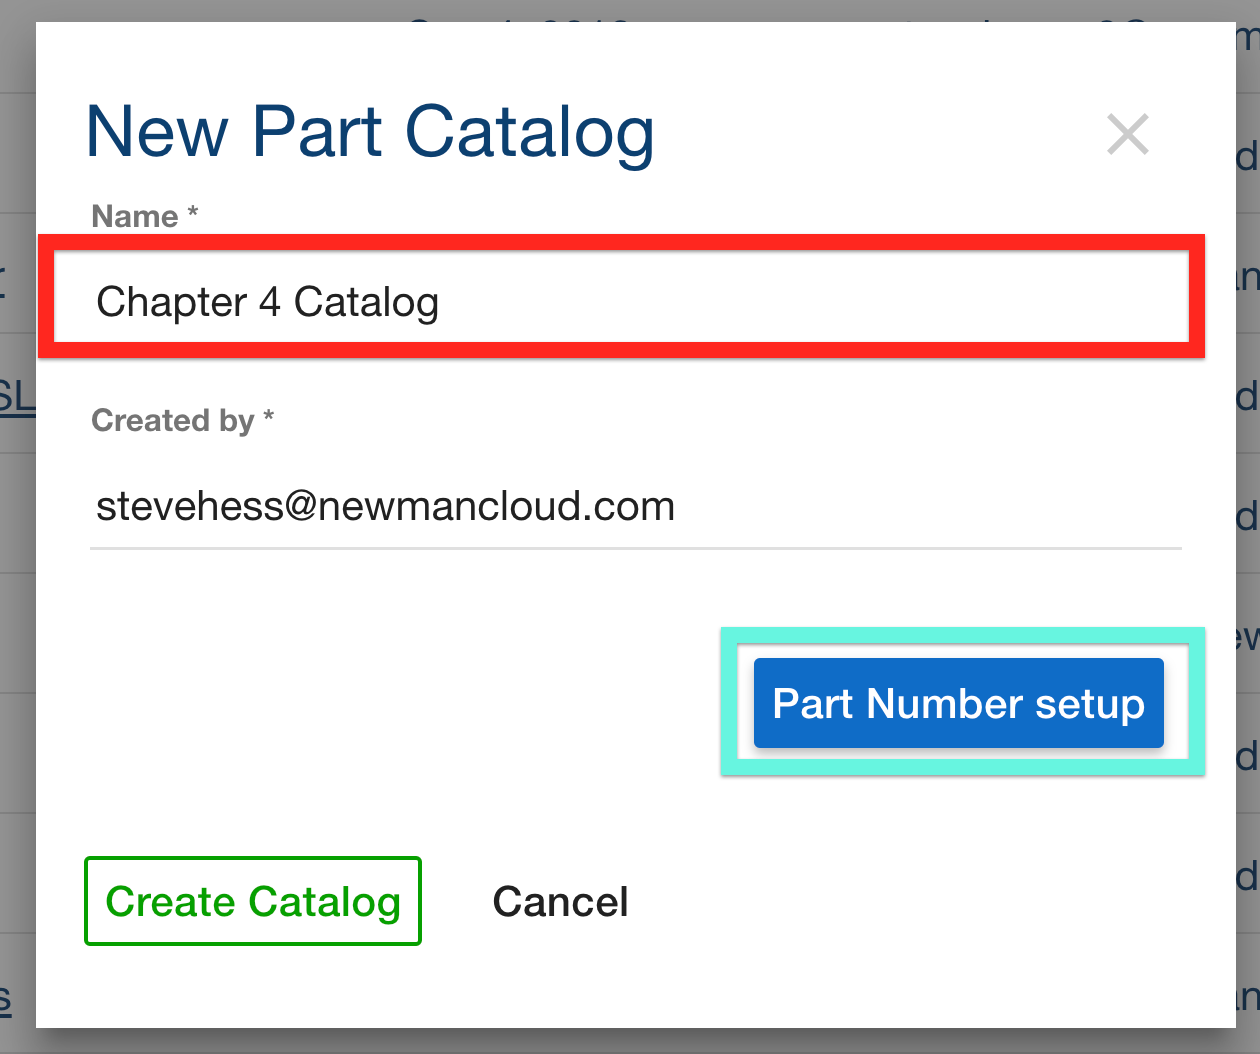
- Name is required
Click “Create Catalog” and the Catalog will be created.
Import BOM, Import Catalog
Search from the dashboard
There are two types of search from the Dashboard.
- Free text search
- Part search
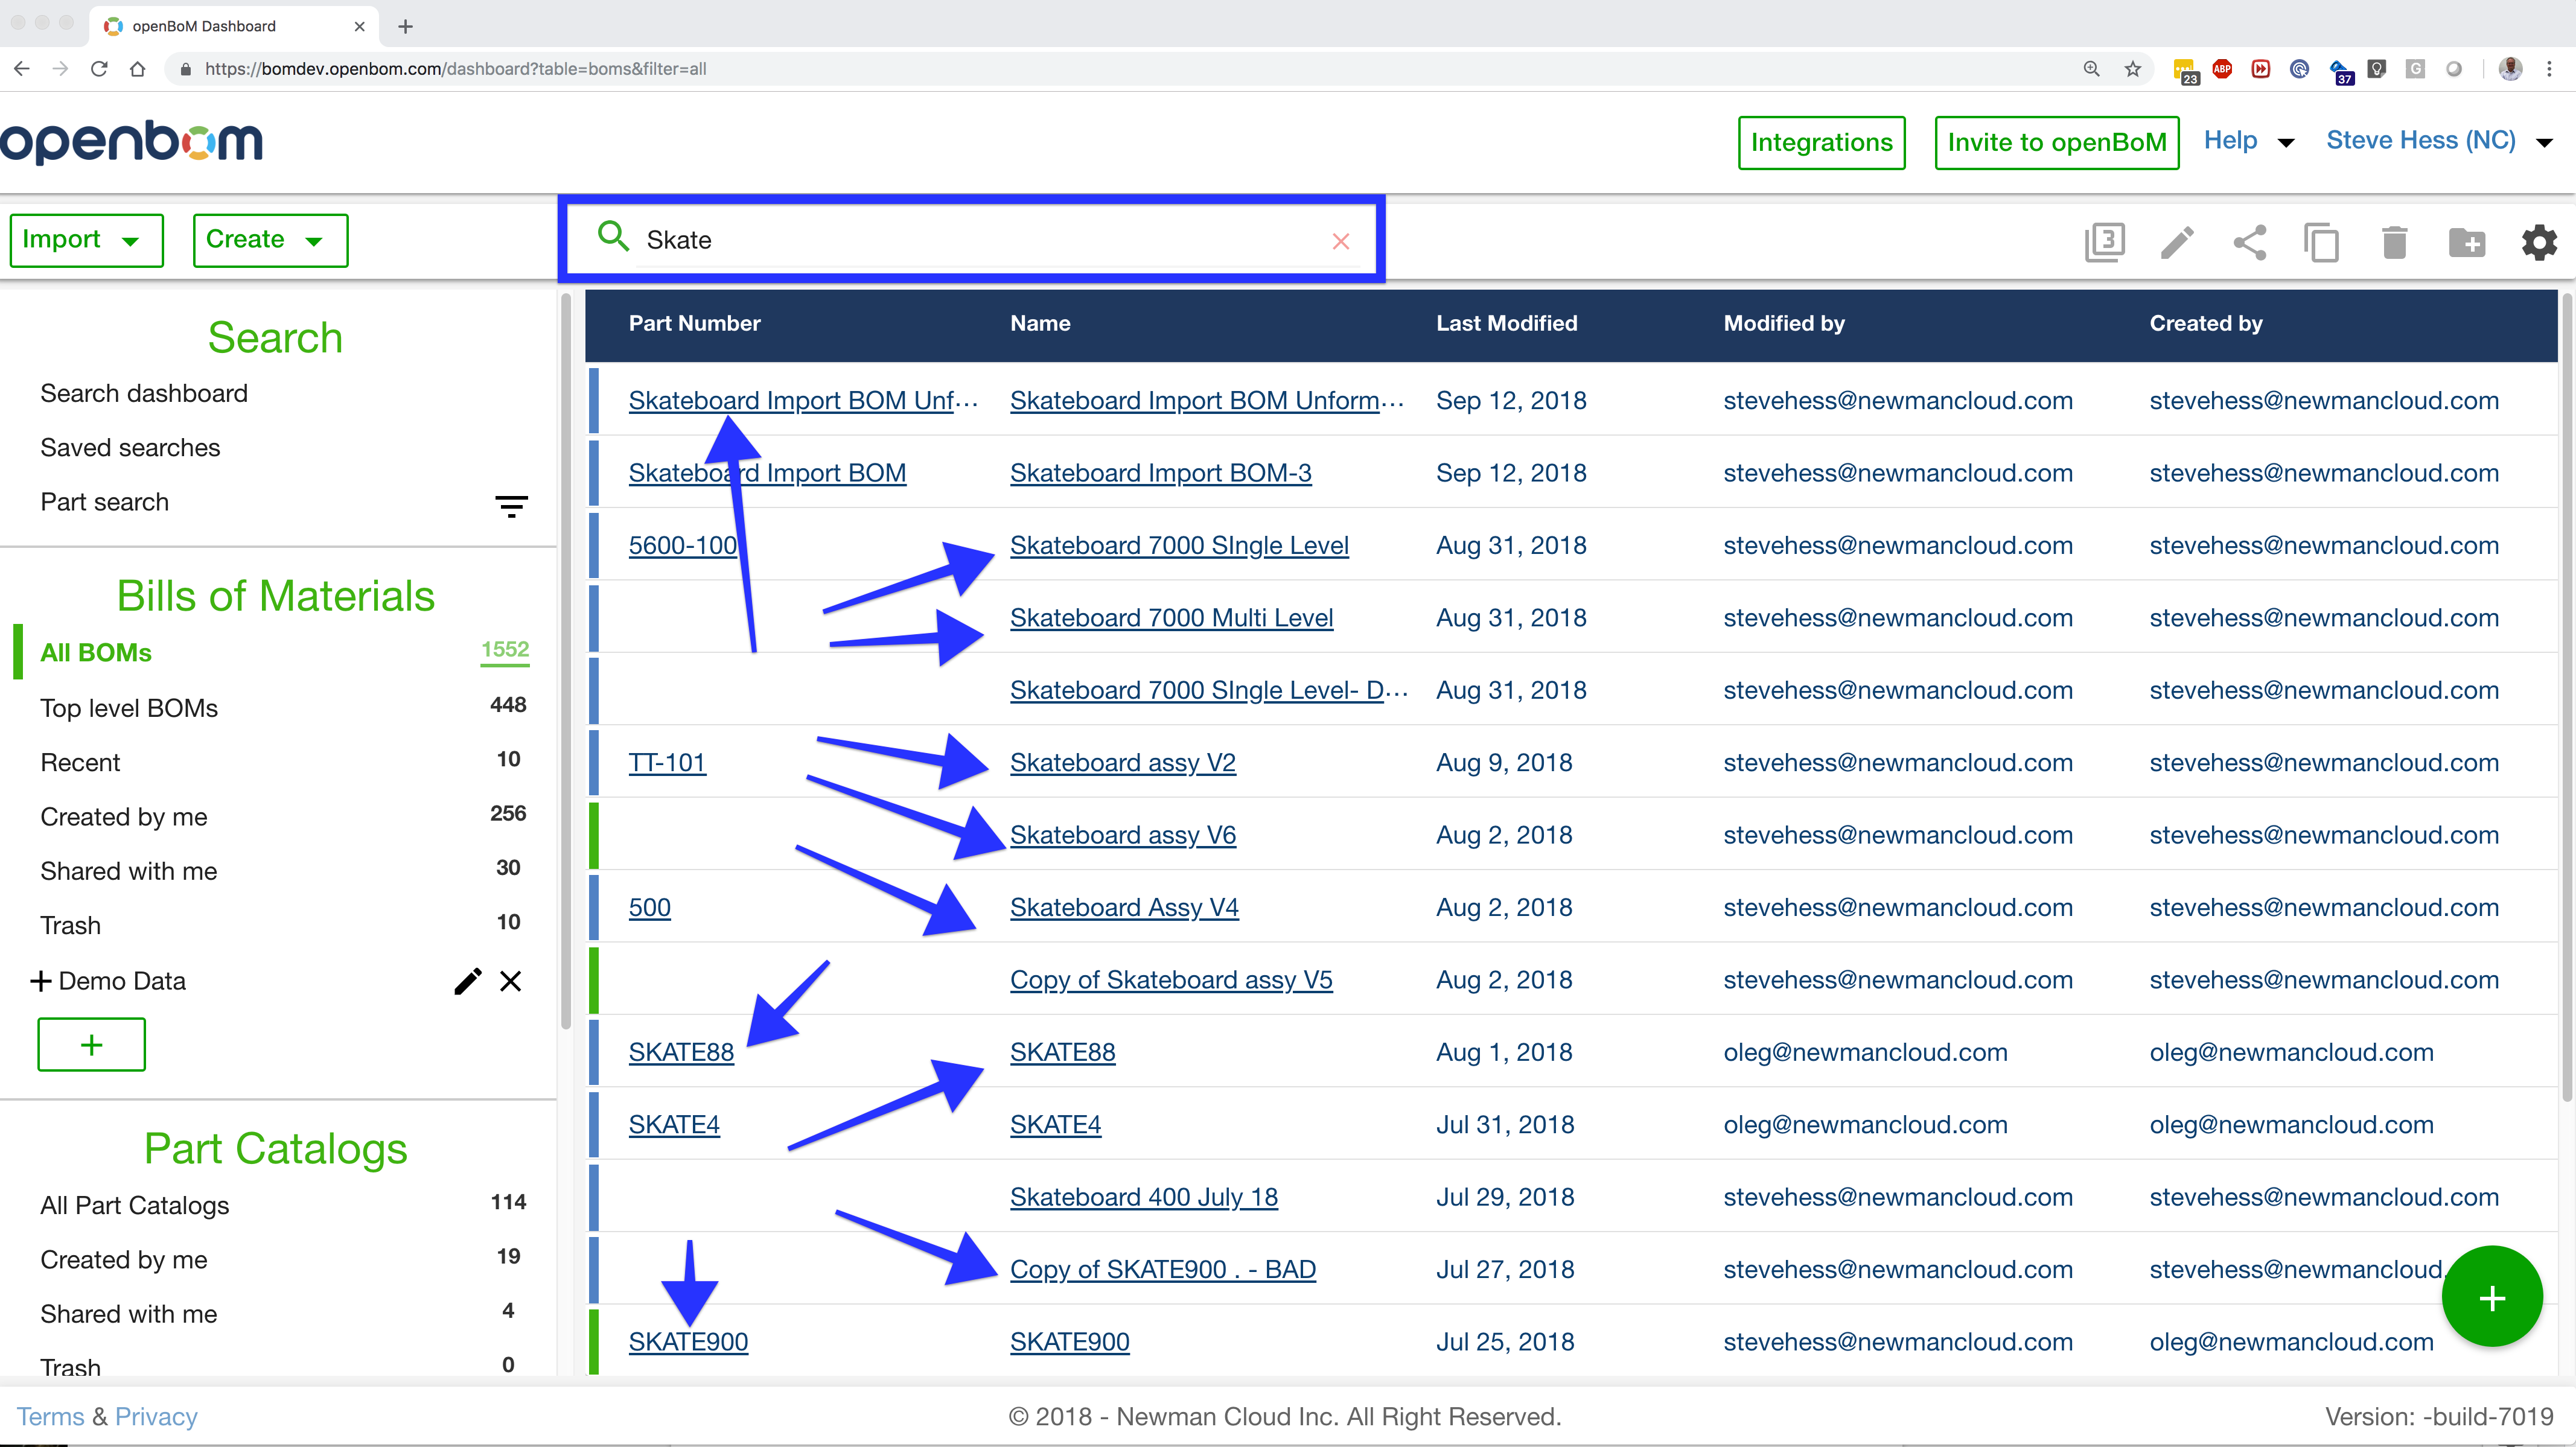
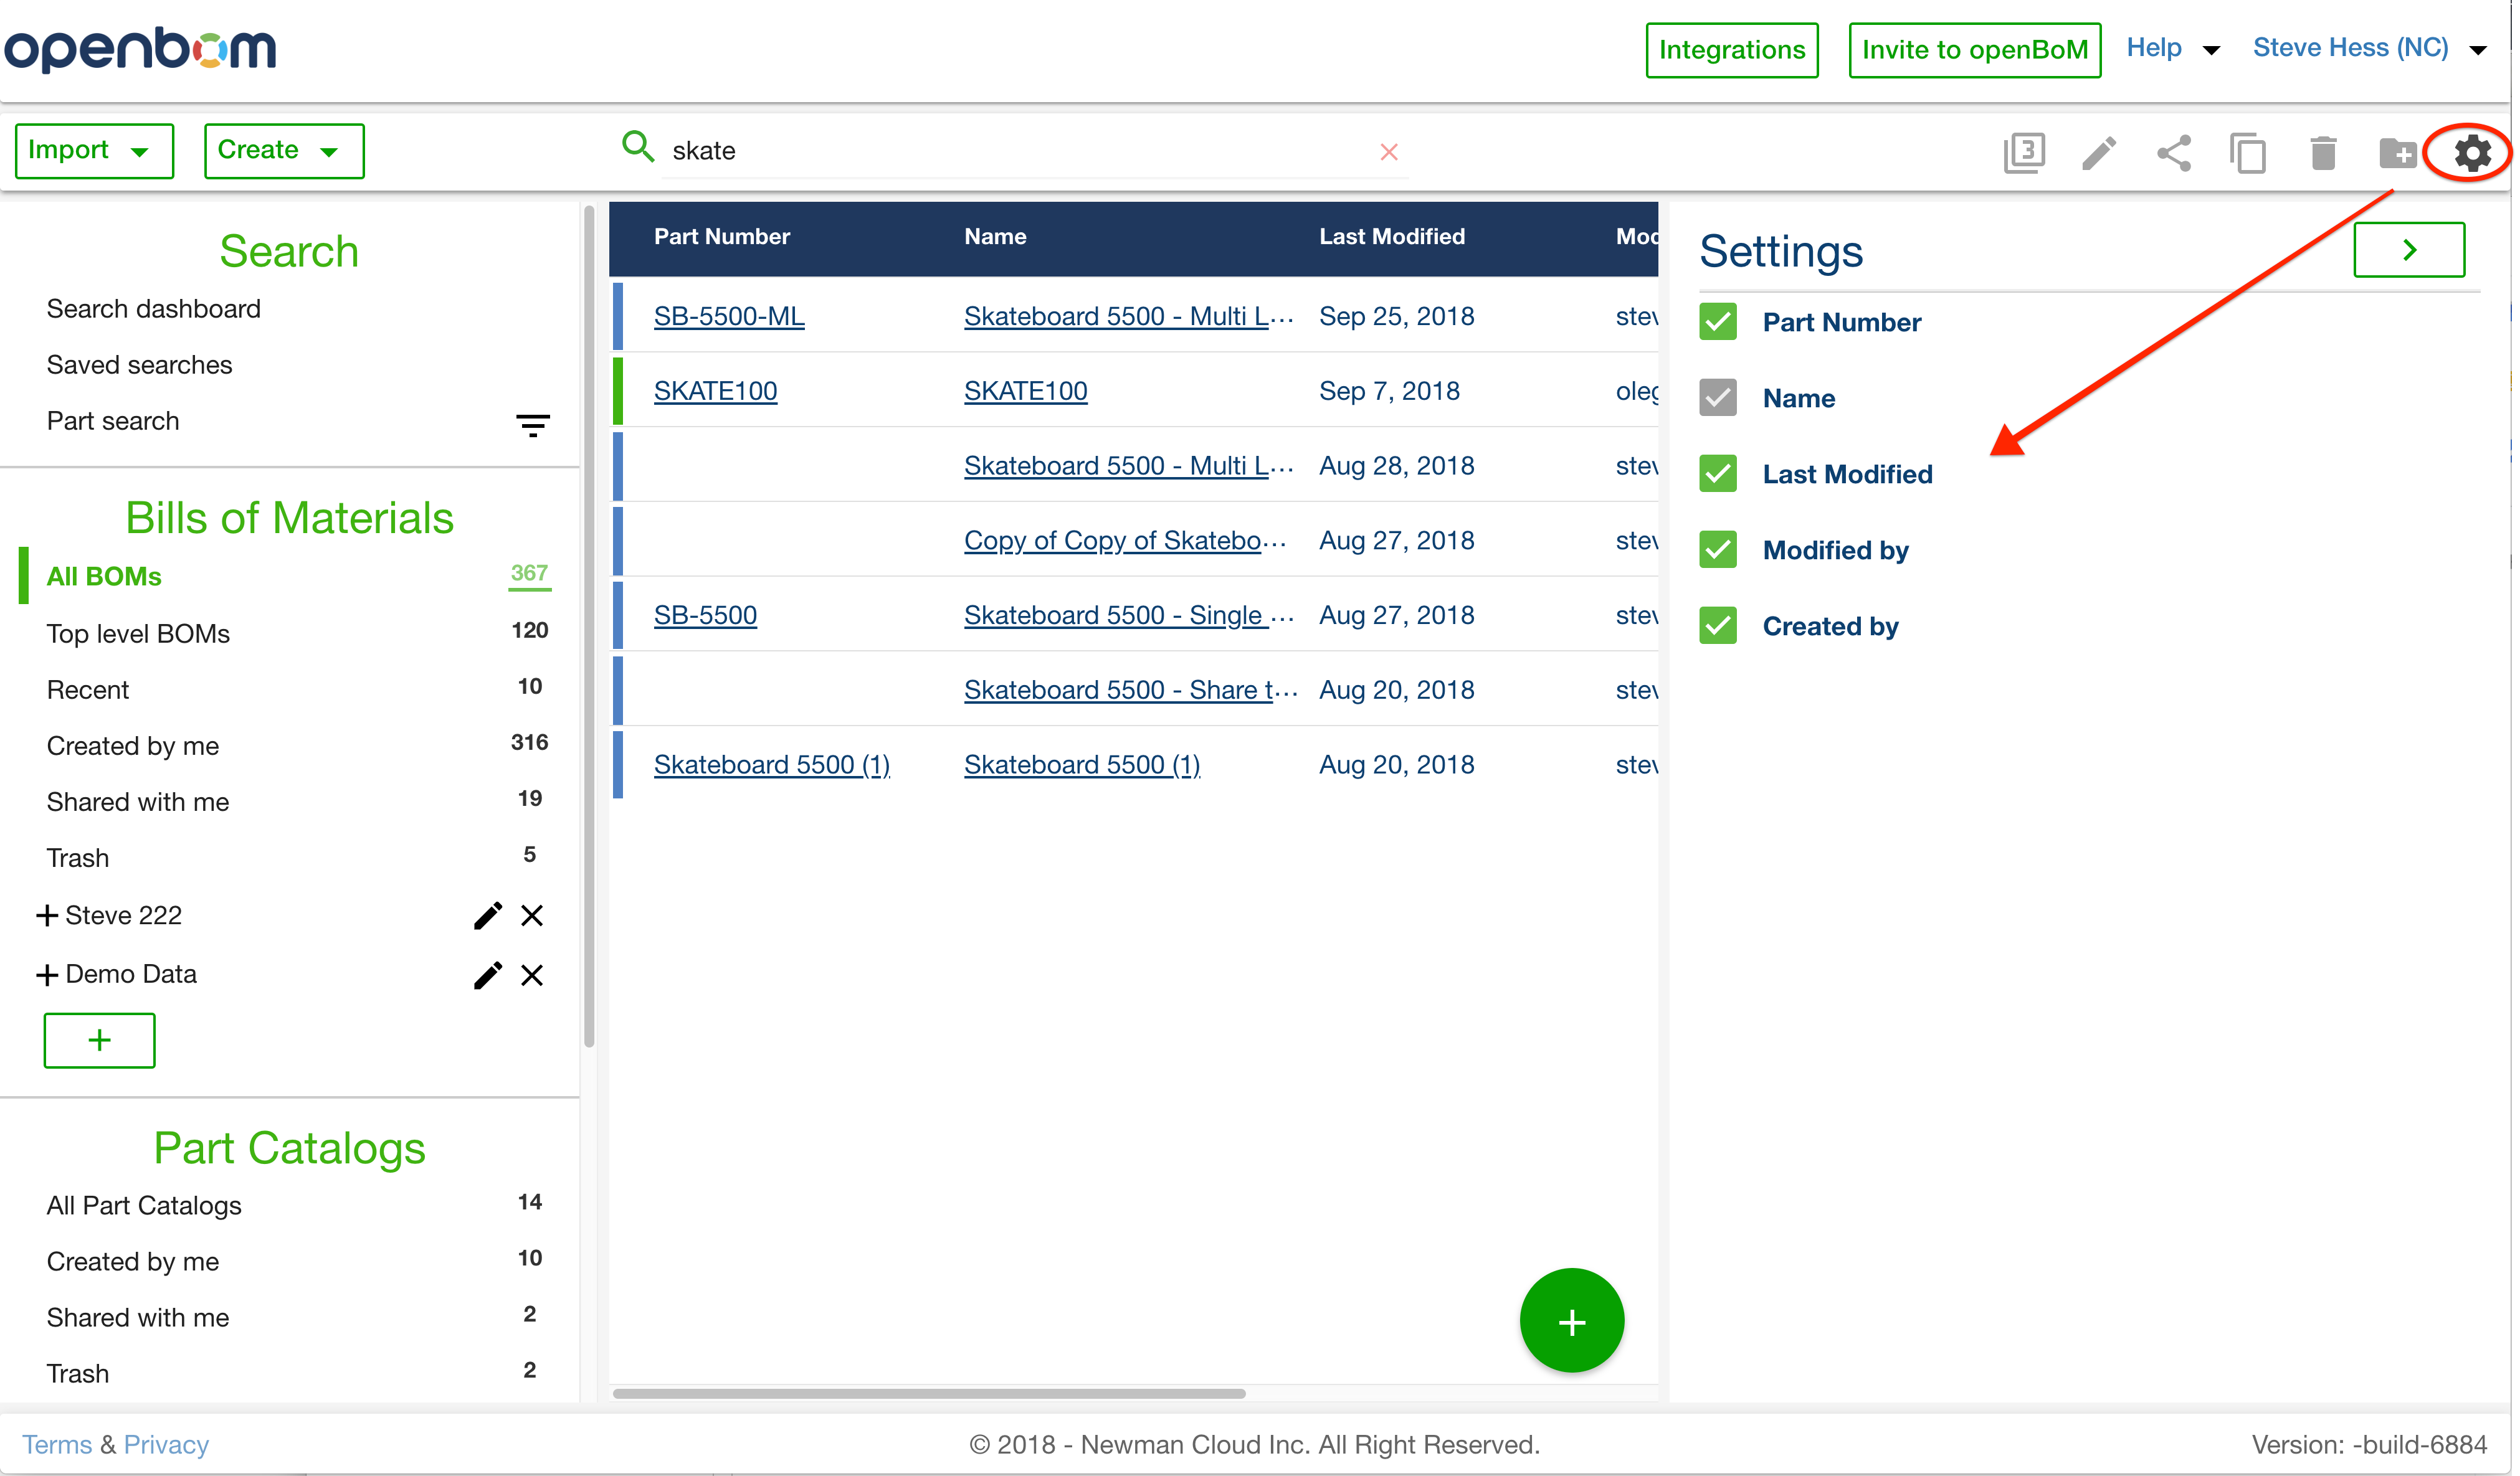
1) Dashboard Search
Both BOM and Catalog dashboard have a Search field at the top shown here. In this example we are looking for all BOMs with the word “skate” in the name or part number.
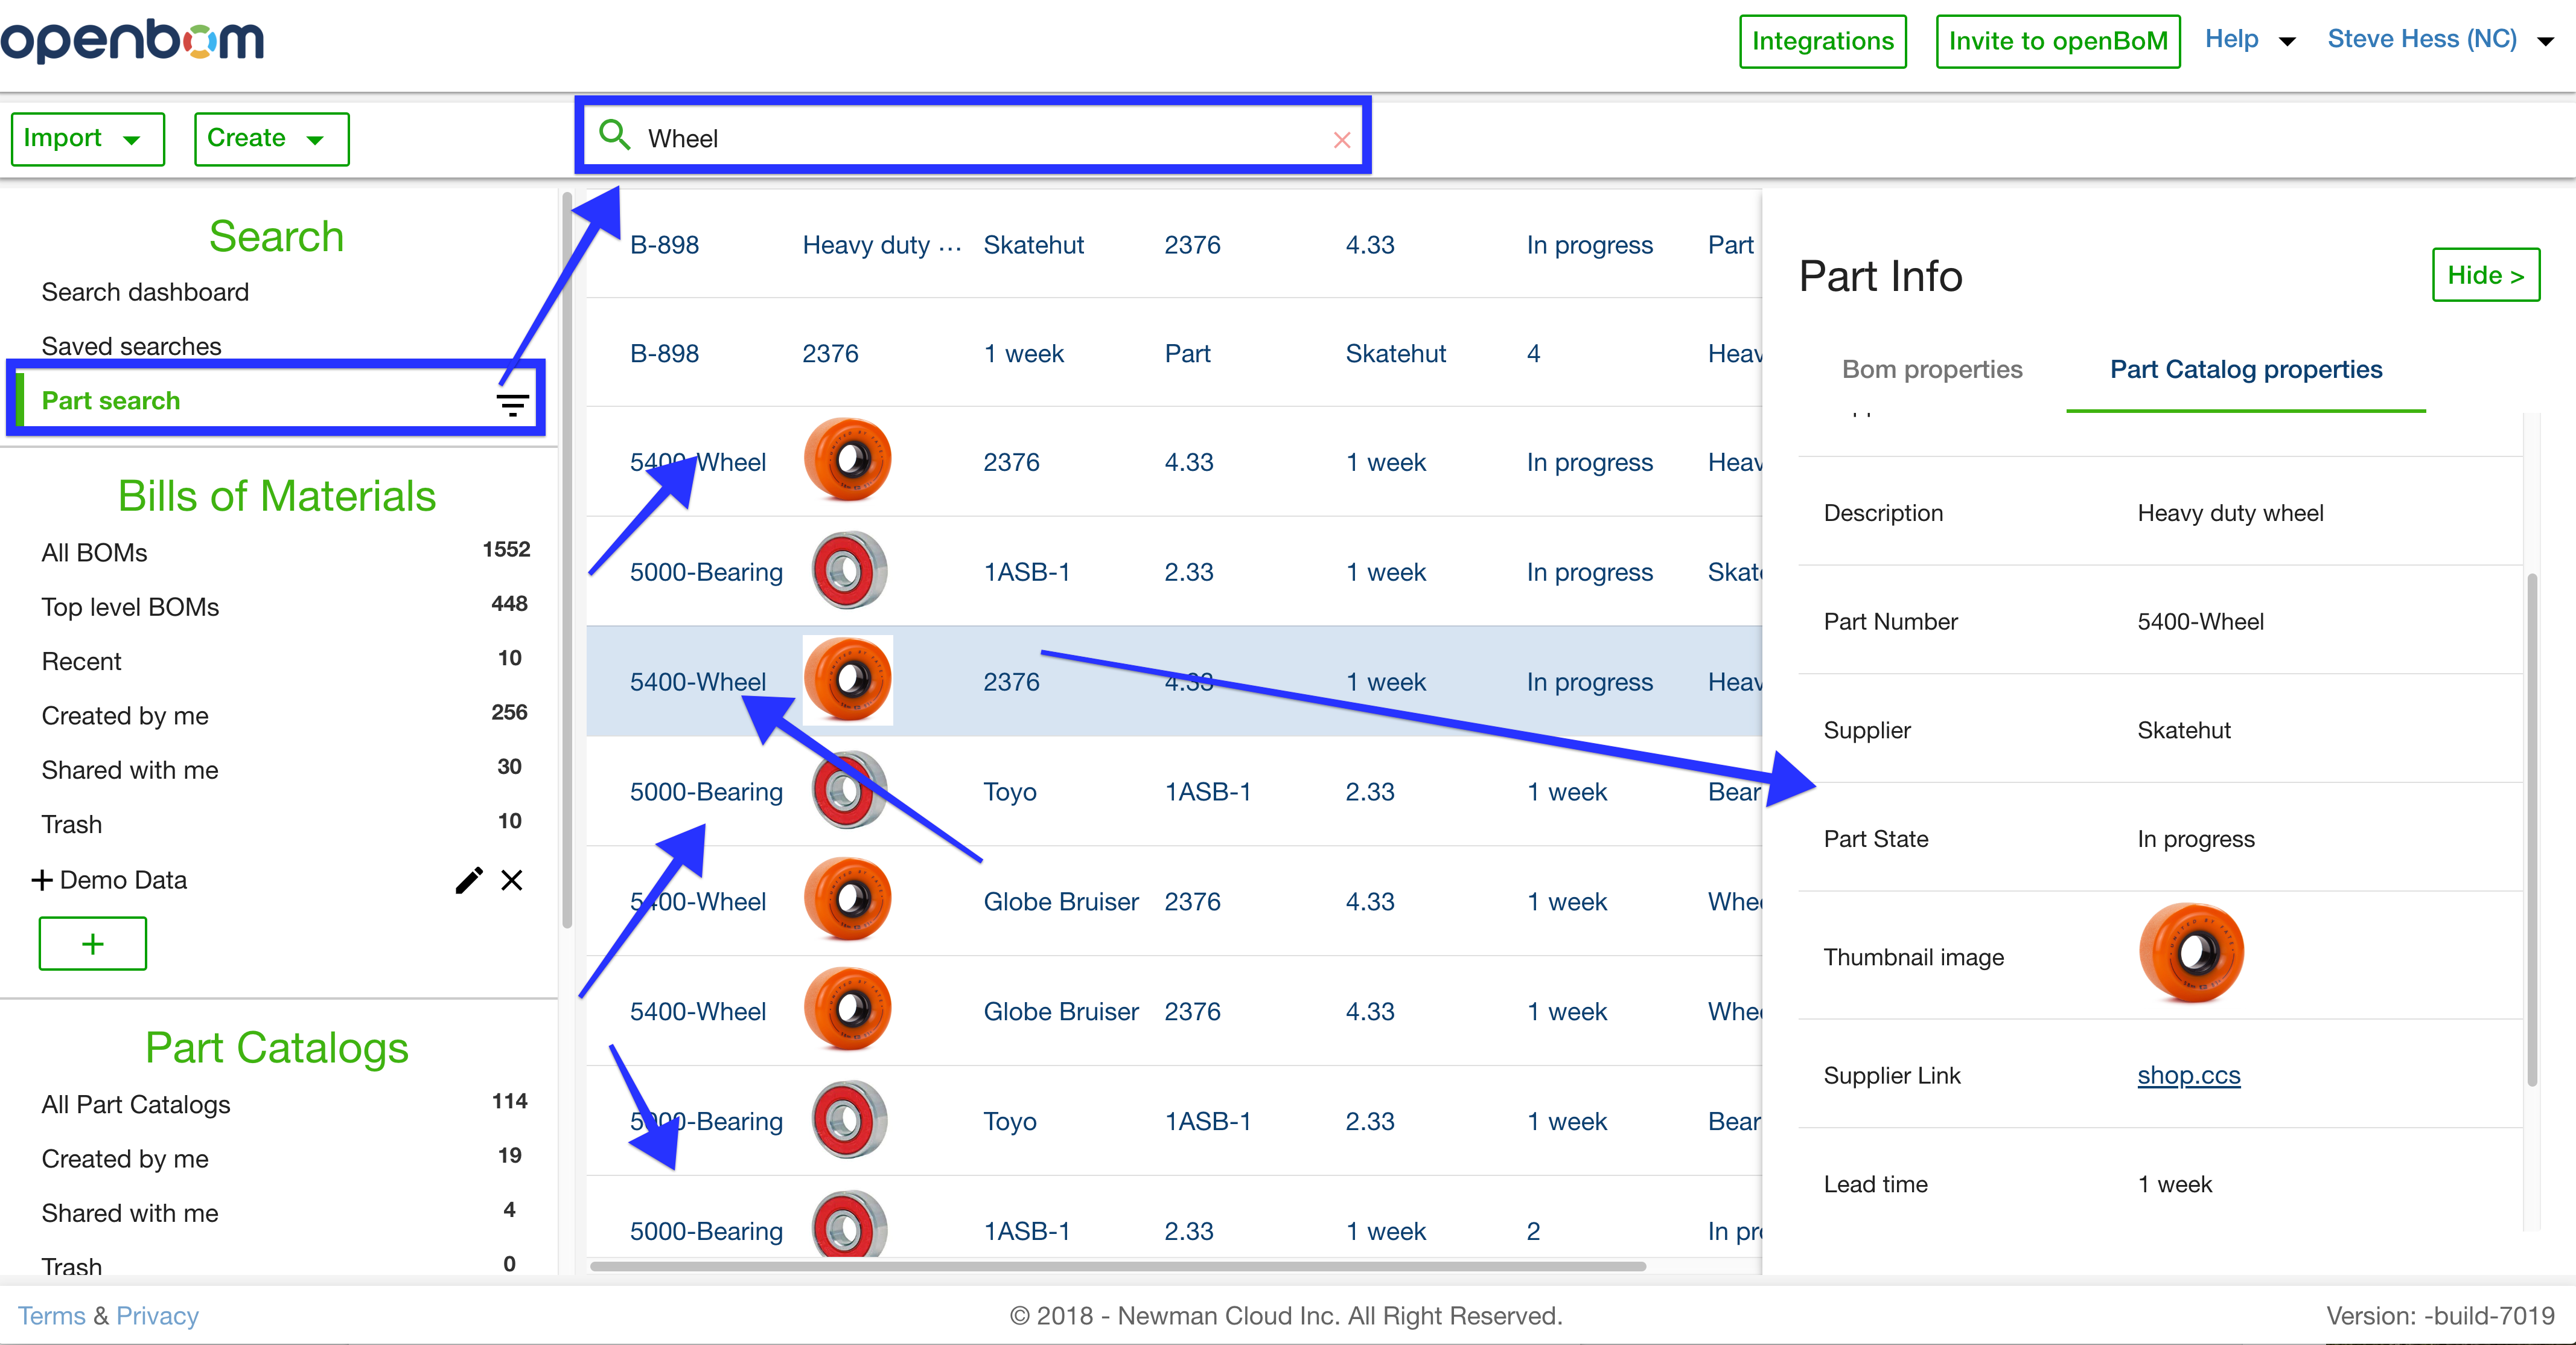
2) Part search dashboard
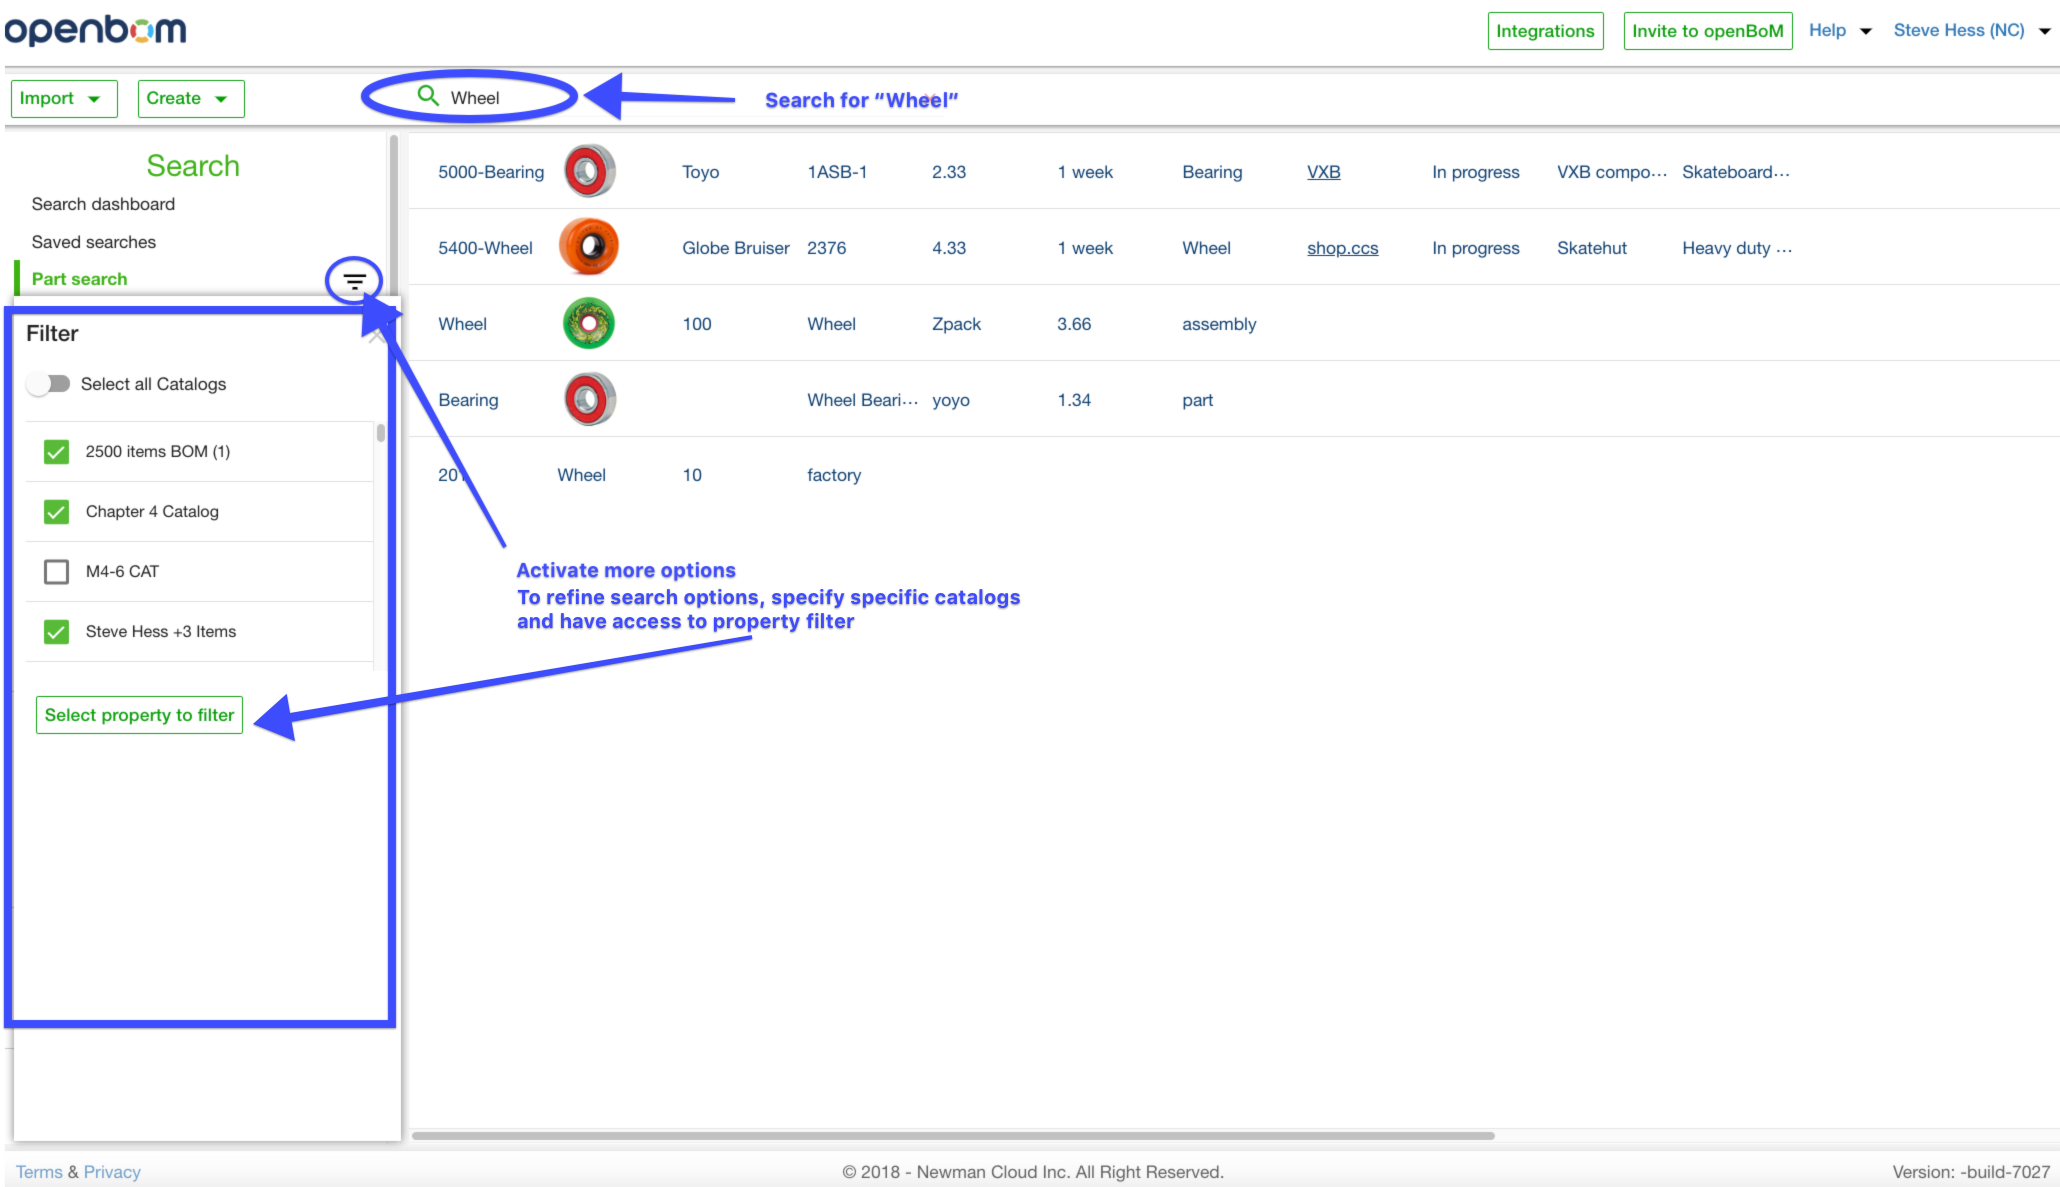
This search option returns Parts from BOMs and Catalogs, supports filtering by catalog and full parametric property fitler. Activate Part Search by clicking Part Search in the left panel and typing in a search term. In this case “Wheel”. Click the ground symbol to activate filtering.
Click on an individual line item to see more Part Info about the item.
Below we refine the search even more by clicking the ground symbol and specifying specific Catalogs to sears.
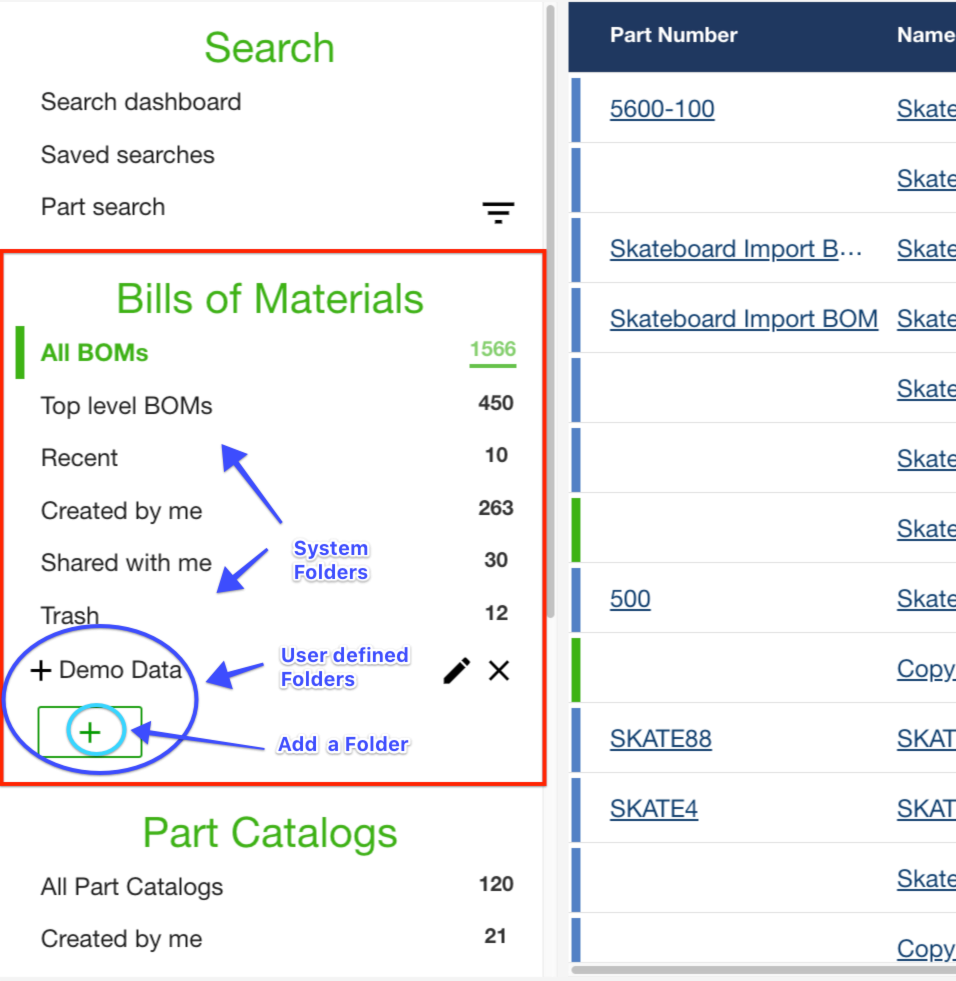
Folders
Create and Manage folders
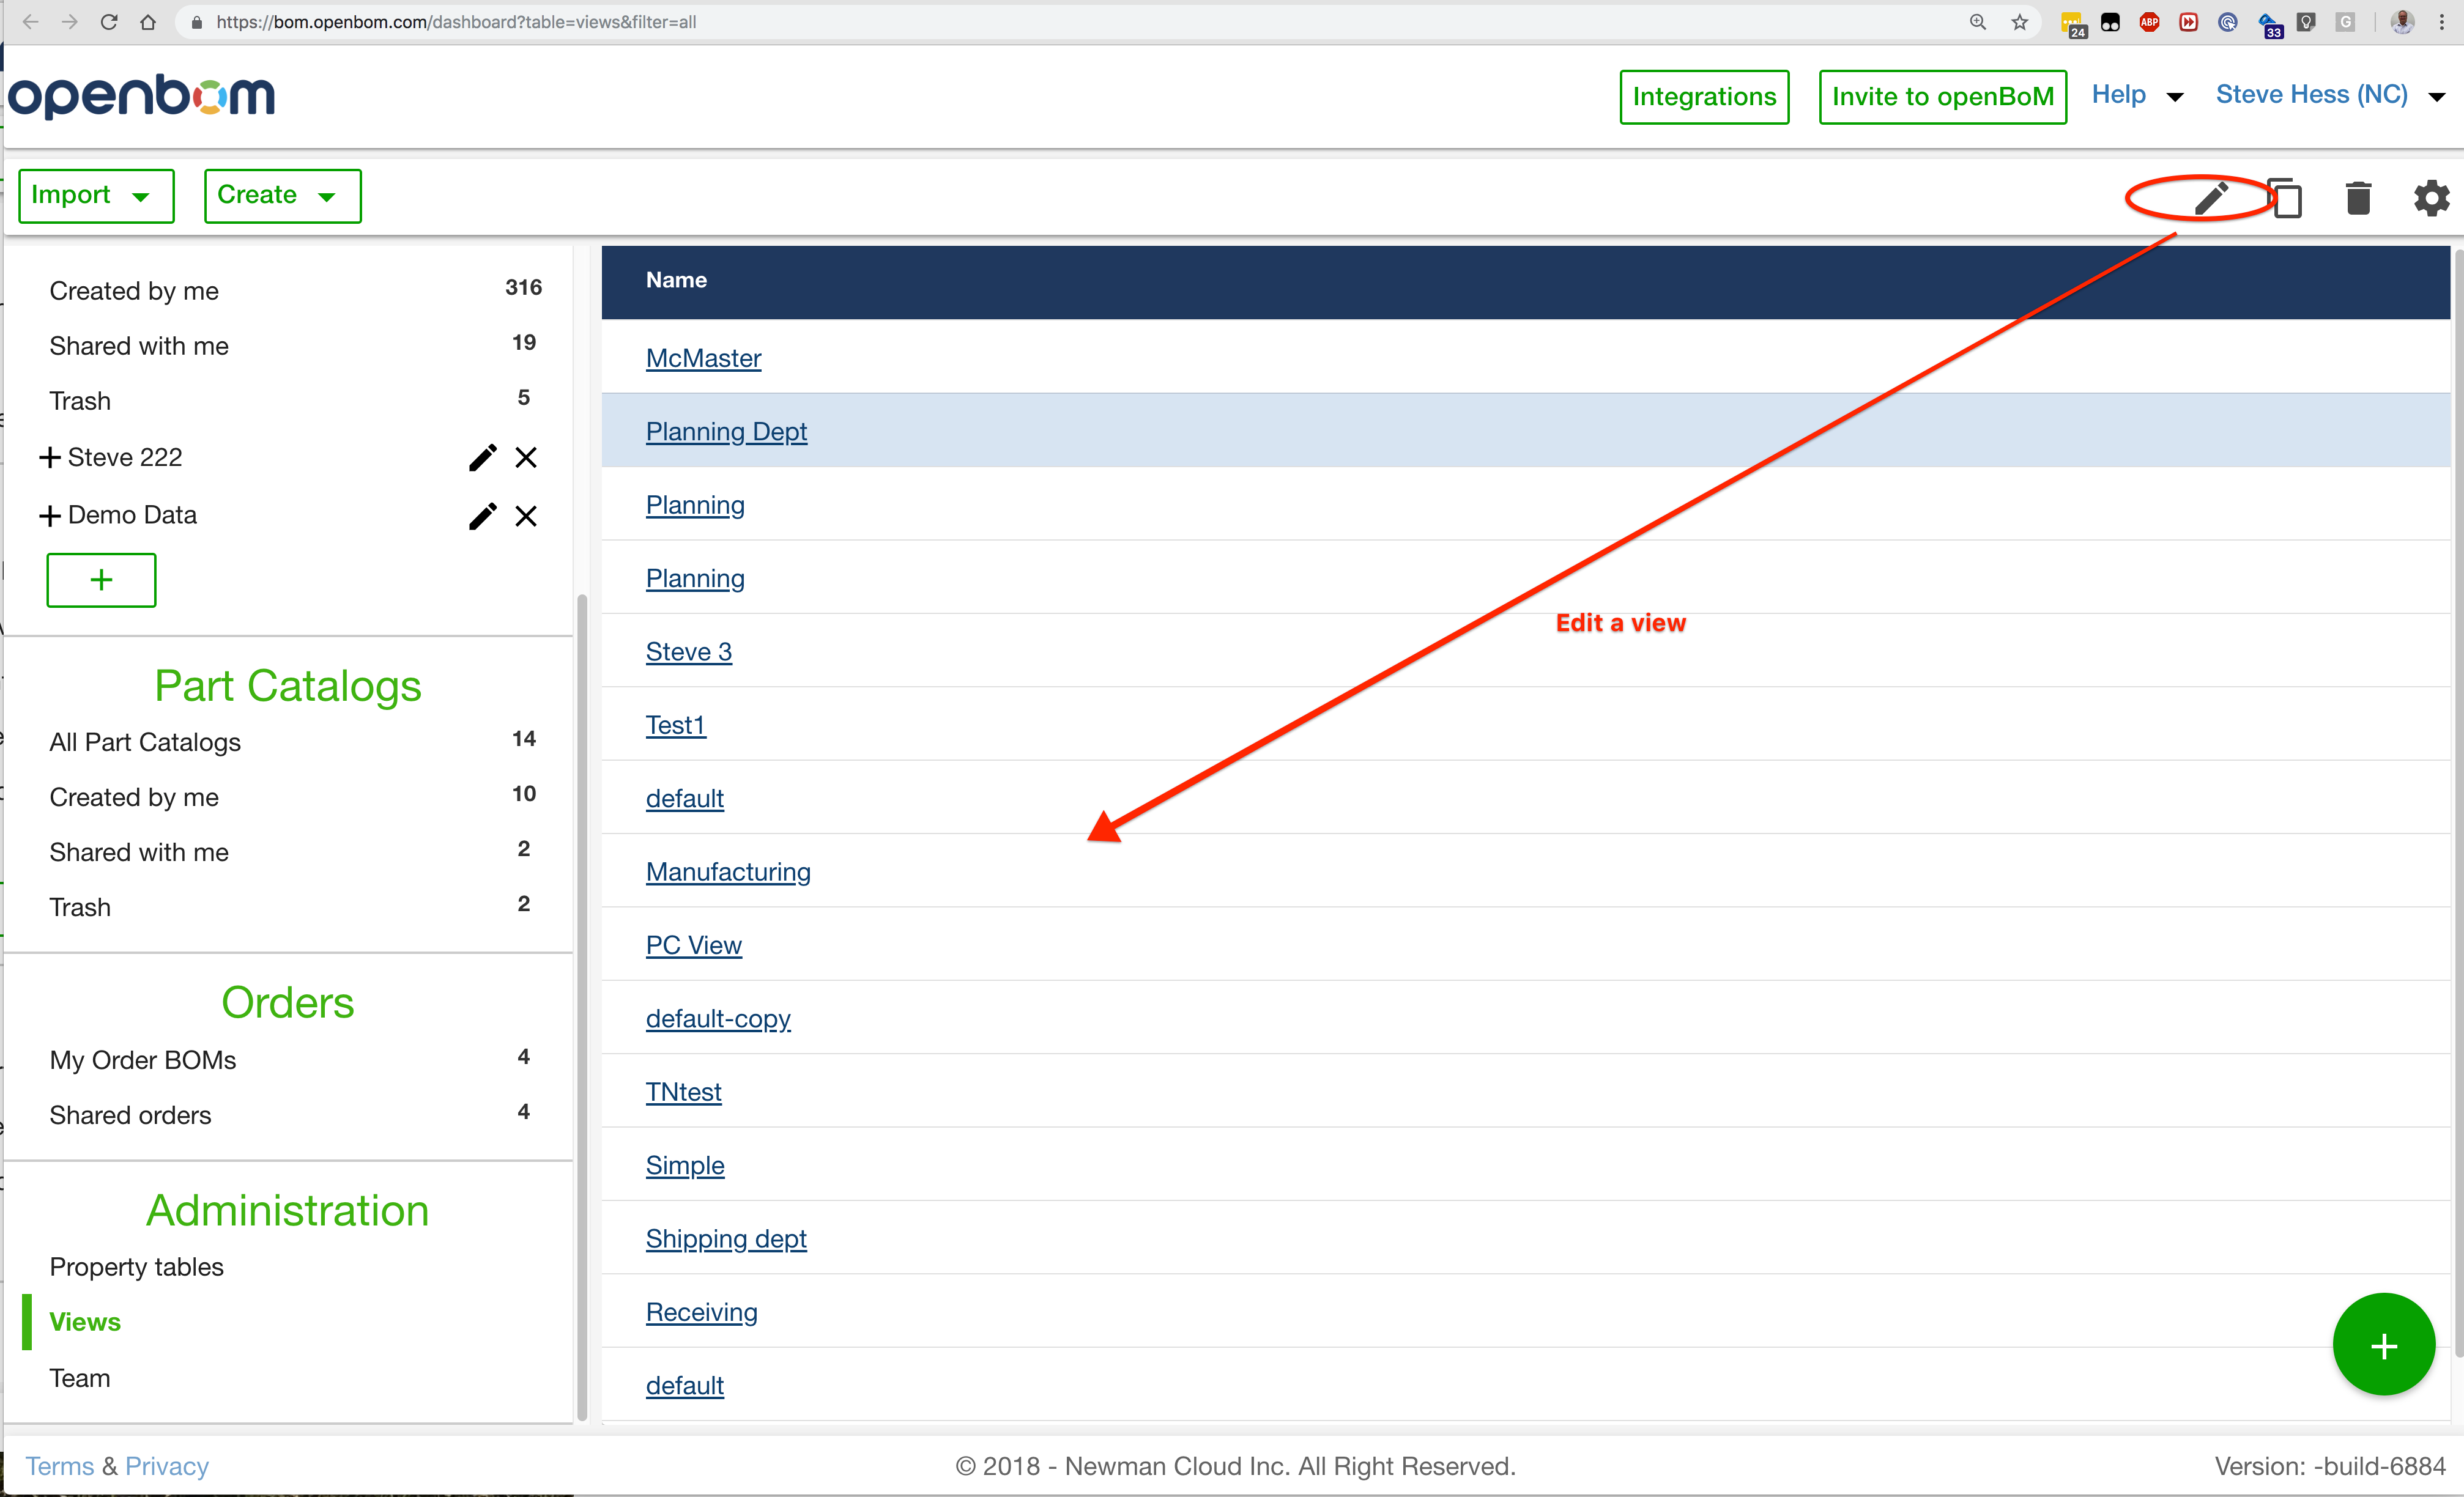
Views from the Dashboard (there are more View commands in the BOM and Catalog editors.)
Opens the Views dashboard – double click the view name to change its properties, click the pencil to rename.
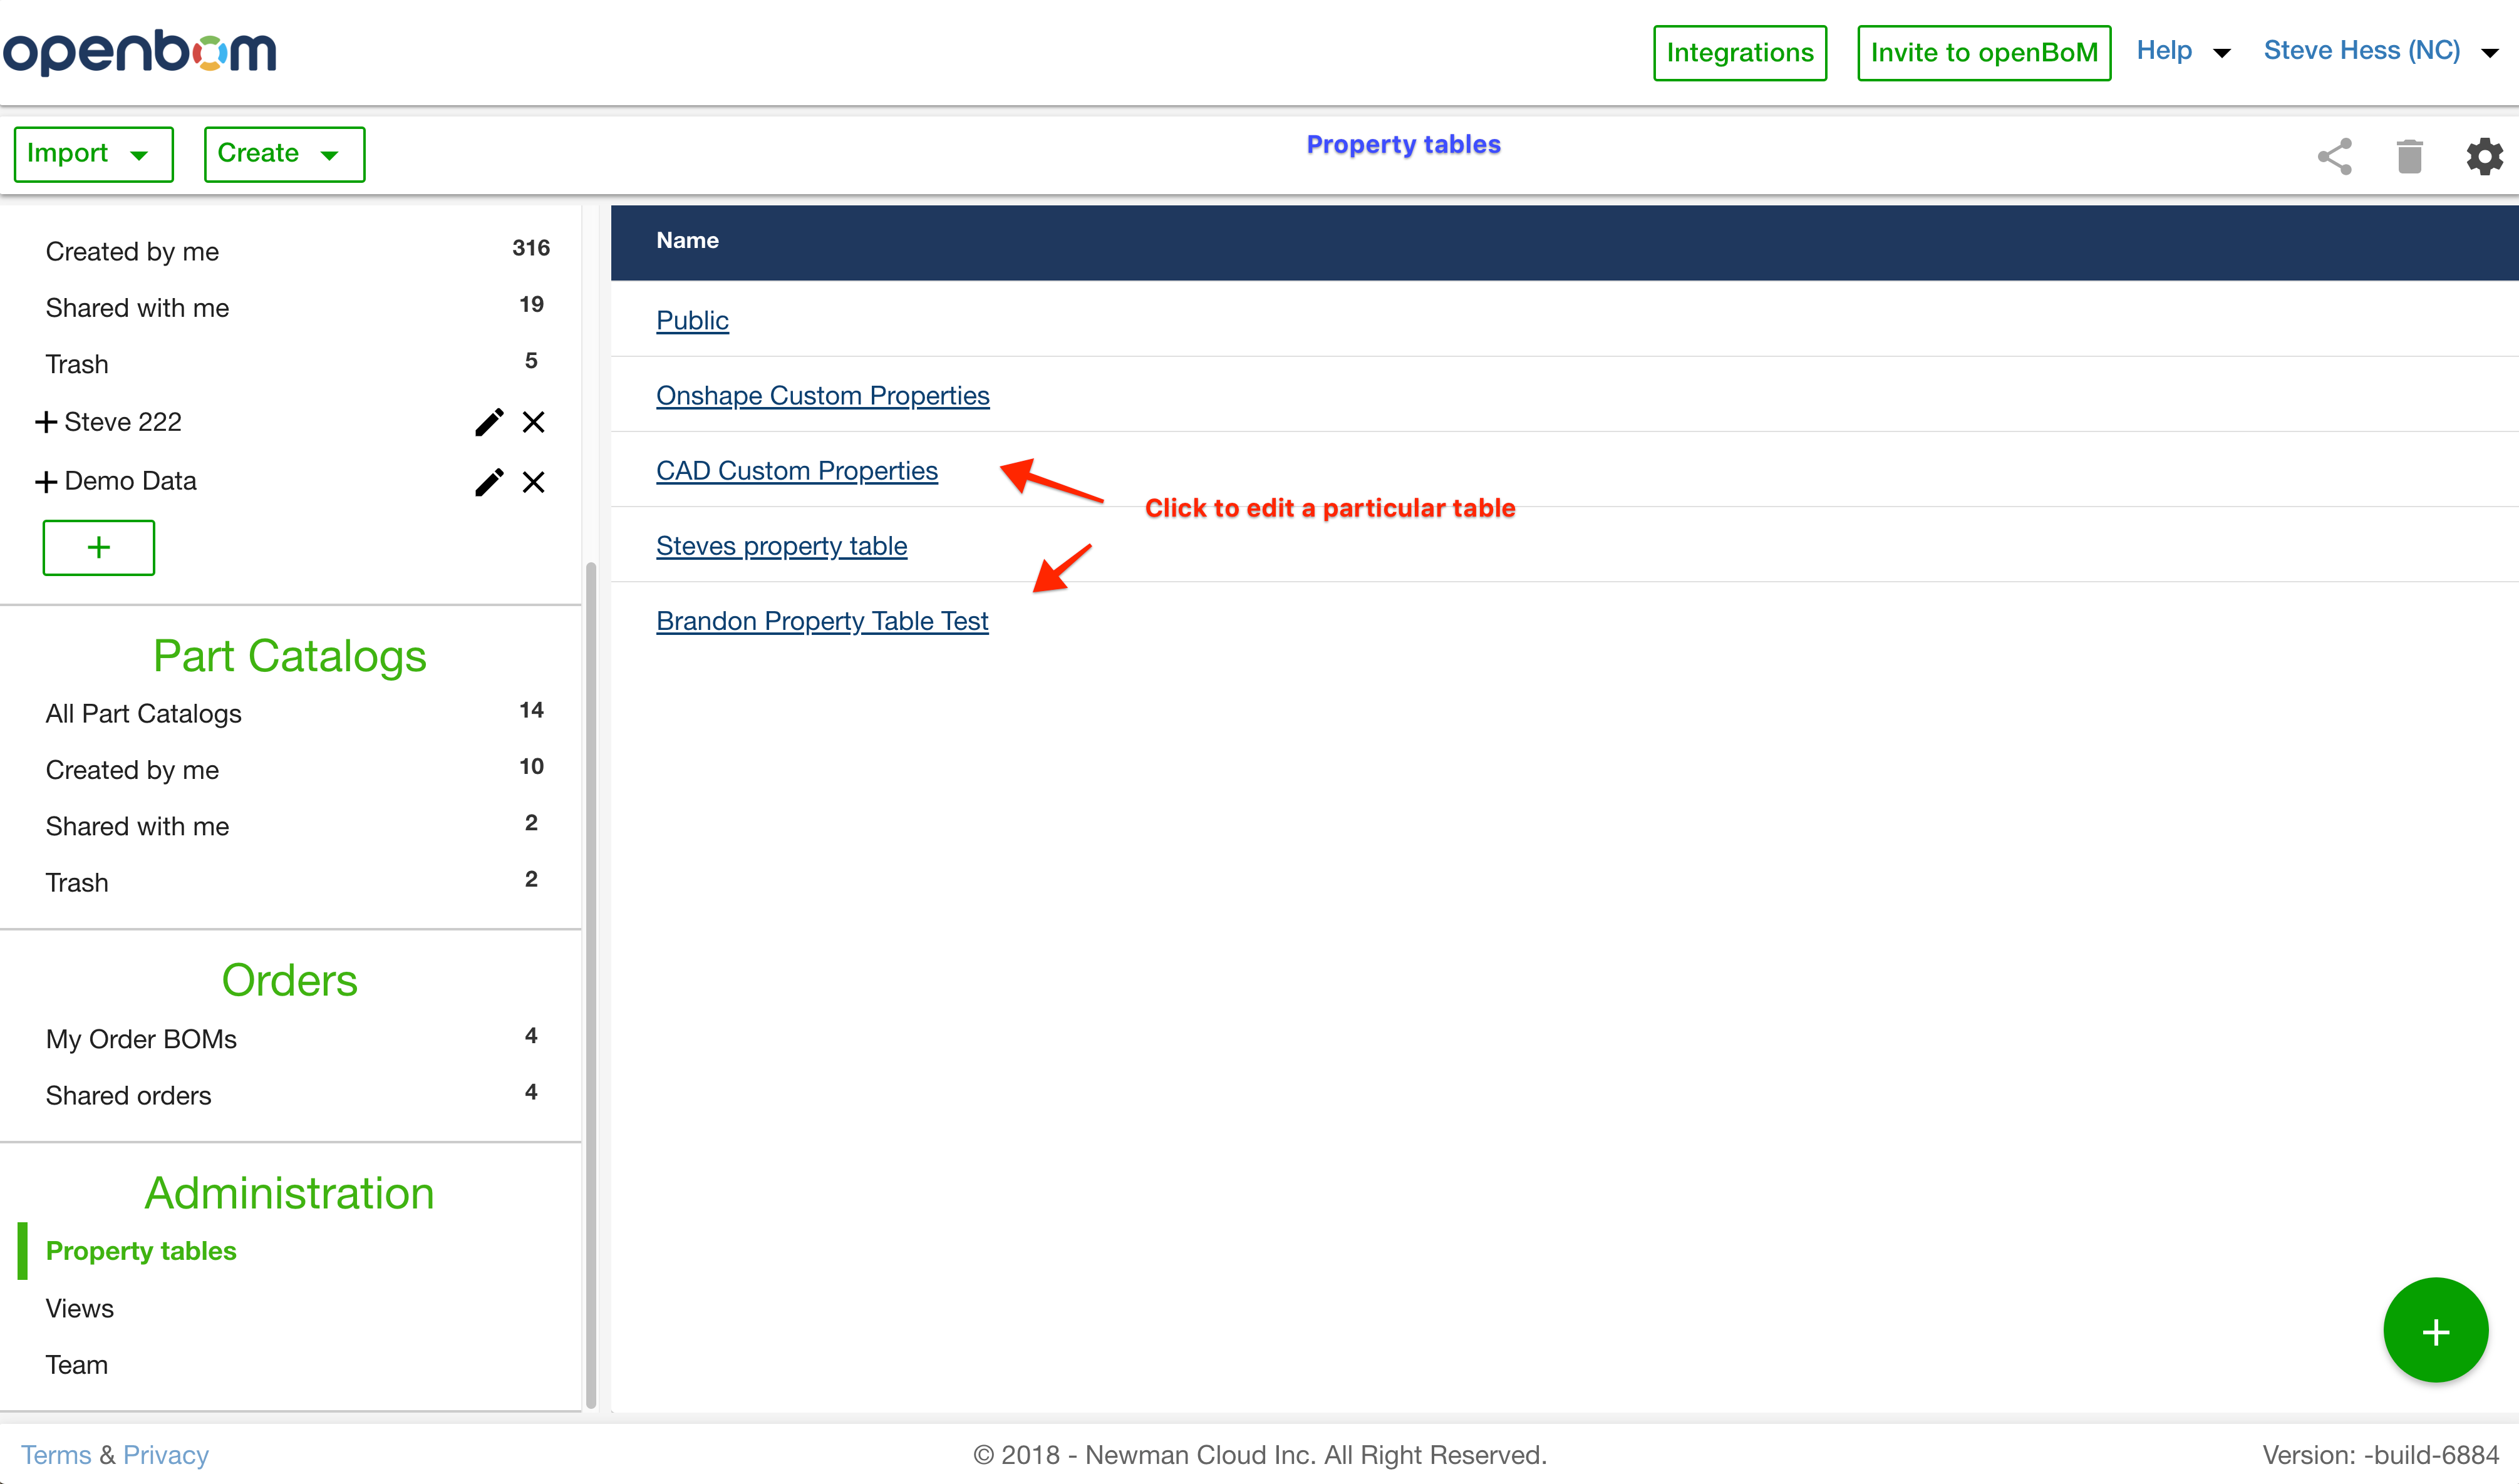
Property Tables
Configuring Dashboard
Dashboard can be configured to see a specific set of columns
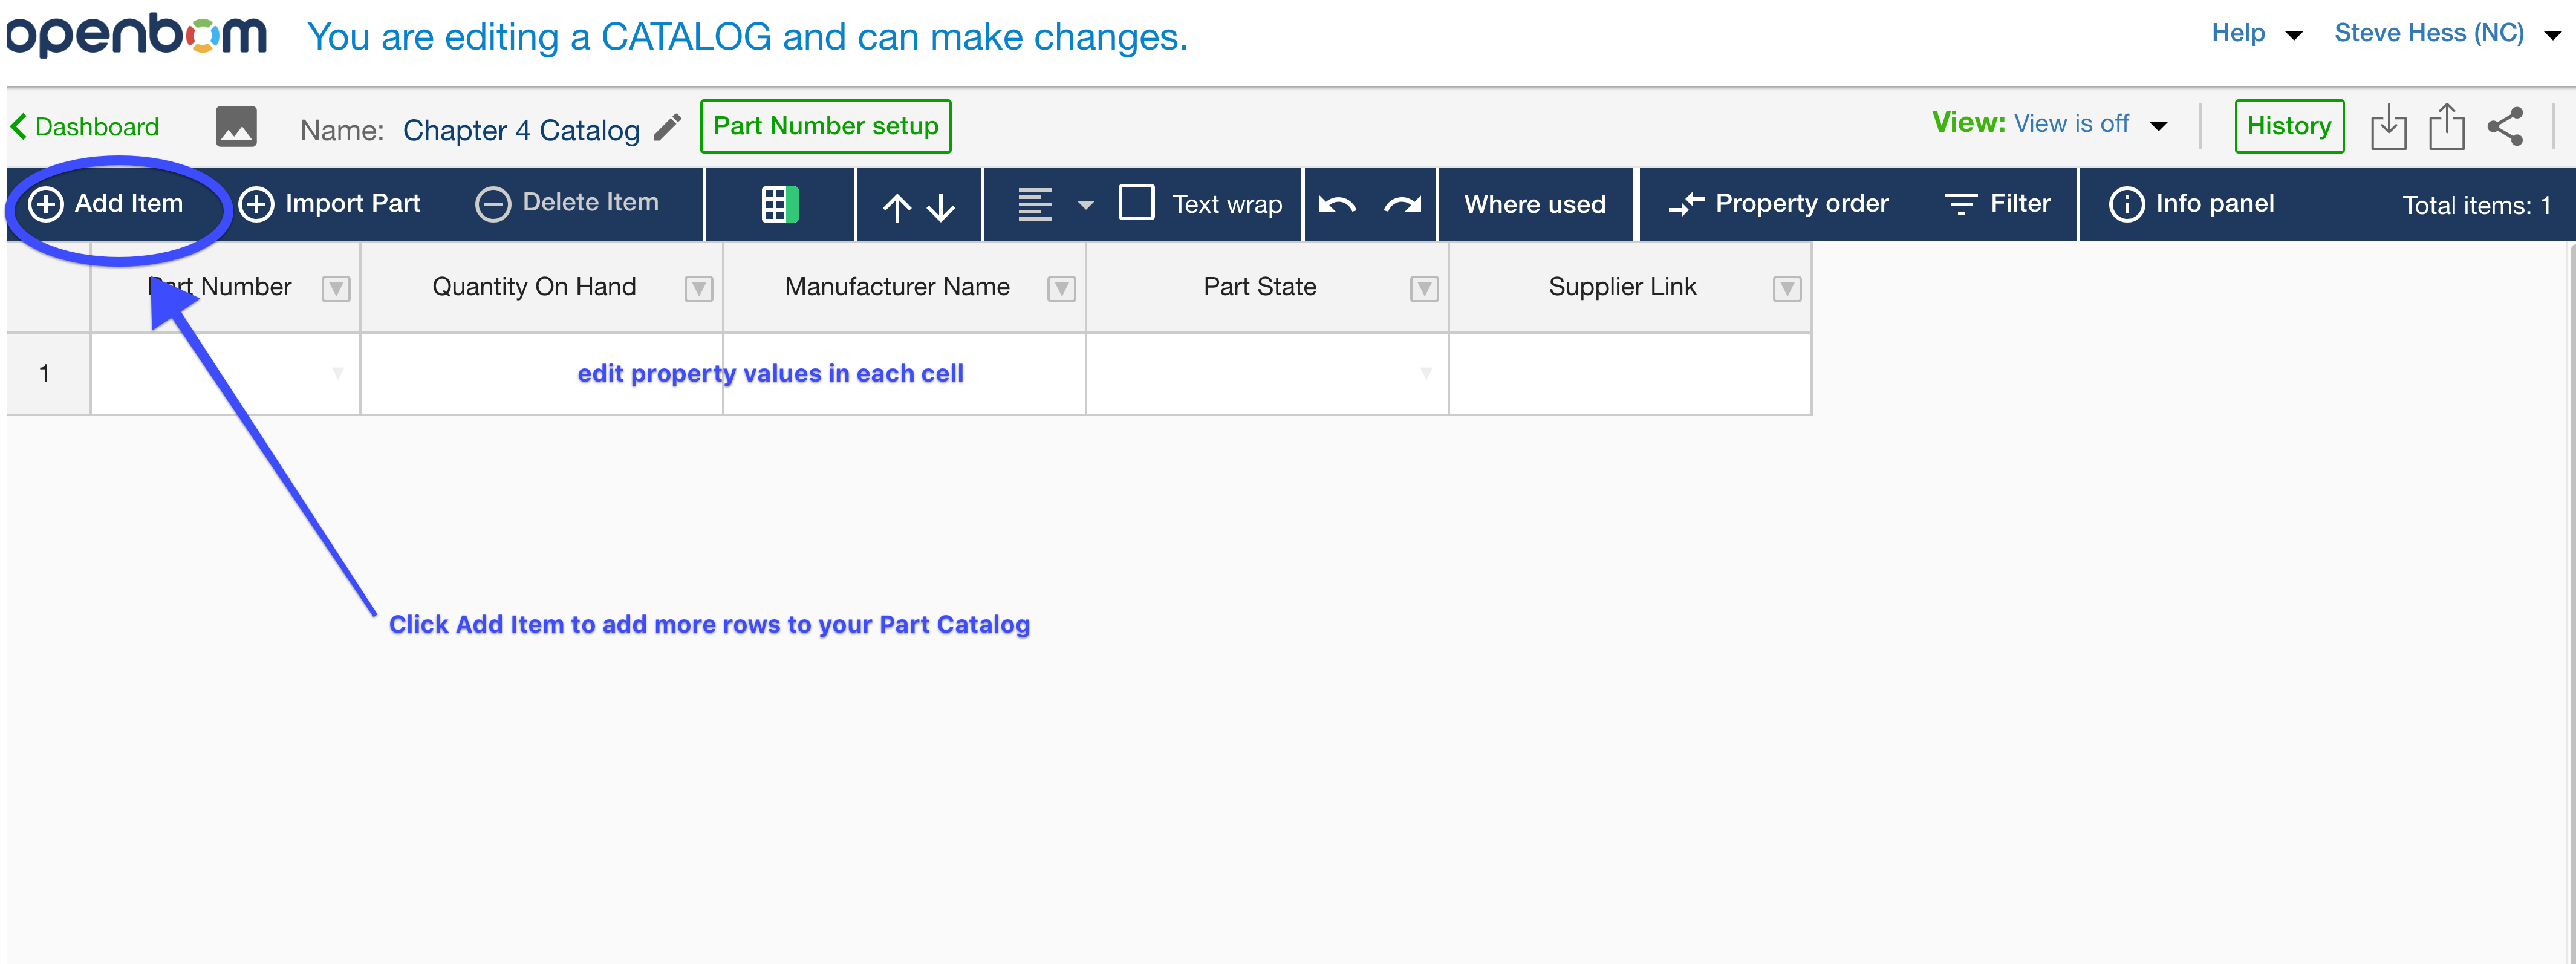
BOM (Bill of Materials) User Interface
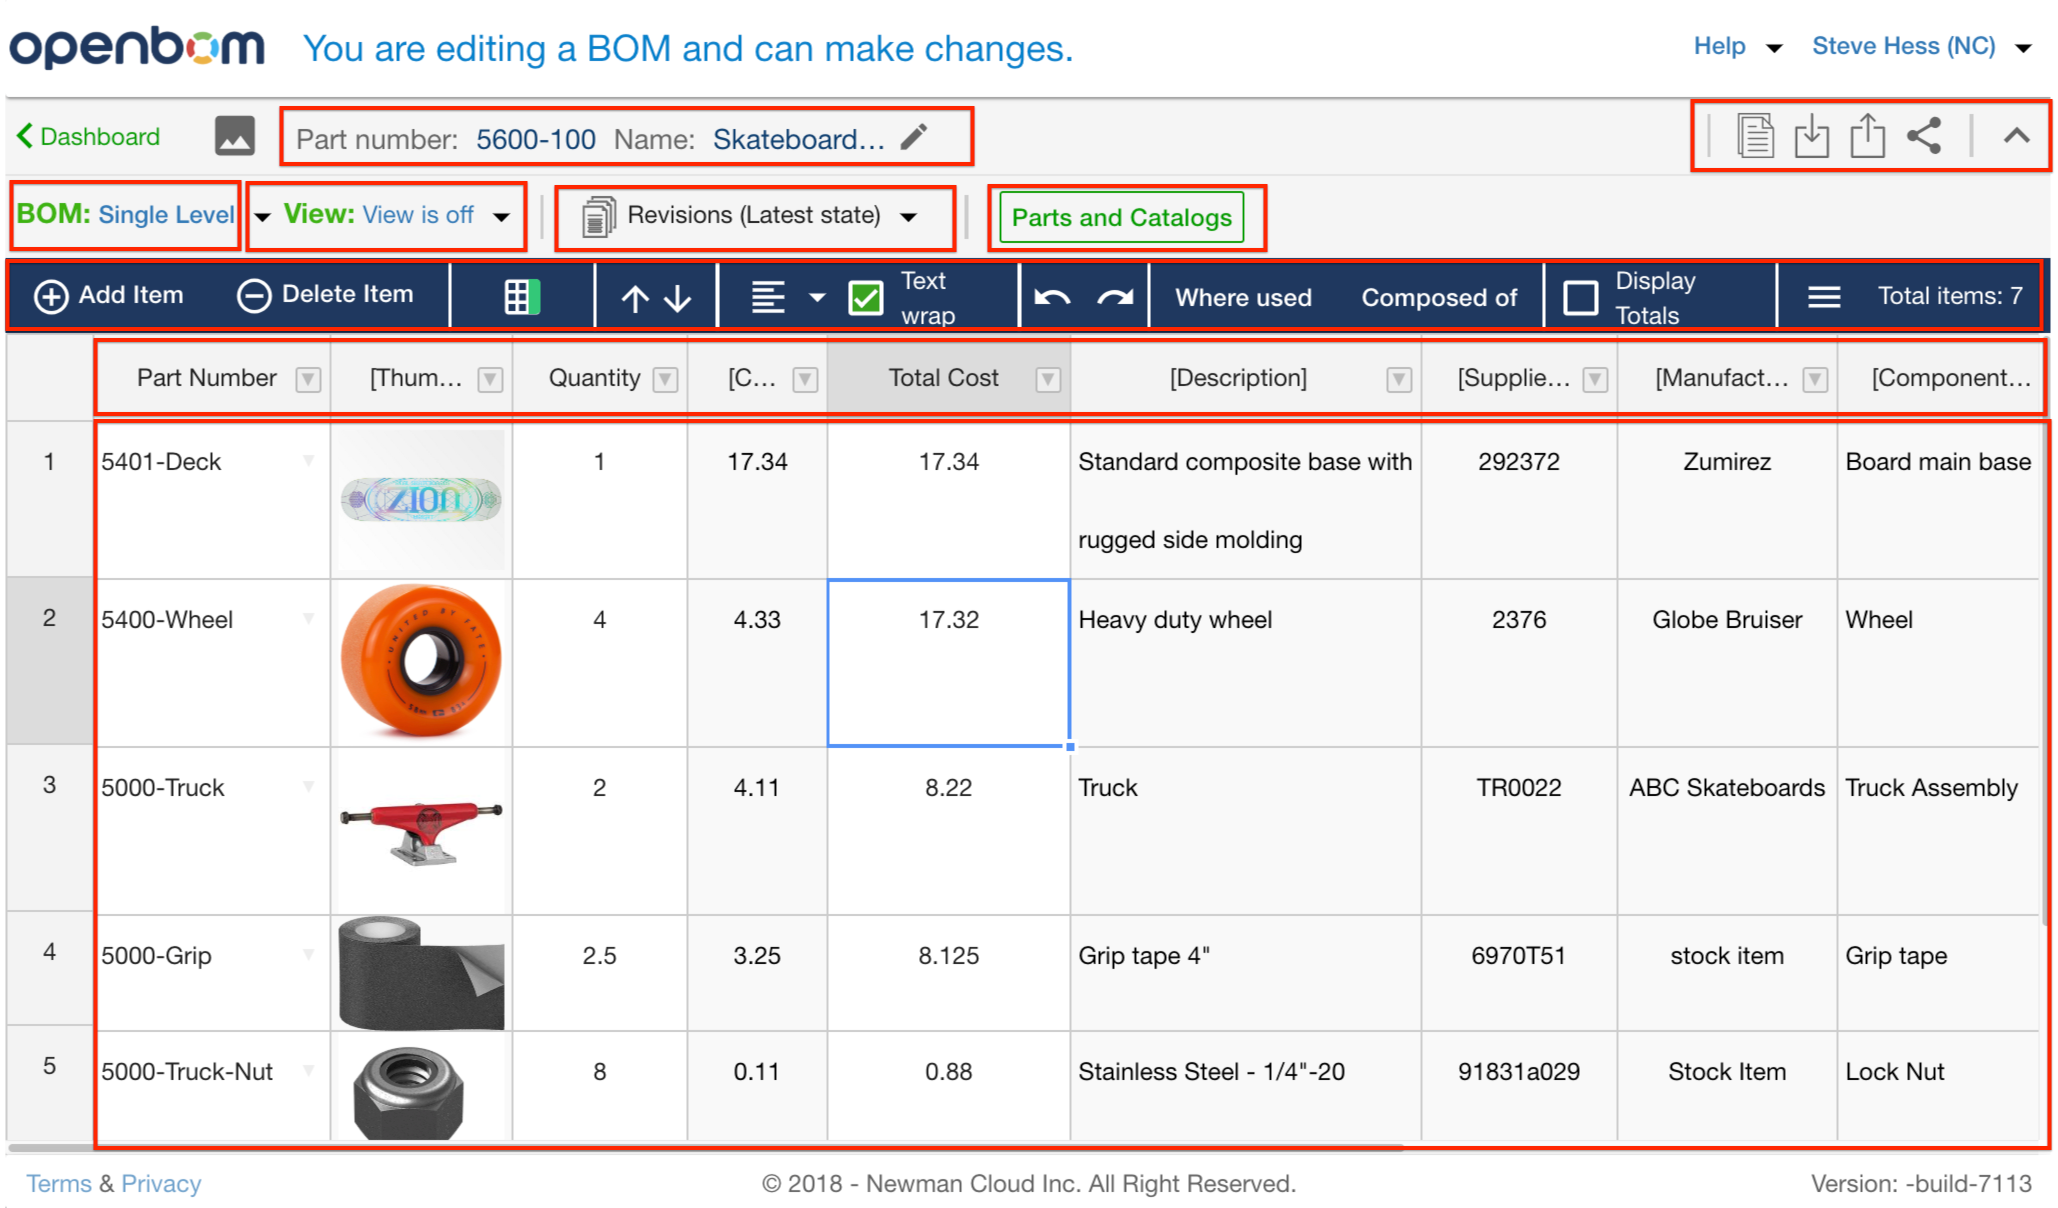
BOM types – Select Single-Level, Multi-Level flattened
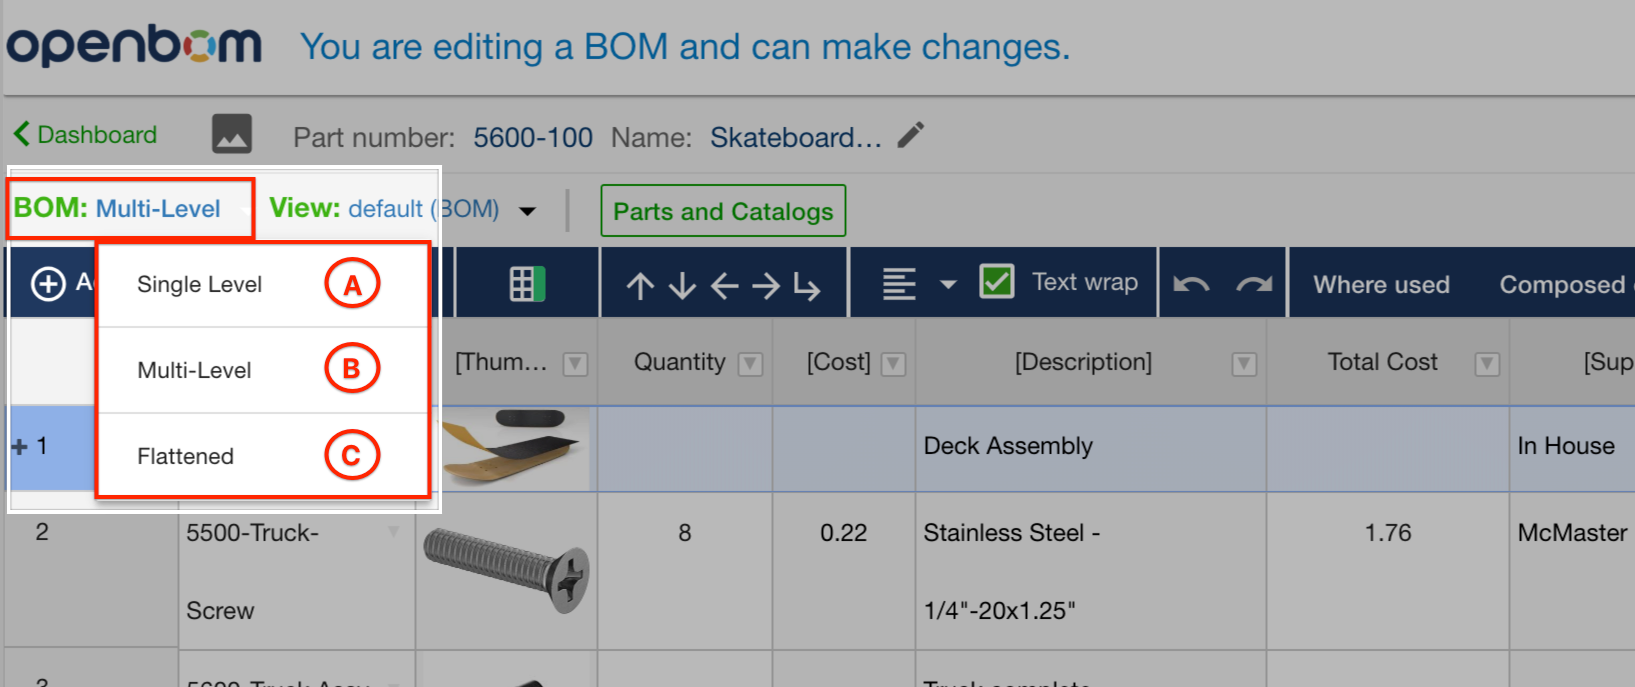
BOM type: Switch between the three supported BOM types
A – Single level, list of items for the current level only. All parts and assemblies will be listed as items. Single-Level may be viewed with “View is off” to see raw data.
B – Multi-level – A fully indented bill of materials including all parts and assemblies and displayed with indentation (levels) such as 1, 1.1, 1.2, 1.2.1, etc. Multi-Level BOM MUST have a View selected.
C – Flattened – the entire BOM in a single list. All instances of parts will be aggregated into a single row with quantities totalled regardless of level. So, if your BOM has 3 of Screw-1 on the top level, then another 5 at a lower level, Screw-1 will be identified in the flattened view with a quantity of 8. Many people call this a “Quantity BOM”
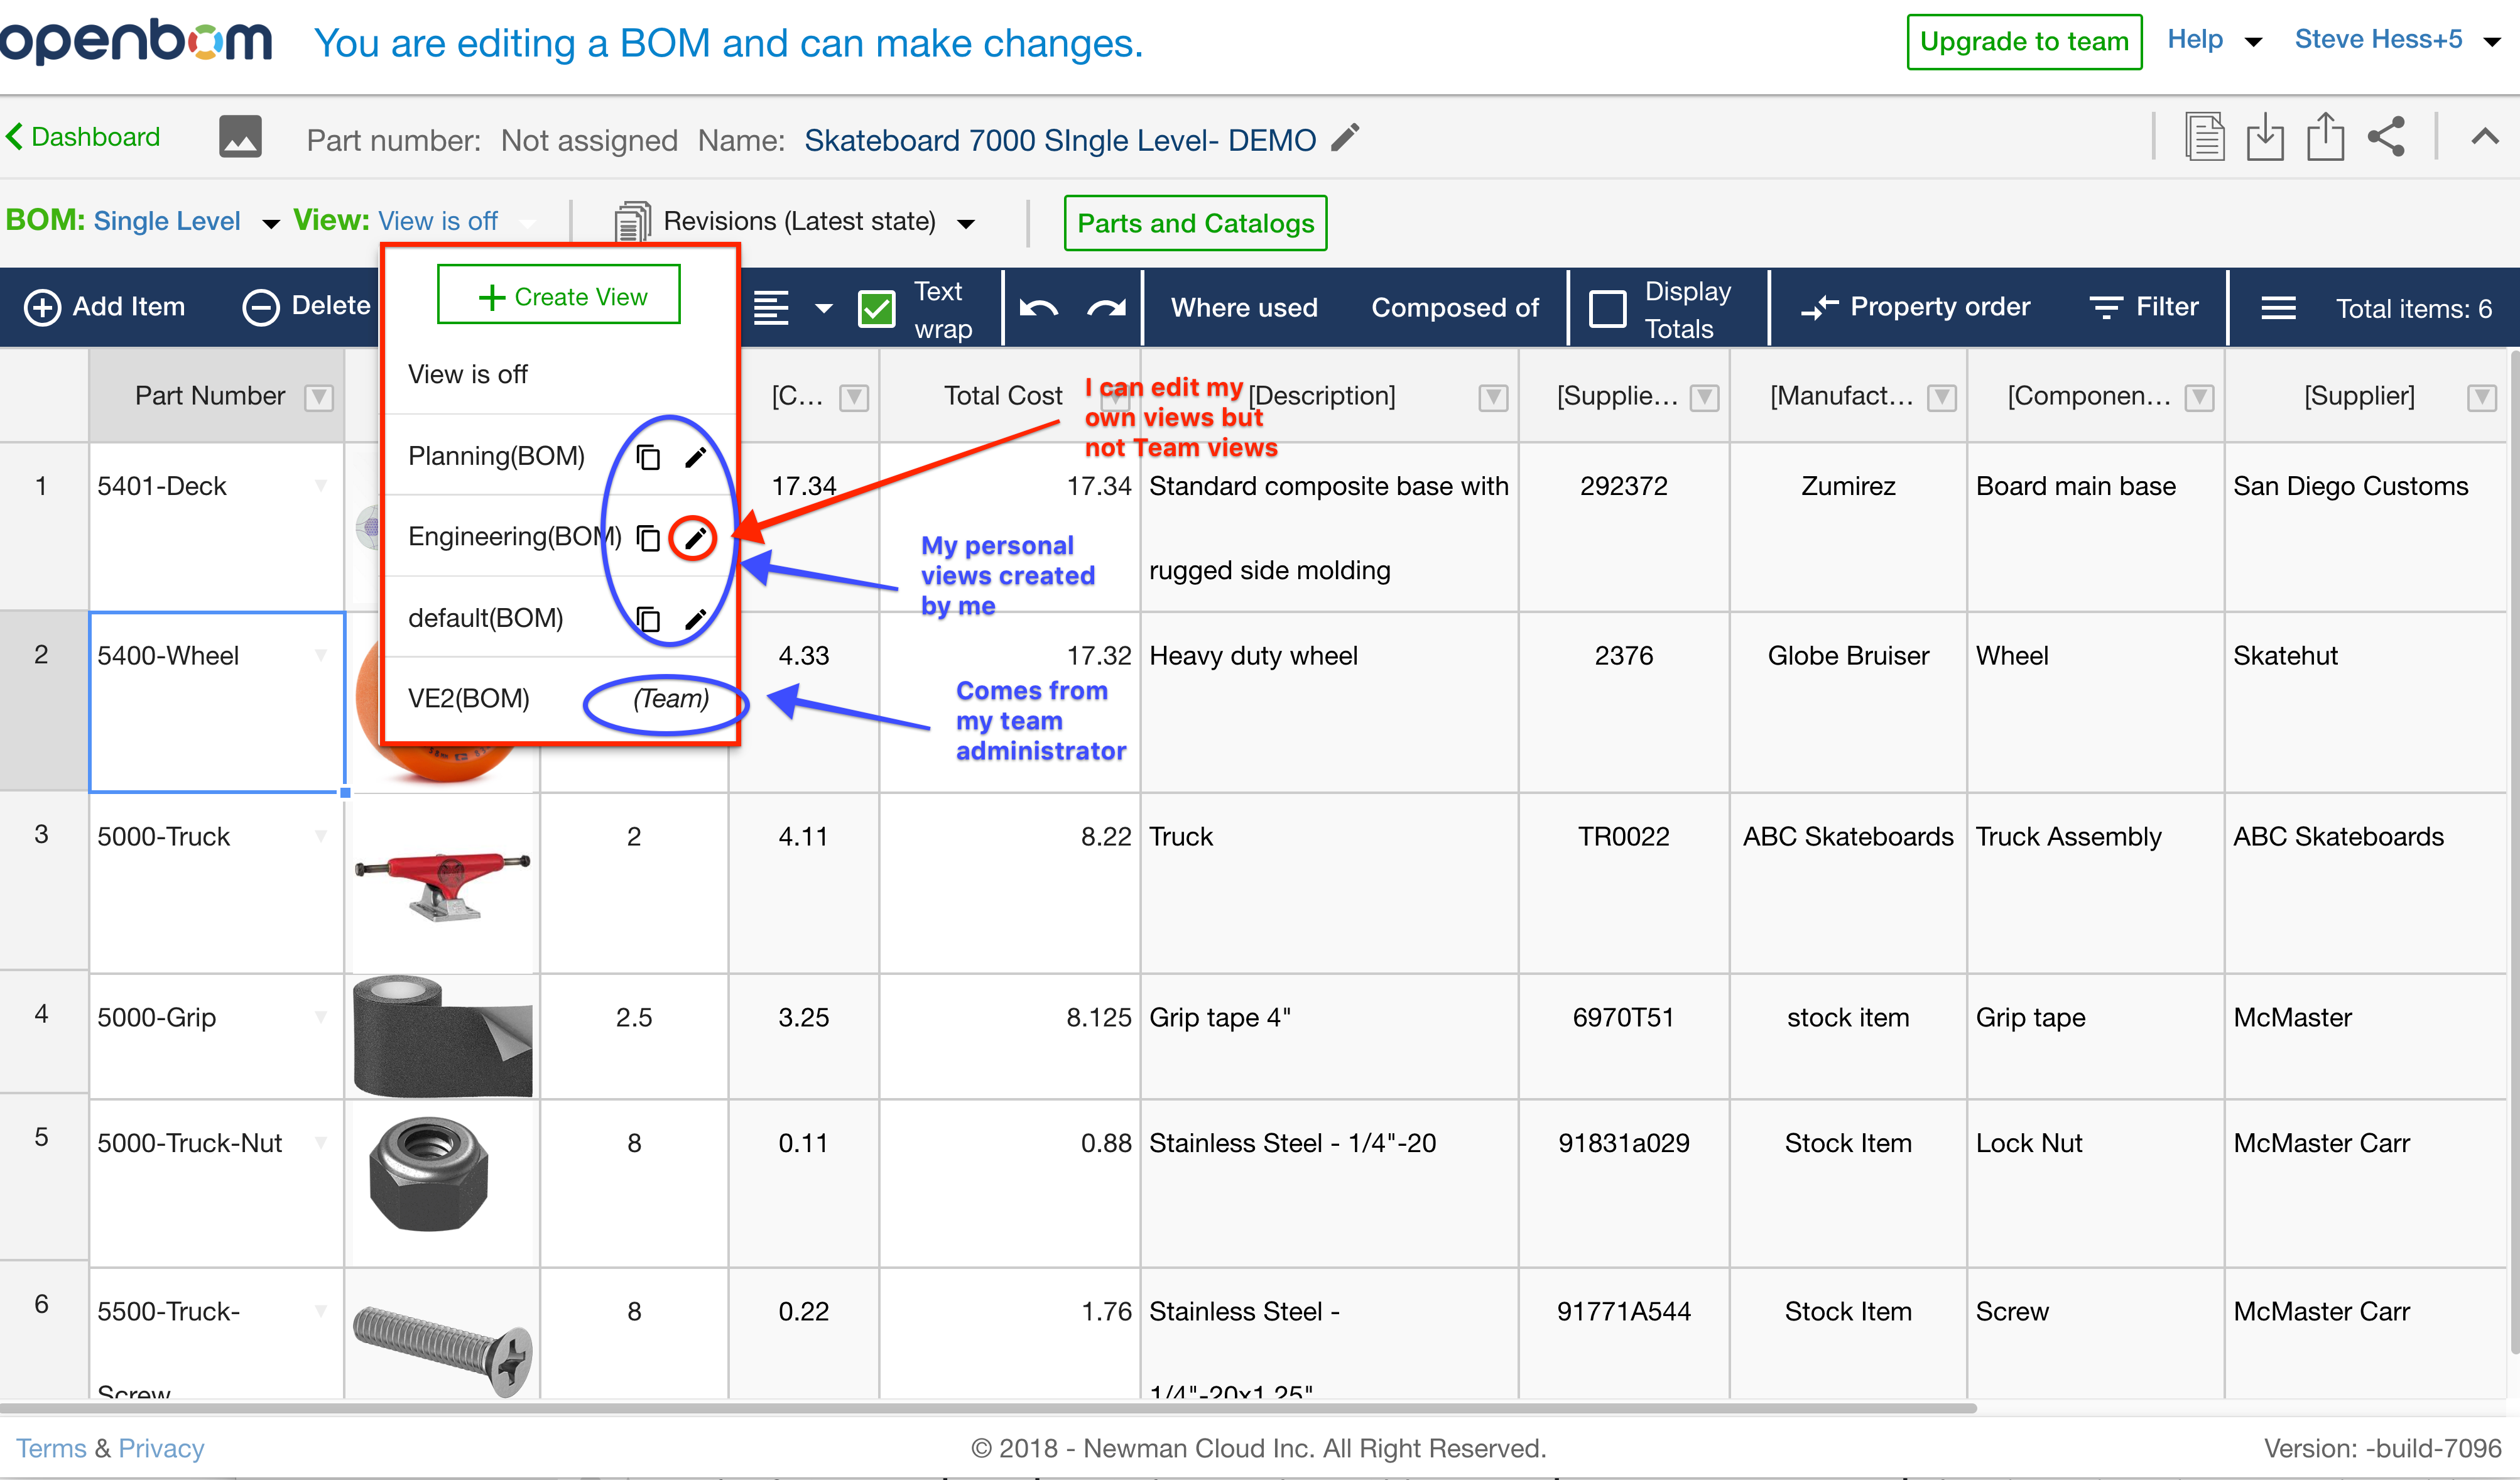
Views
Views are a lens which the user can see the BOM or Catalog data through. Views may be the users own created views or defined by the Team Administrator in which case they may be shared with the Team. Views also specify the access to the data – in other words, a View determines if the user has read-only or edit access to the dats. See the Team Admin views area for more details.
User defined views. You can define a view for a BOM and for Catalog. OpenBOM is automatically configured with “default views”, but you can change it.
Another look at a possible View drop menu
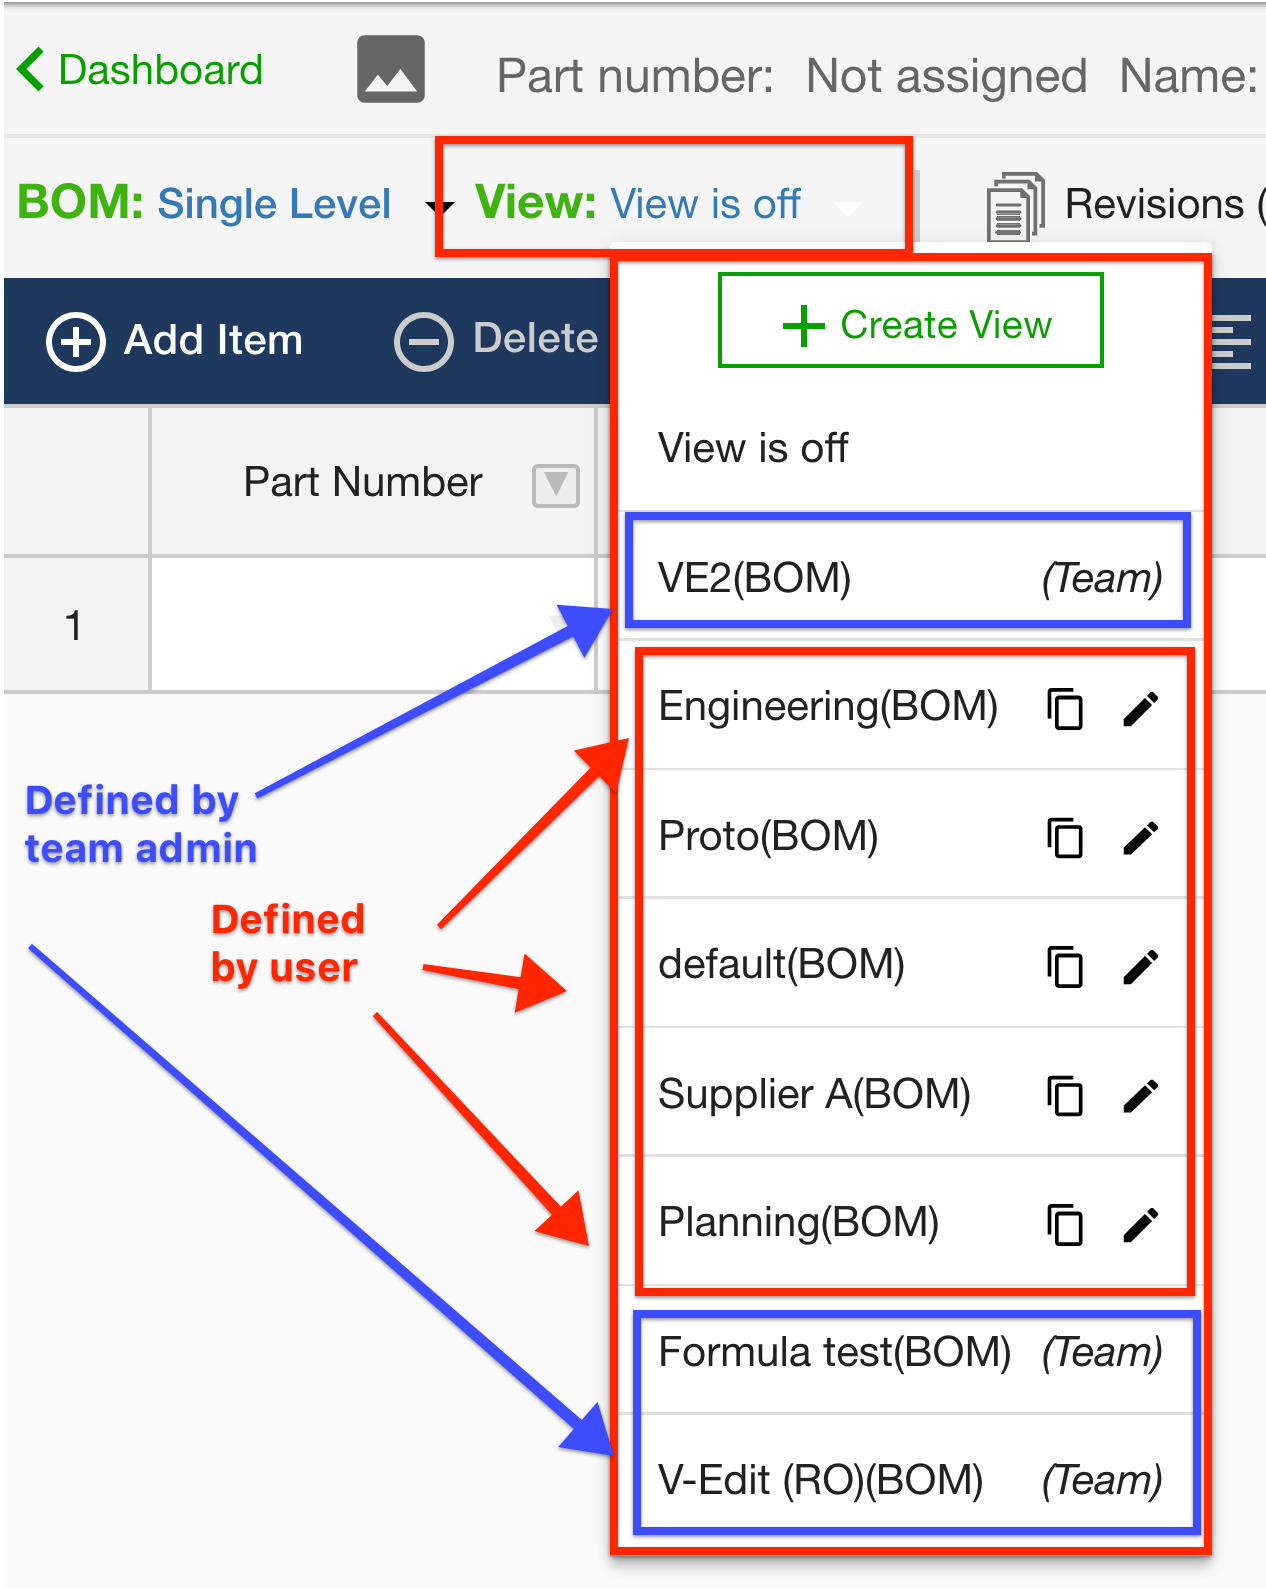
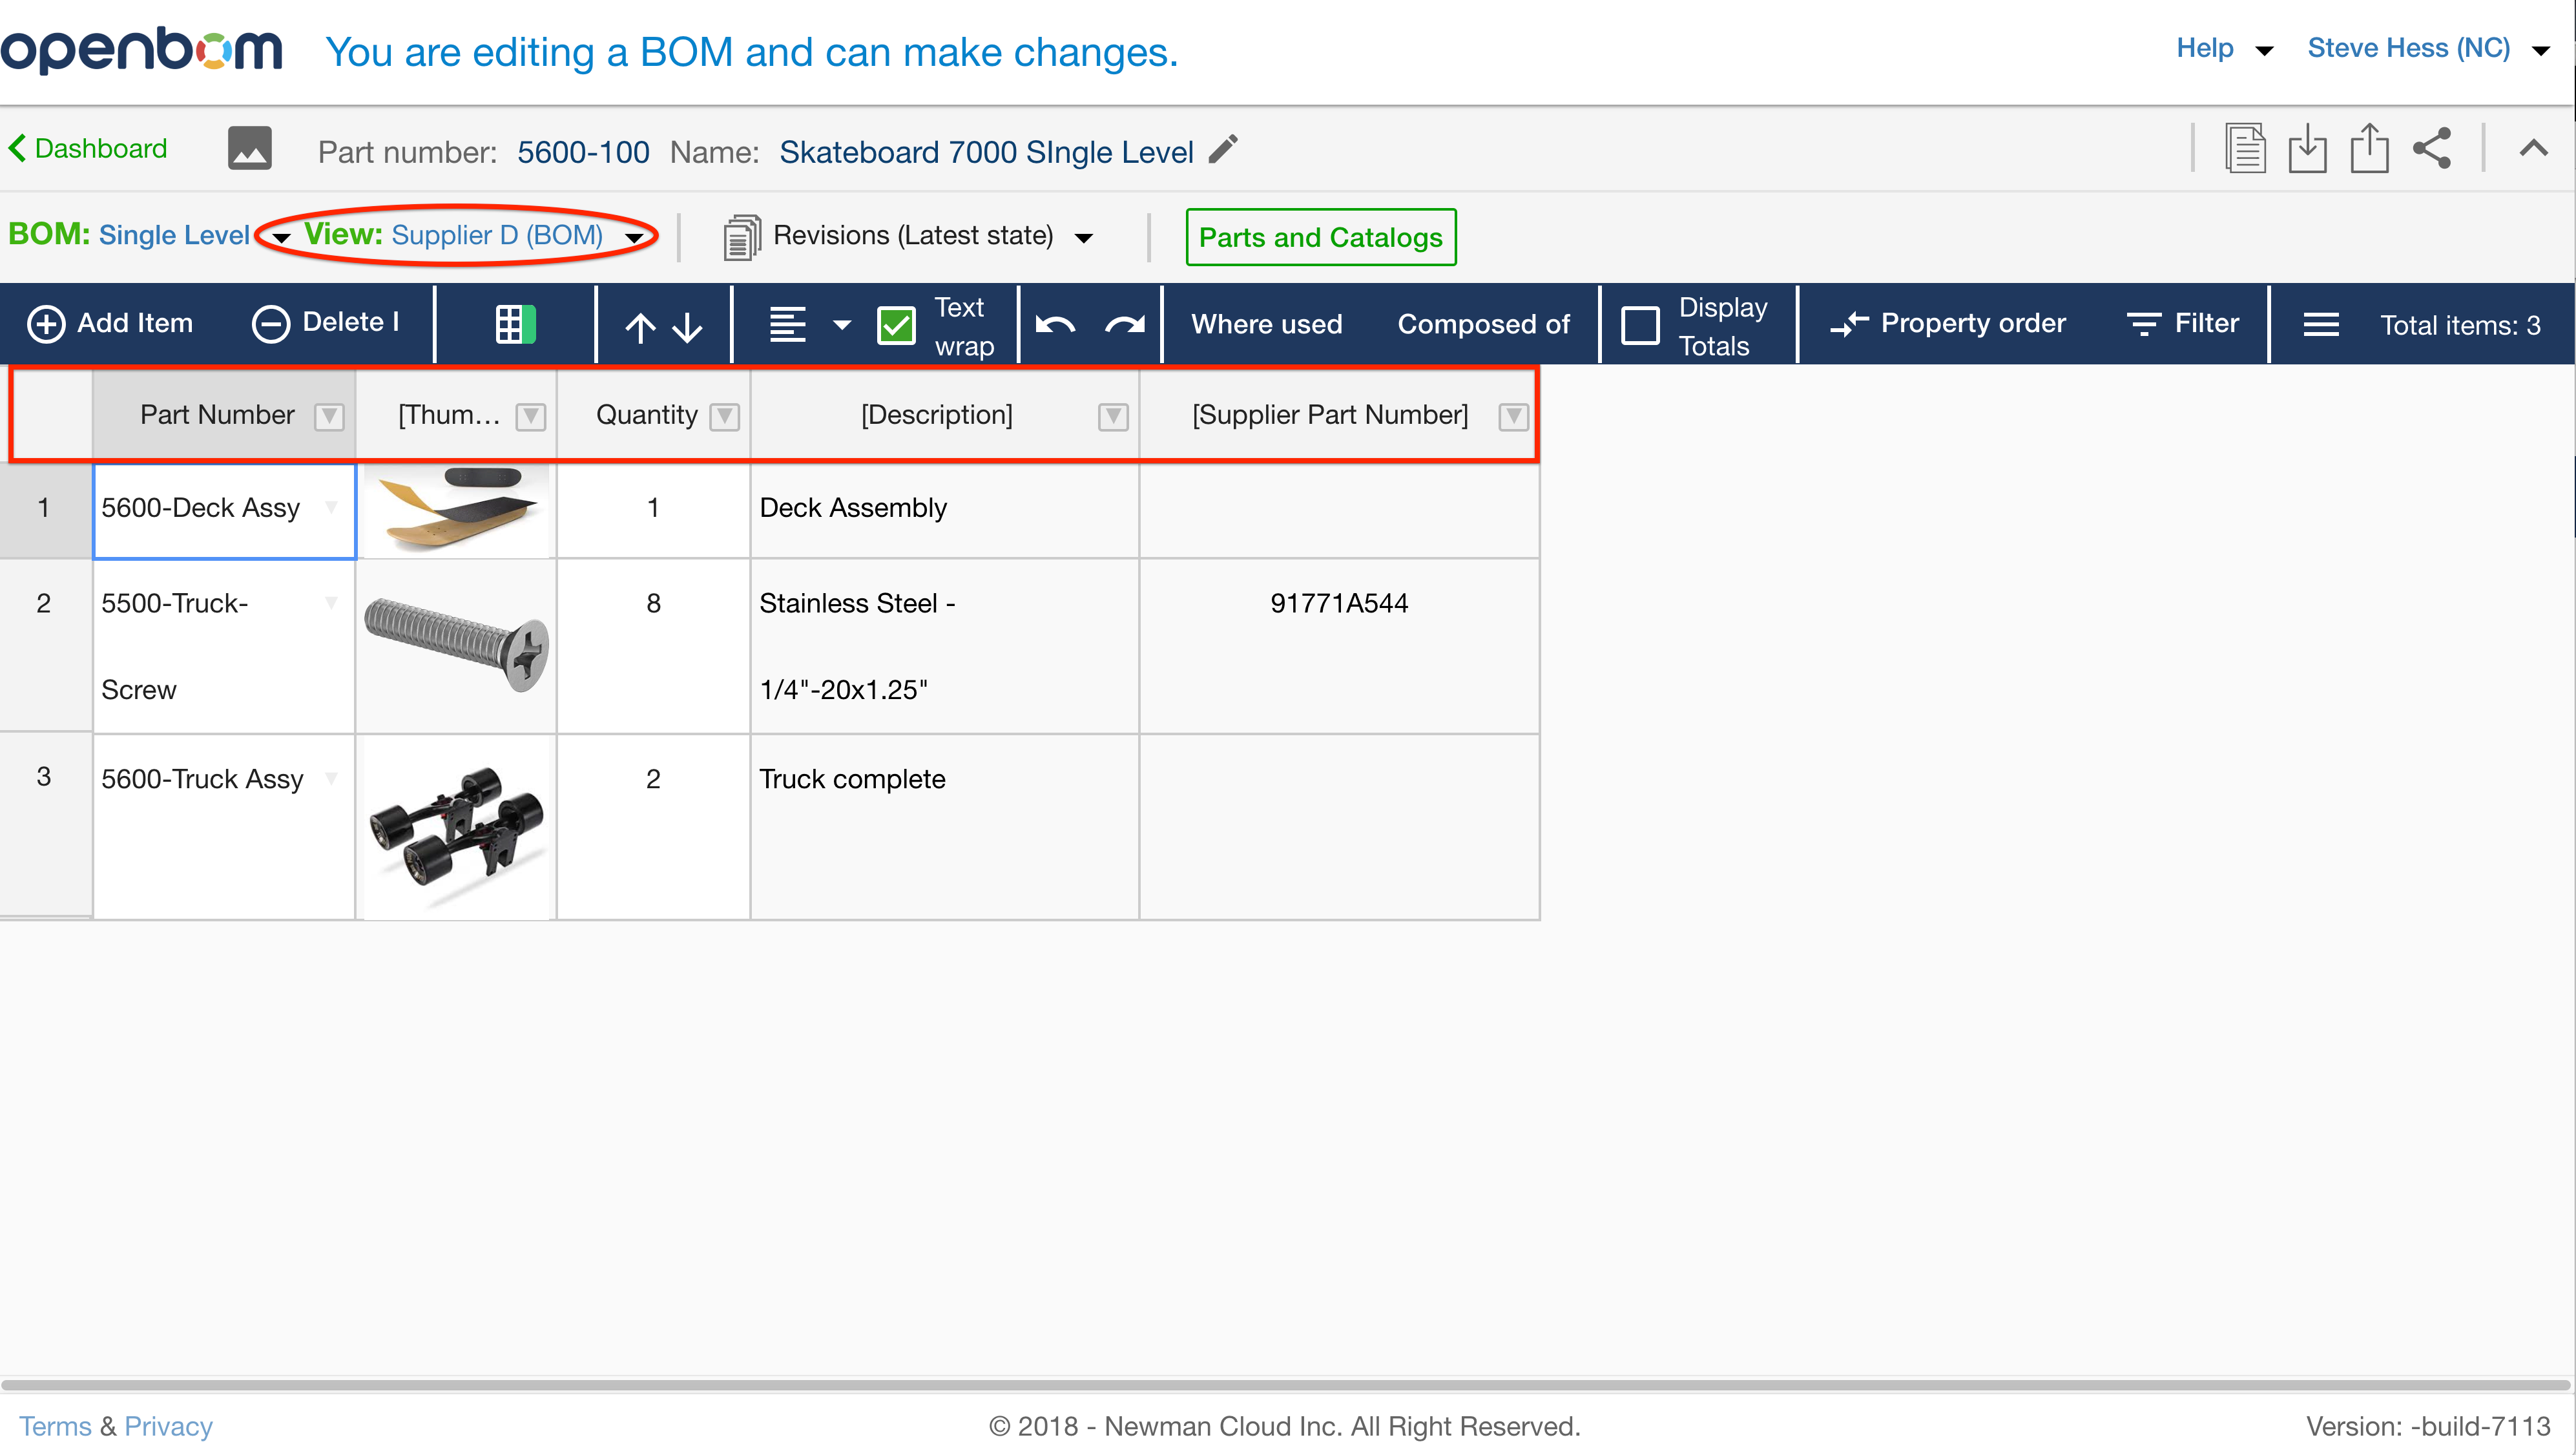
If View if Off then all properties will be displayed, if View is set to a View Name then only those properties defined in the view will be displayed. (see more examples below)

Catalog User Interface
Catalogs are very similar to BOMs with only a few exceptions.
- Duplicate part numbers may exist
- Catalog item (part or assy) properties may only be edited only in the Catalog and not from the BOM. A Catalog item in a BOM is always read-only from the BOM.
Catalog Dashboard
CREATE (IMPORT) BOM or Catalog FROM EXCEL
Here’s a video which walks you through the process:
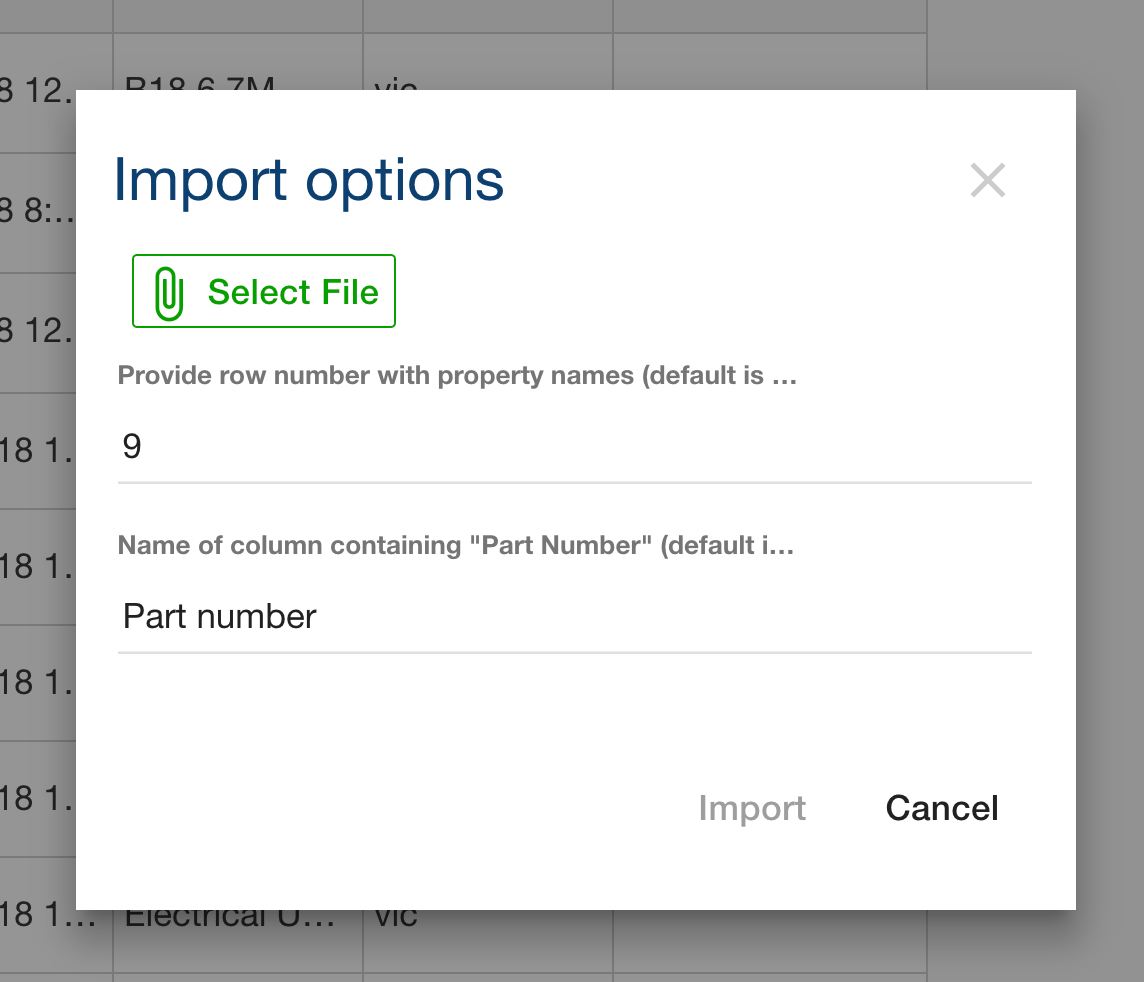
Select your spreadsheet file as shown below by clicking “Select File” and choosing your .xls or .xls file.
Specify header row and “Part Number” field.
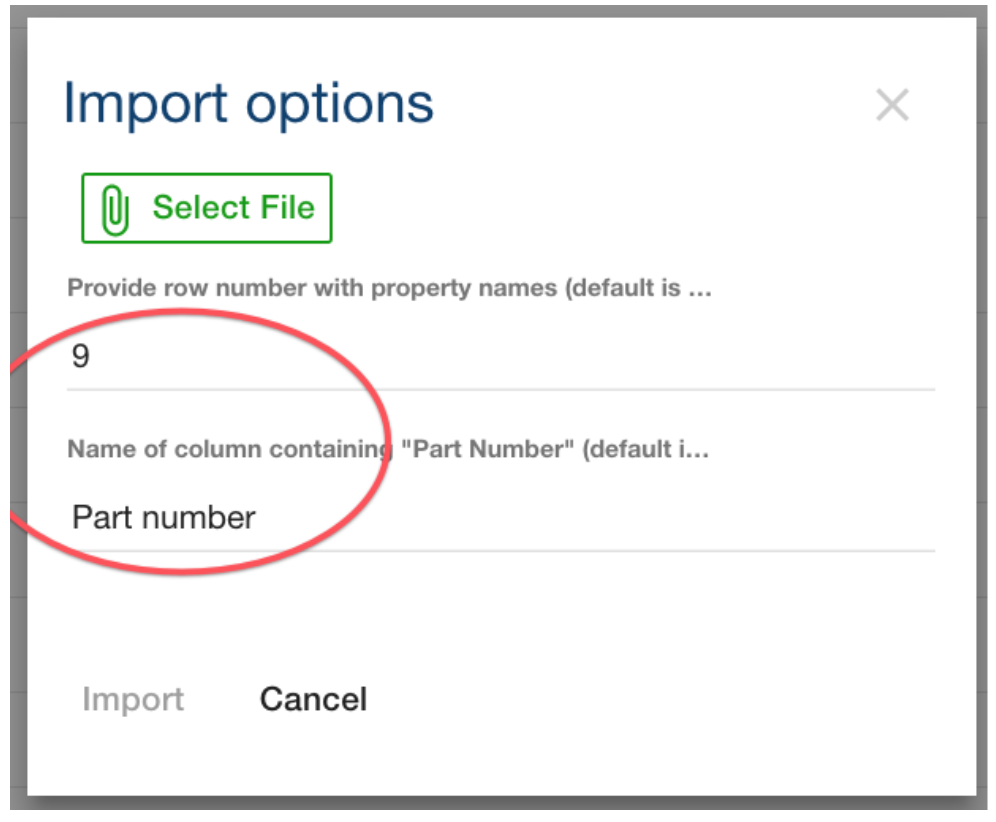
Download a pre-formatted Excel template by clicking, here.
Import Catalog from Excel is identical to the process above only a Catalog will be created.
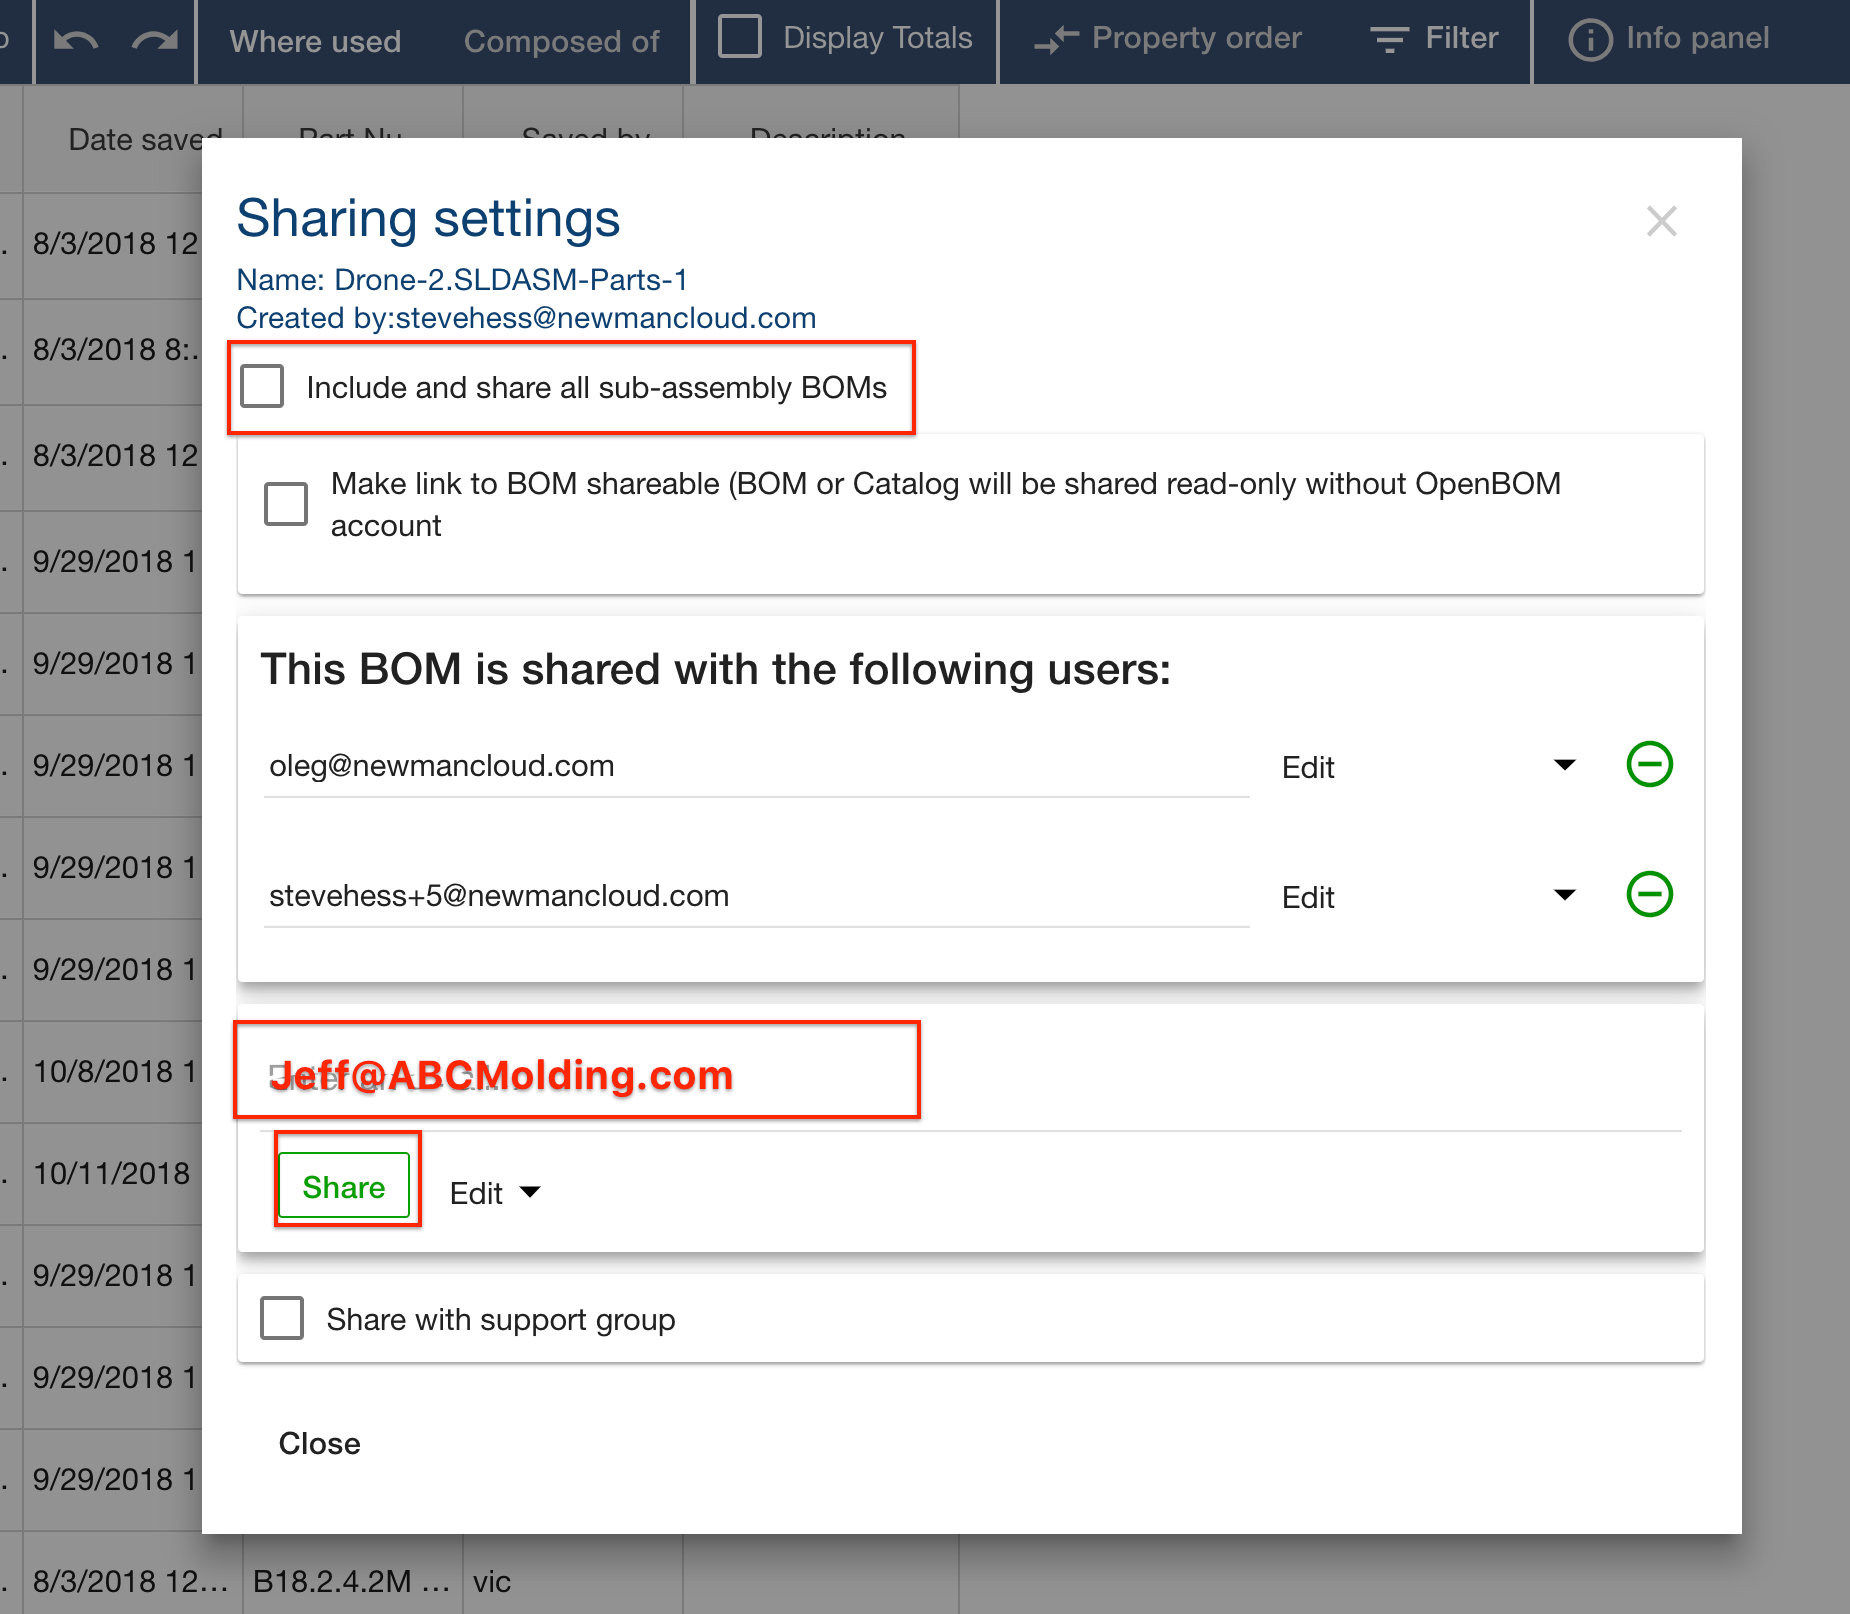
Share BOM or Catalog
Share dialog allows you to share BOM or Catalog with other users. User must have OpenBOM account to be shared in directly. You may share the BOM or Catalog with a link as read-only to anyone, no OpenBOM account required. Just copy the link and send it to the desired user(s).
History
OpenBOM preserves history of all changes. It is done automatically. You can access it from the menu:

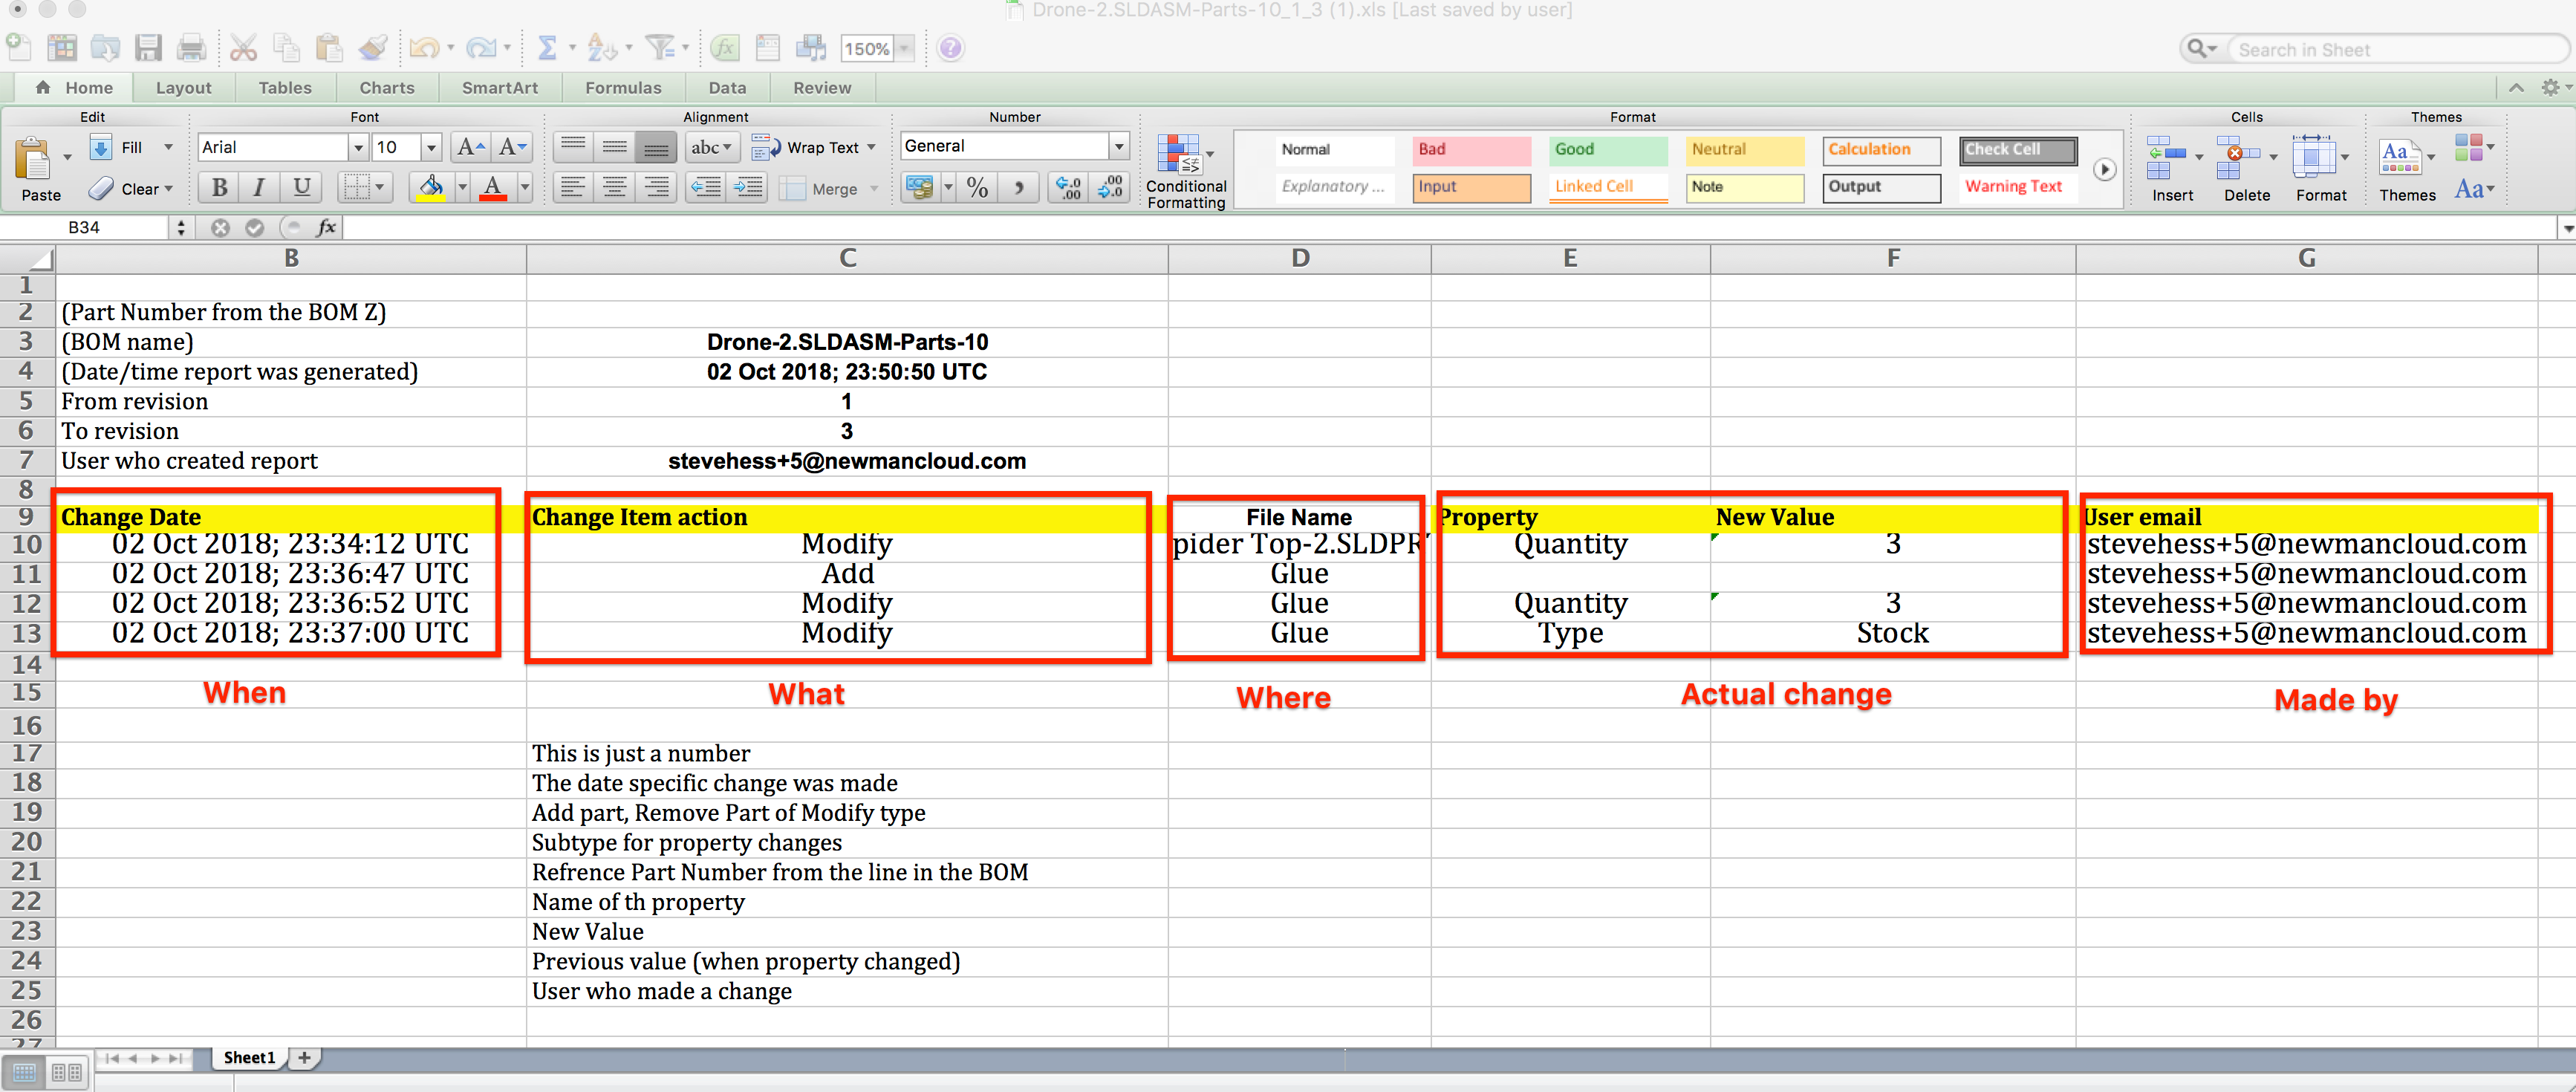
Change report
Click Change Report from the History panel
Allows you to generate differences between revisions. You must have saved at least two revisions prior…
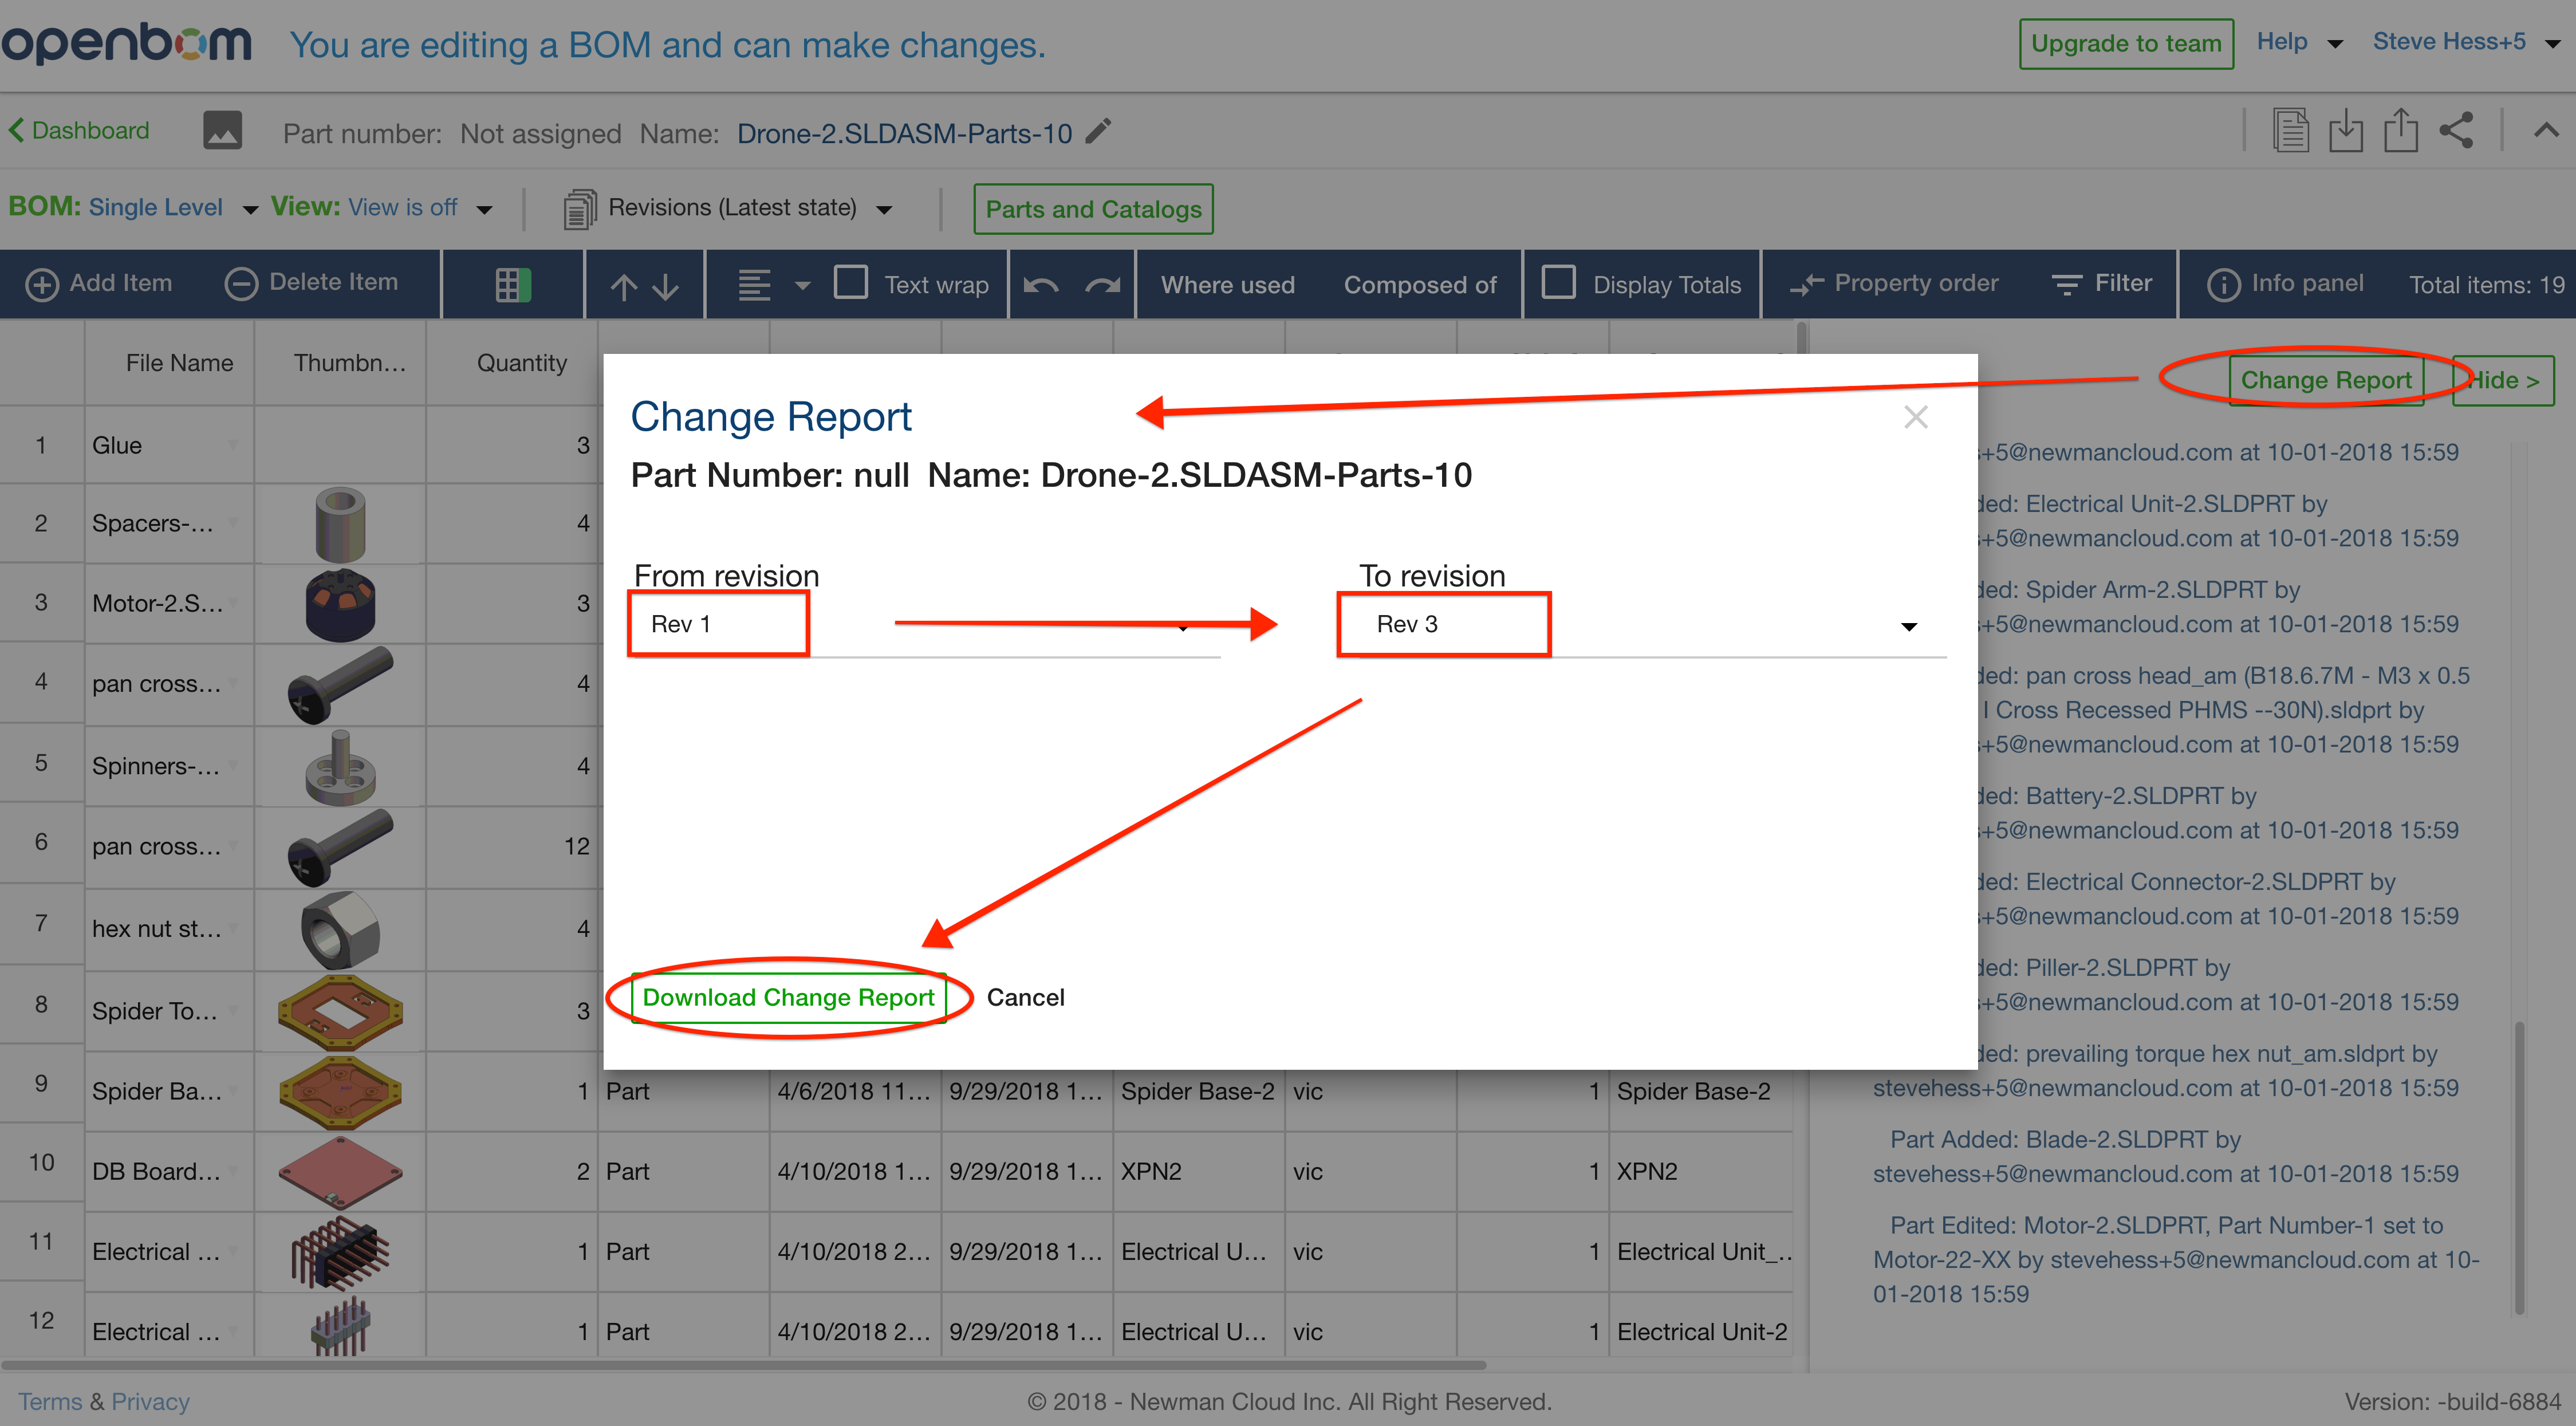
Change revisions will be exported as Excel files.
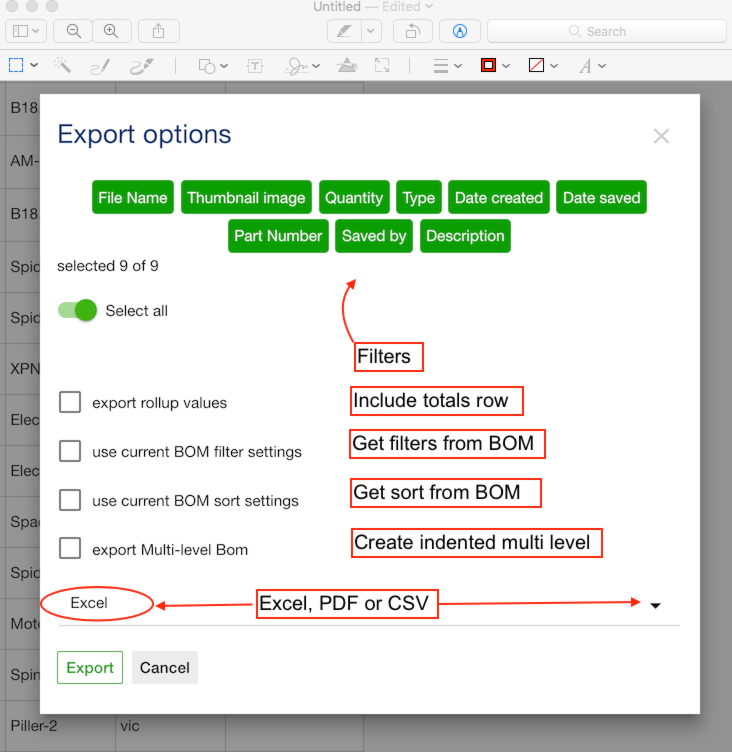
Export
OpenBOM supports configurable export to Excel, PDF and CSV formats.
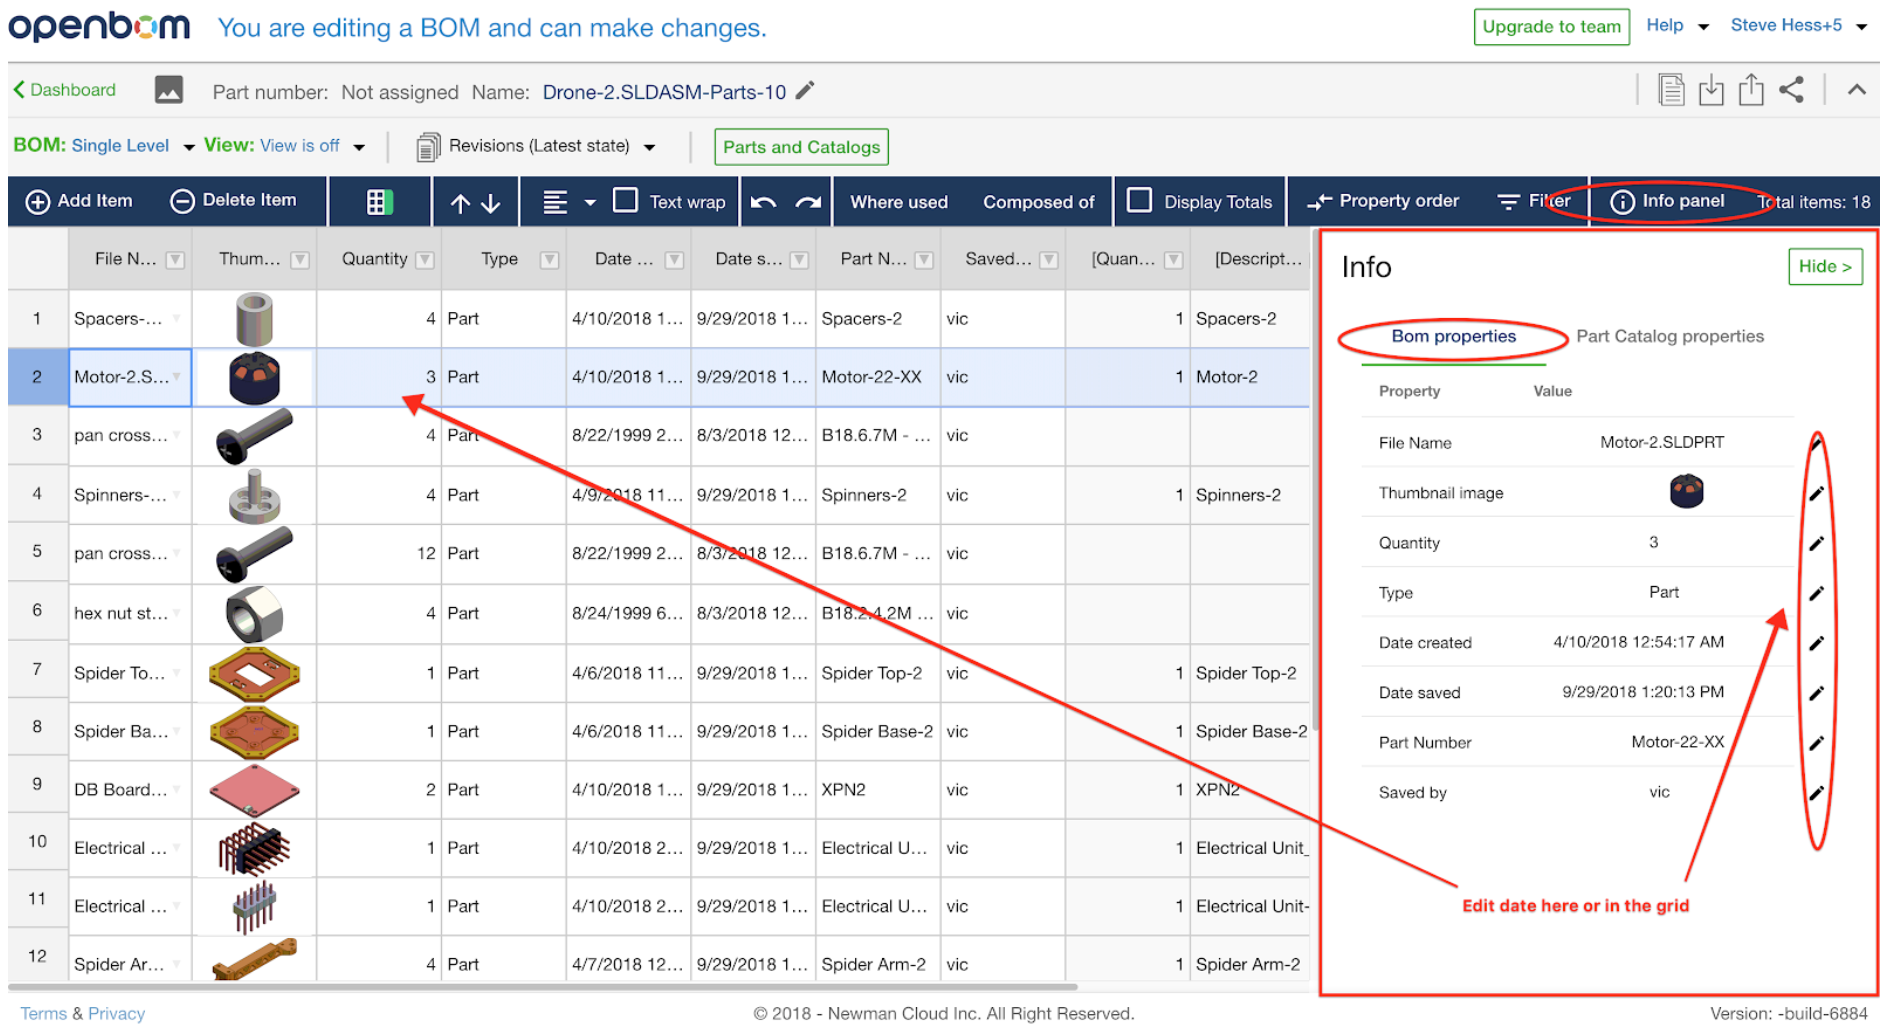
Info panel
Info panel in BOM and Catalog are similar
Team Administration
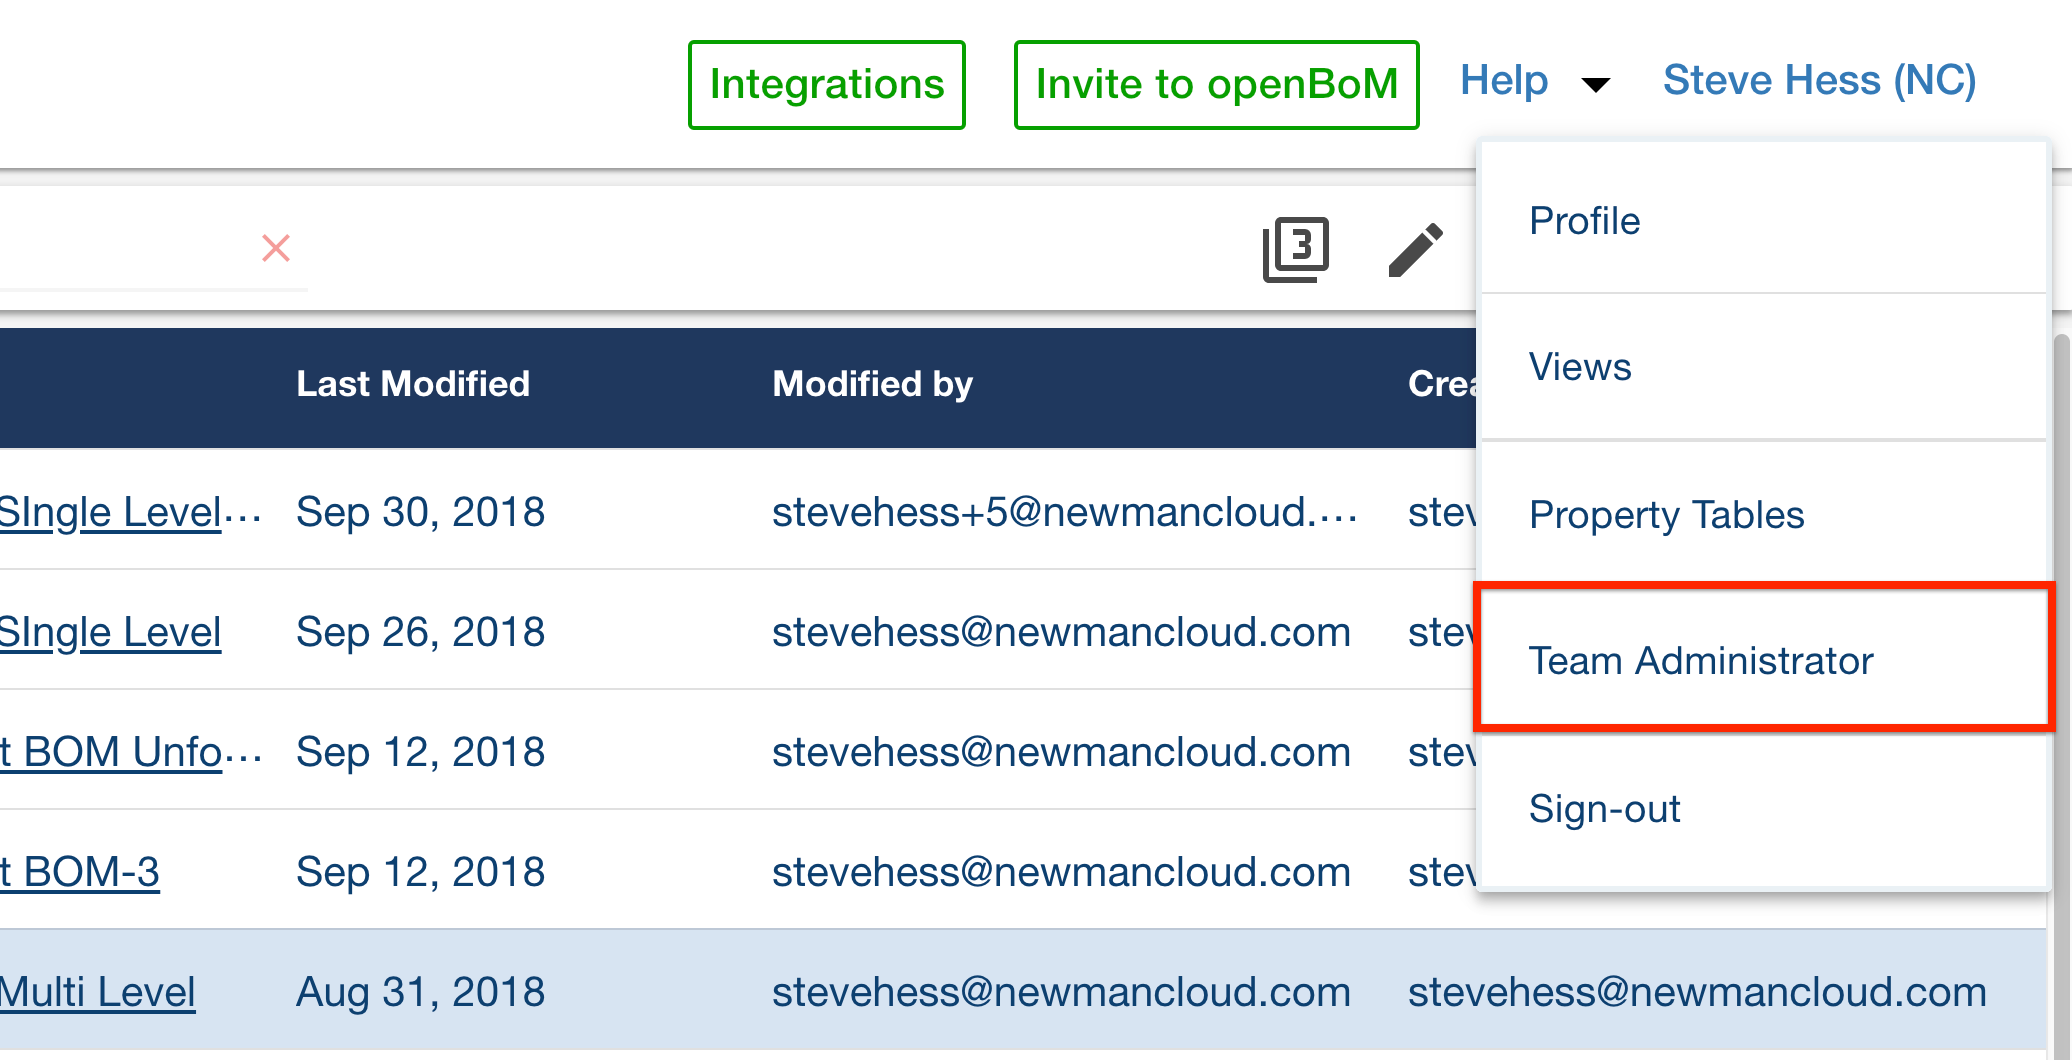
Team Administrators will see a special administrator menu under the profile menu.
Special considerations for teams and Team Admins:
- A user can be a member of one (1) team only. Separate accounts must be created for a person to work with more than one (1) team.
- A Team Admin is the OpenBOM user with special privileges and cannot be a member (as admin or user) of any other team.
- The Team Admin may add and remove users from the team
- The Team Admin establishes various levels of access for the members of the team
The Admin menu is here:
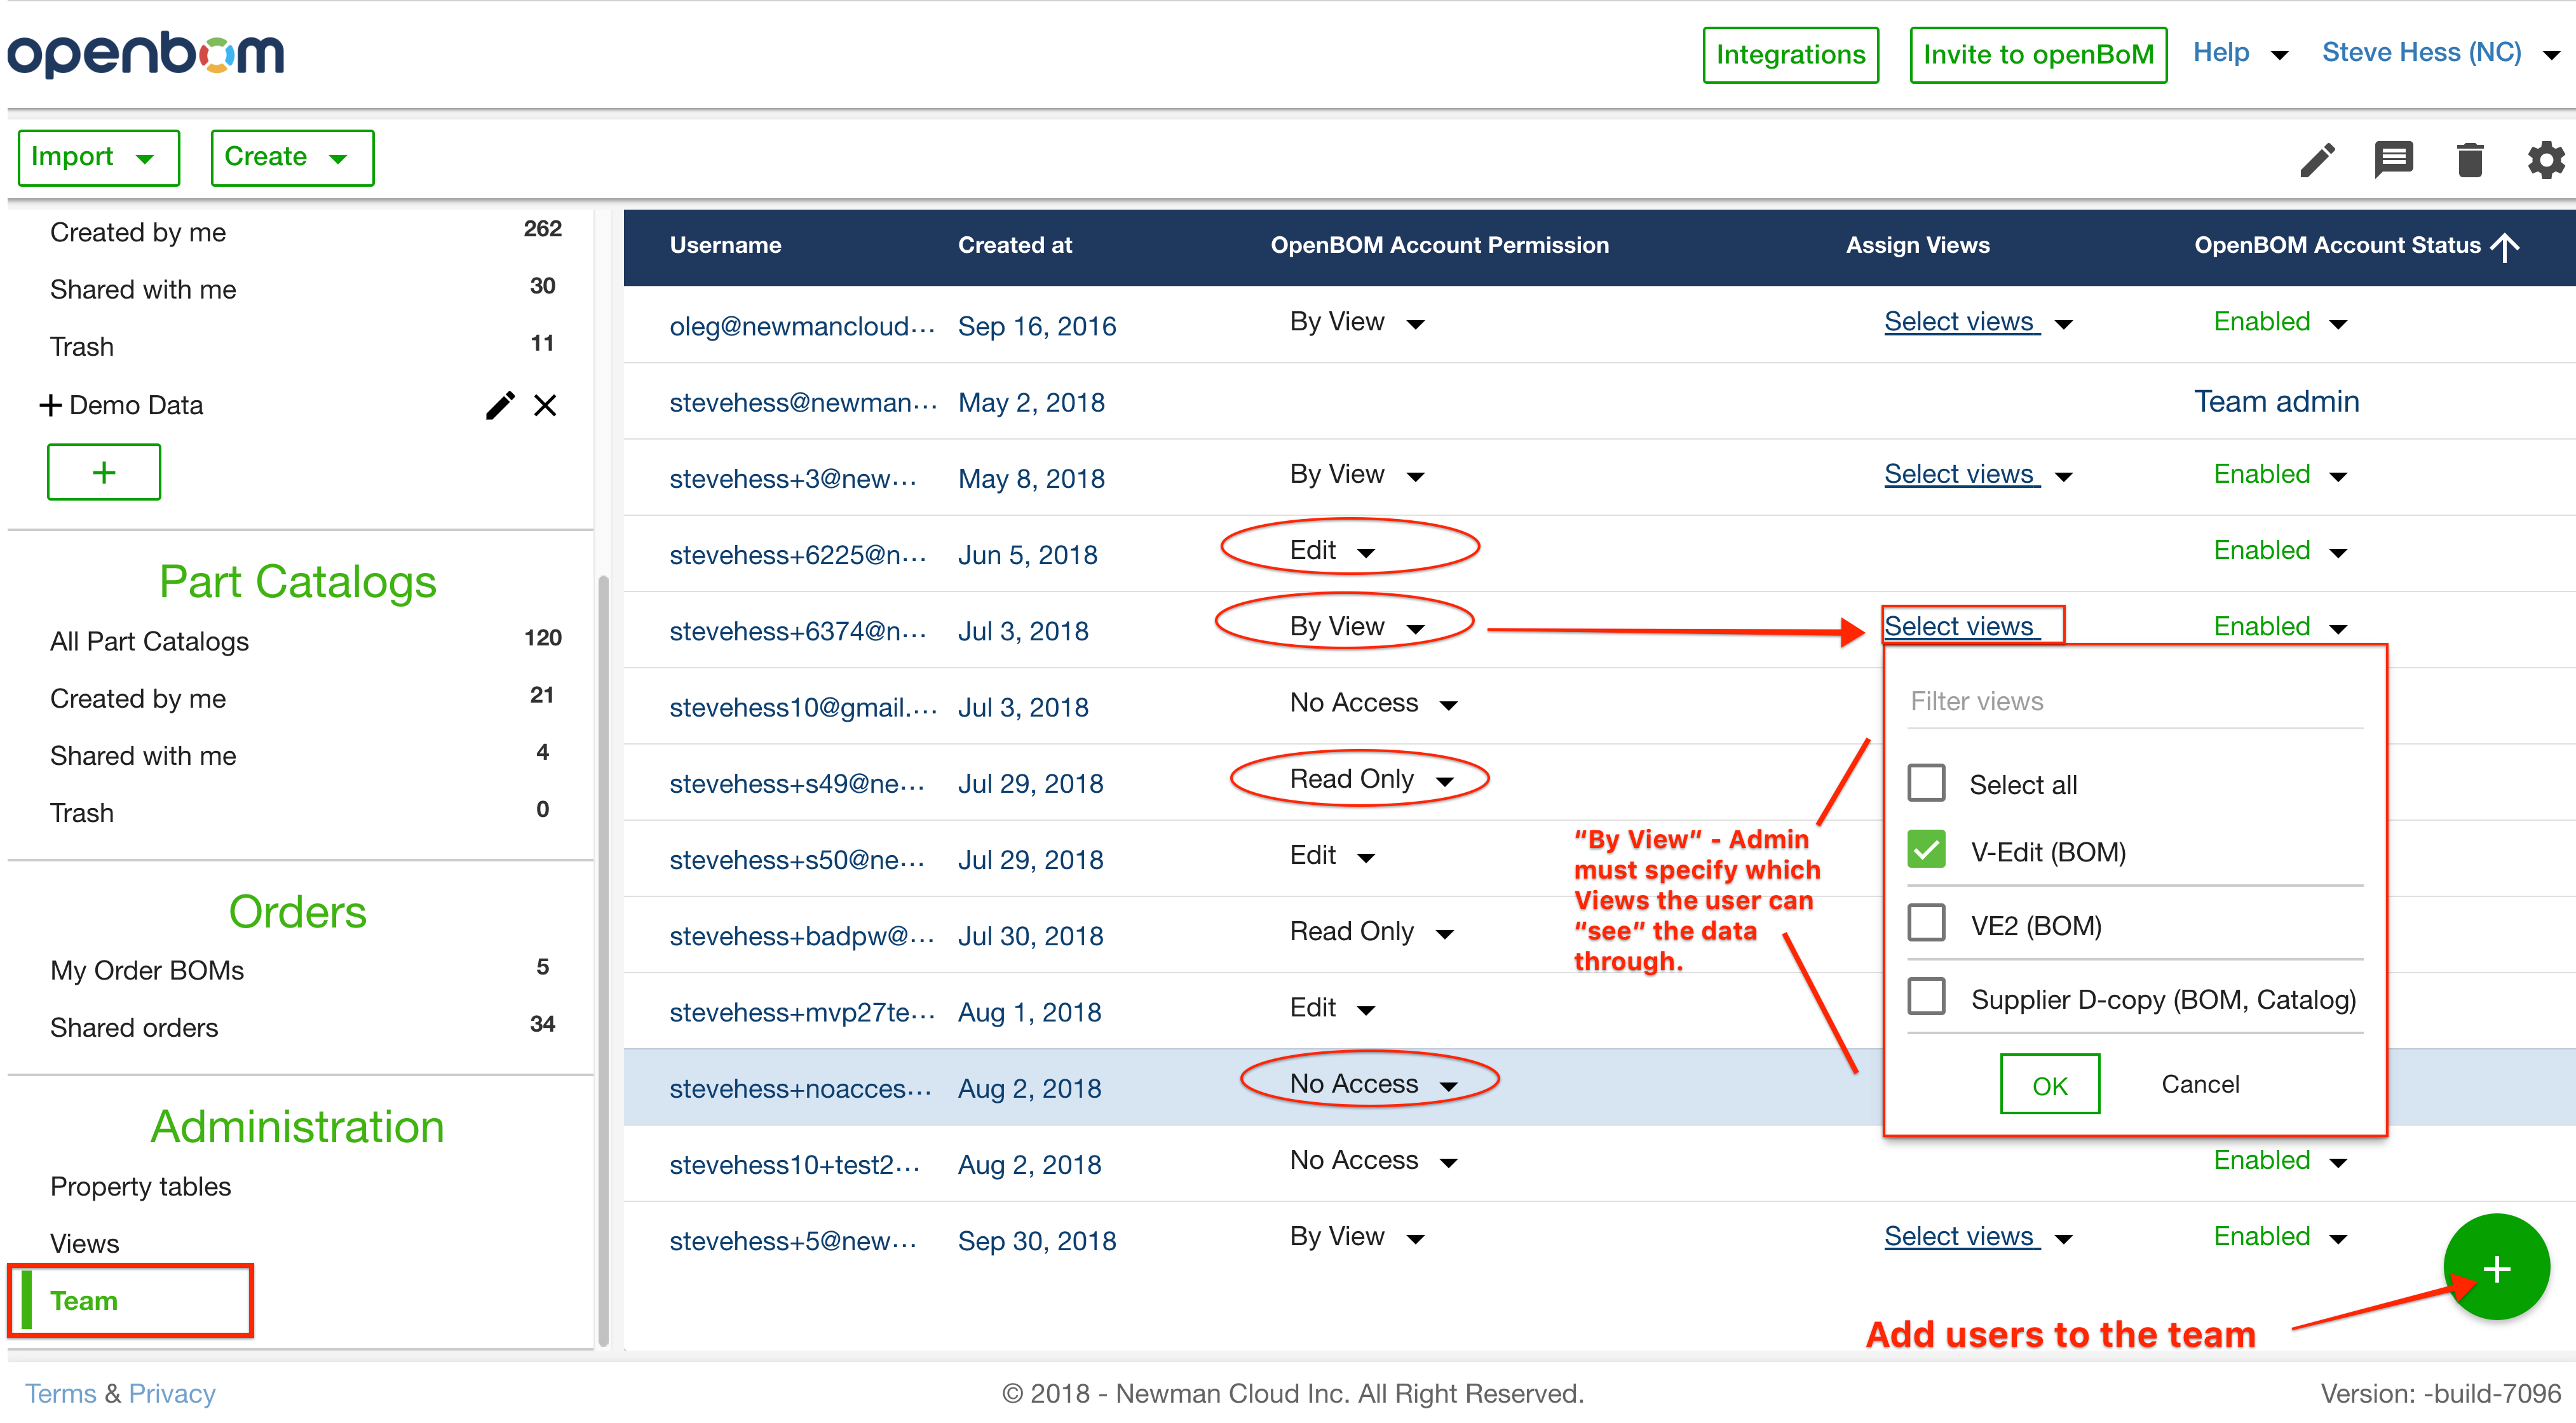
The Admin dashboard is shown below:
Team Views
Setting of the user Views is the single most important responsibility of the Team Administrator. The Views establish which data and what level of access (Edit or Read-Only) a specific user will have.
In the image above, the Administrator is assigning team member “stevehess+5” as having account permissions as “By View” then specifying the available view(s) as the View named “V-Edit”. In other words, when stevehess+5 opens a Team BOM he will ONLY see that BOM data as described in V-Edit. He will see only the properties (columns) in present in that view and with the specified access control (in this case edit).
Using the BOM view menu and the View Configuration Editor, the admin can define a view for a specific role (eg. Supplier or Manufacturing) and assign what properties they can see and whether or not they can edit that data.
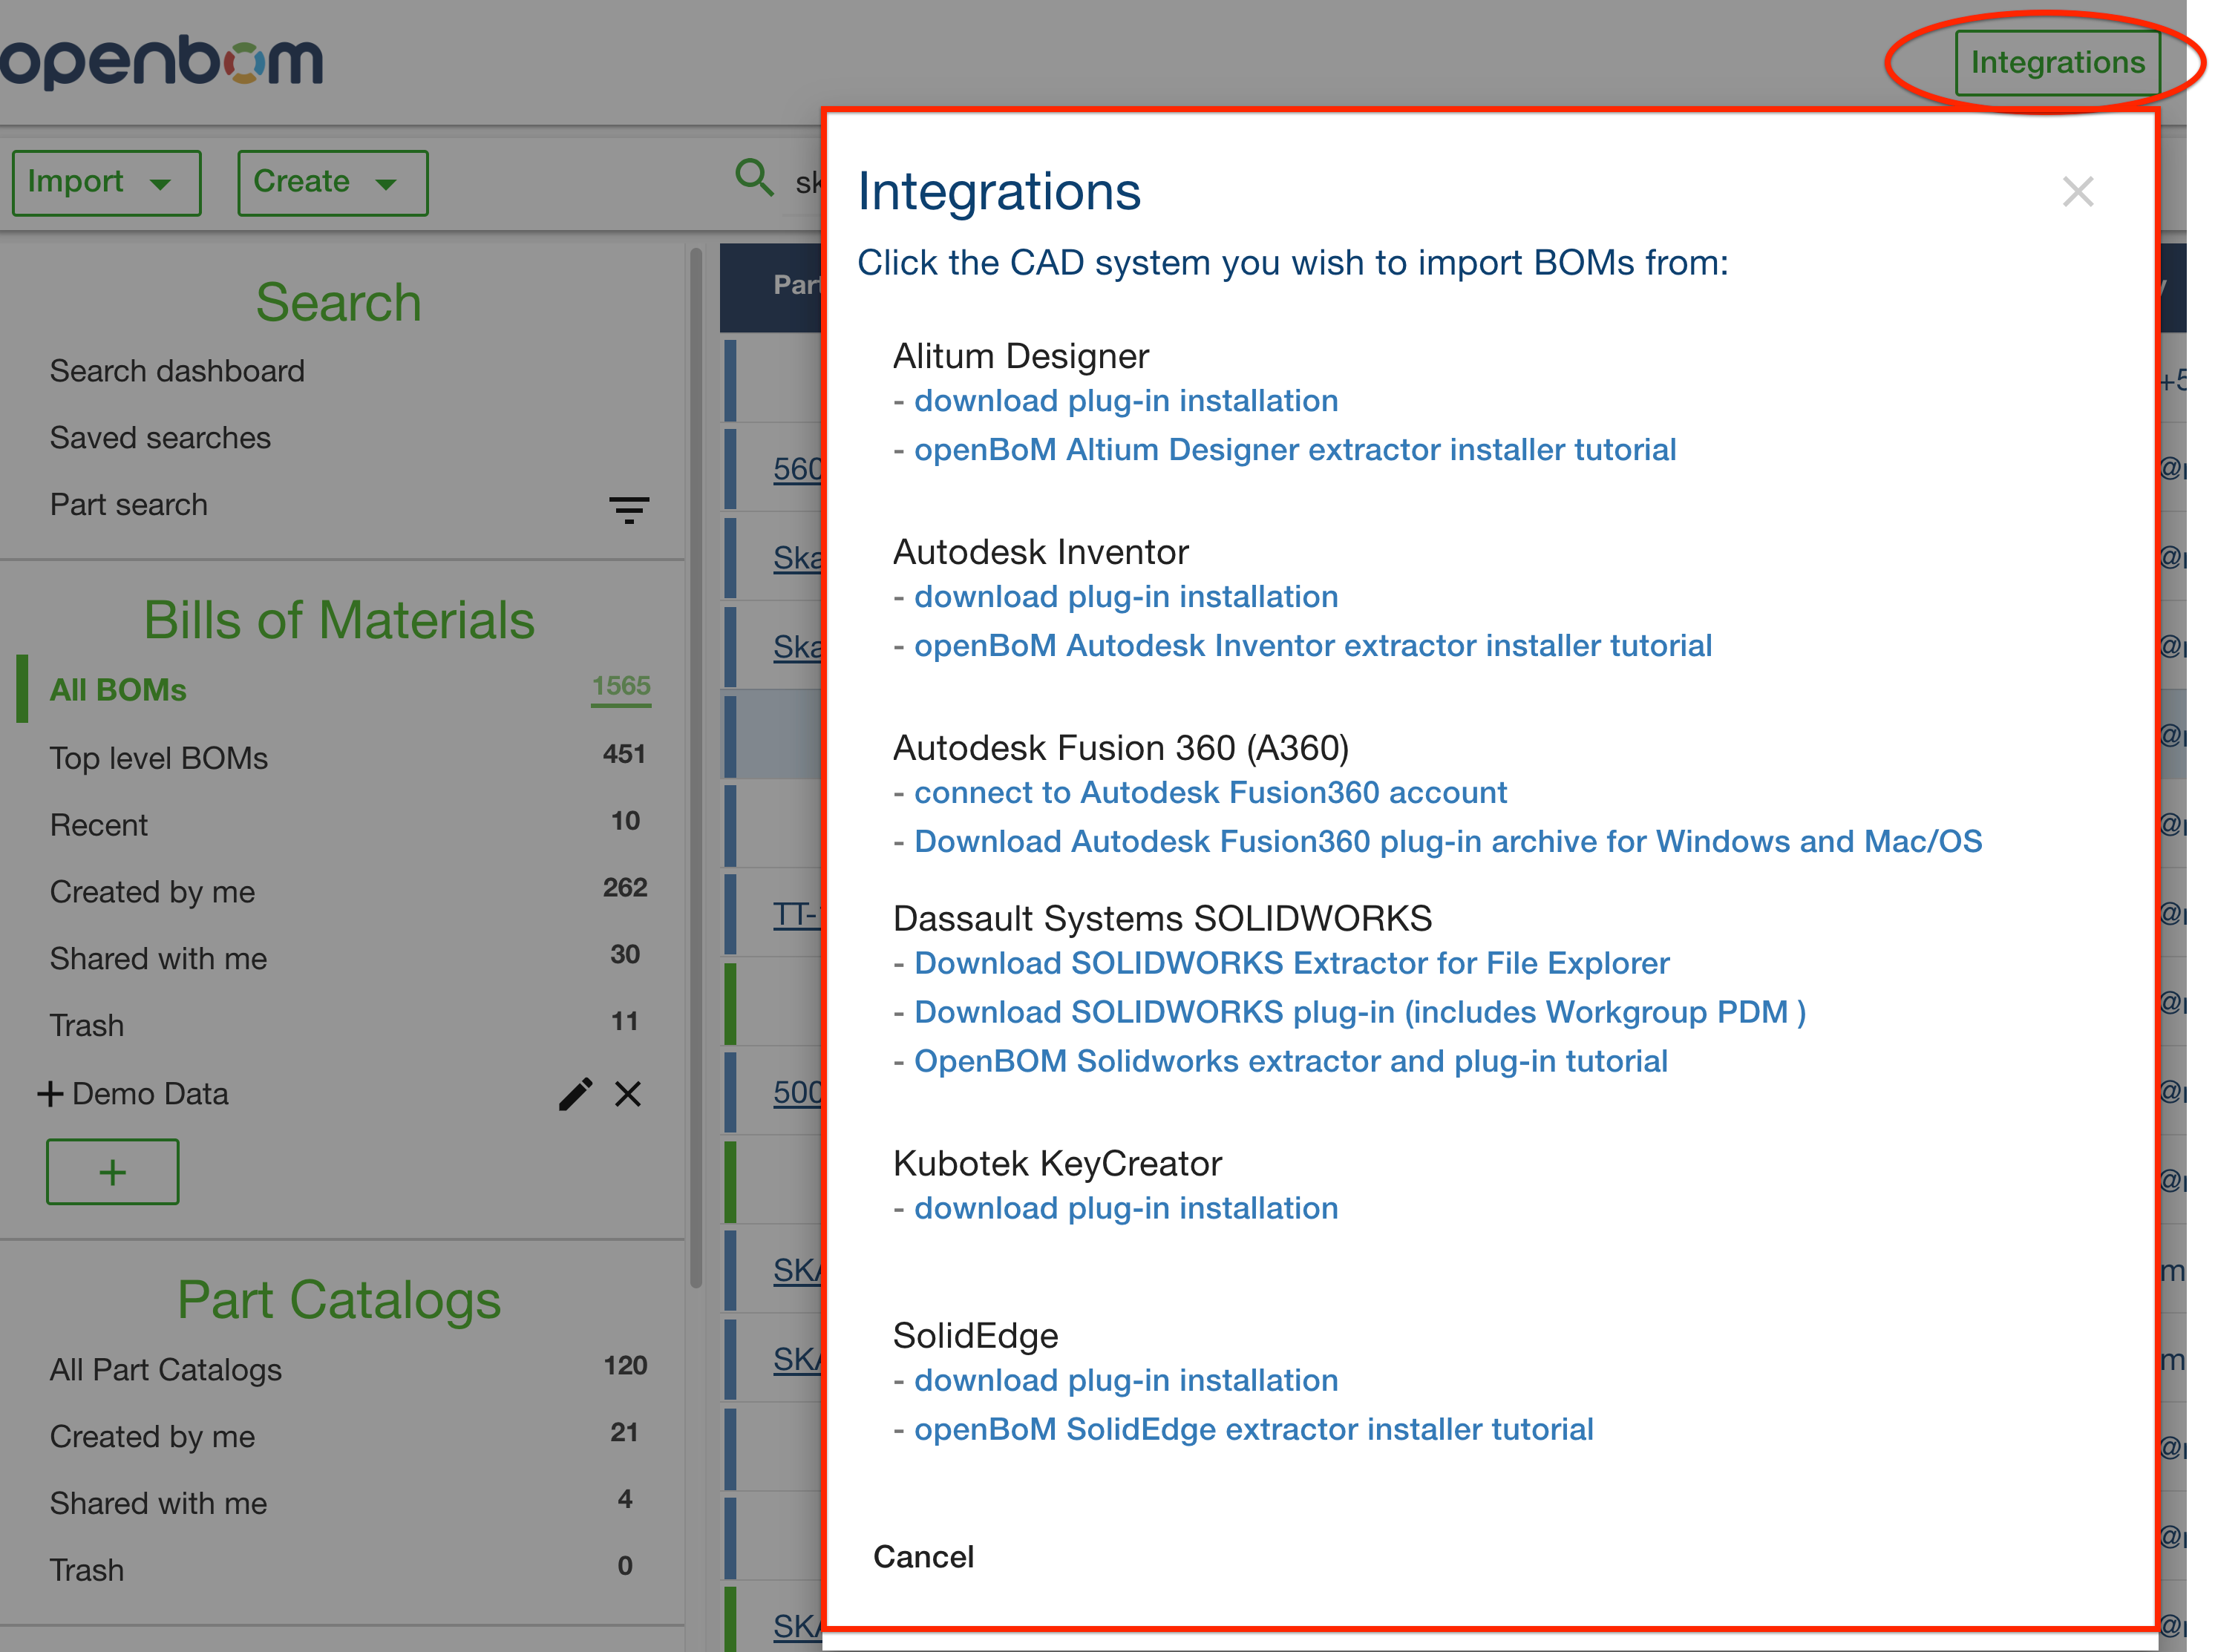
Integrations
Integration user interface allows you to download installers for CAD plug-ins provided as part of OpenBOM user and team subscription.
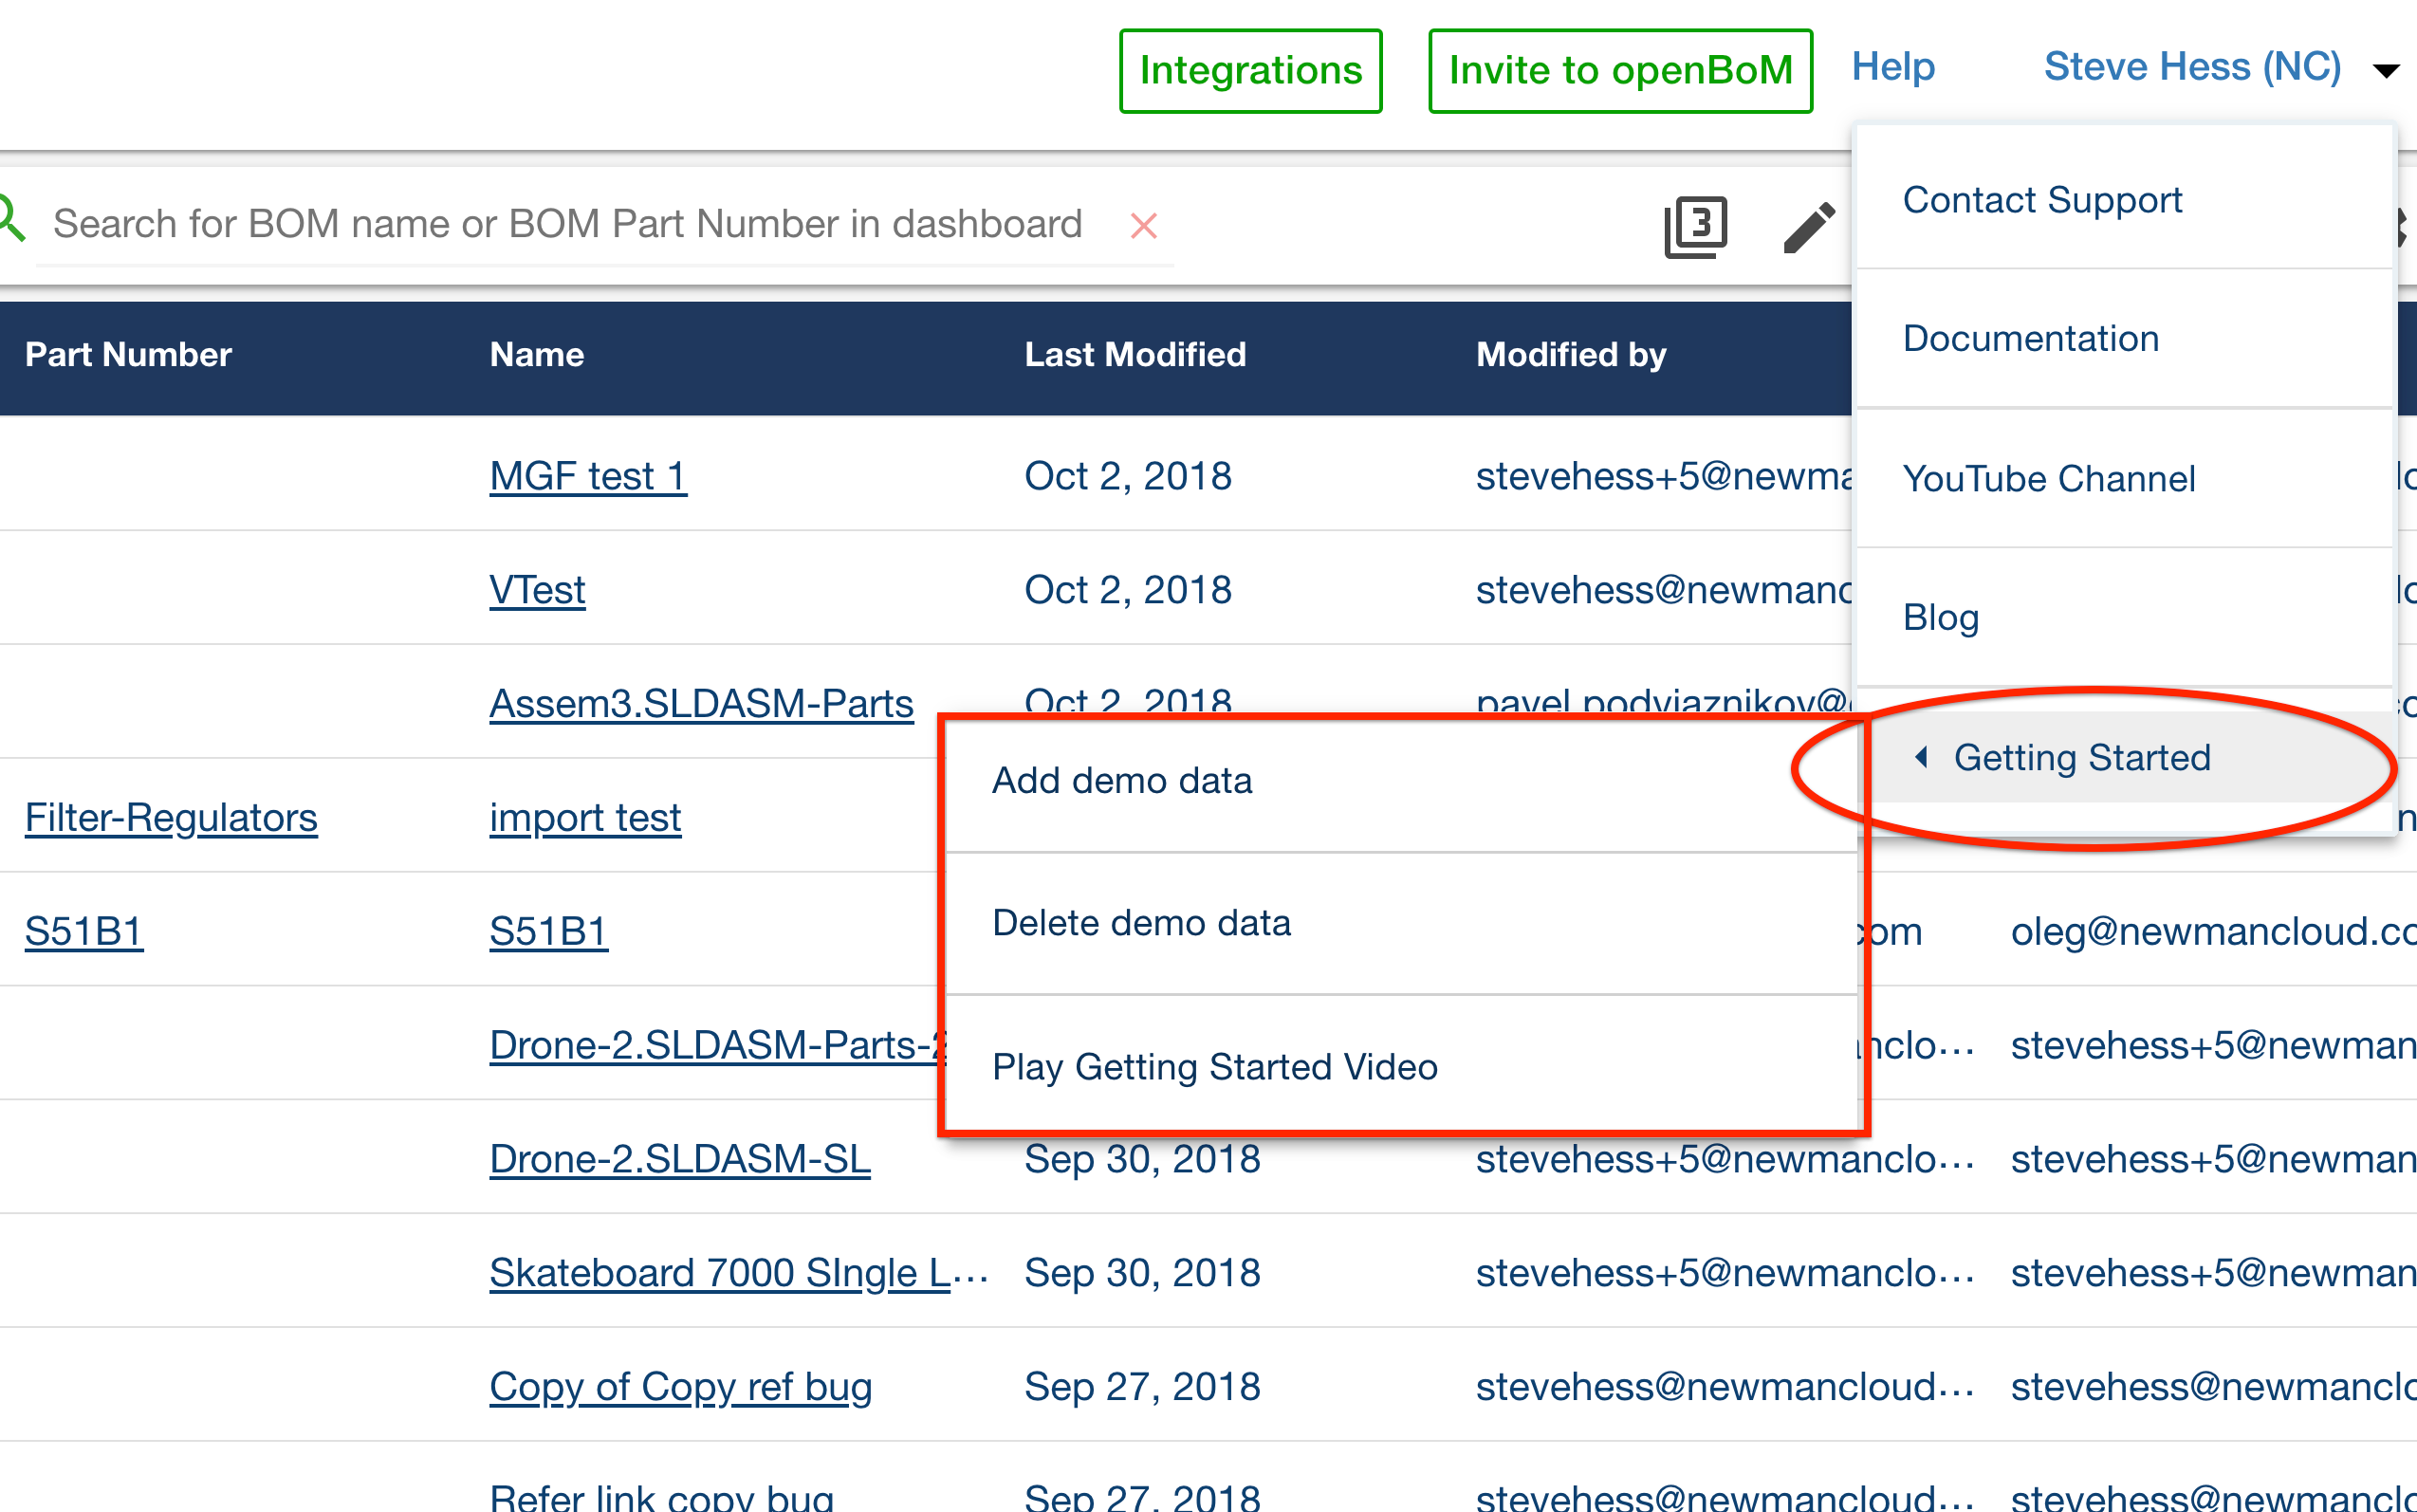
Help menu
List of useful links to OpenBOM website, blog, YouTube channel.
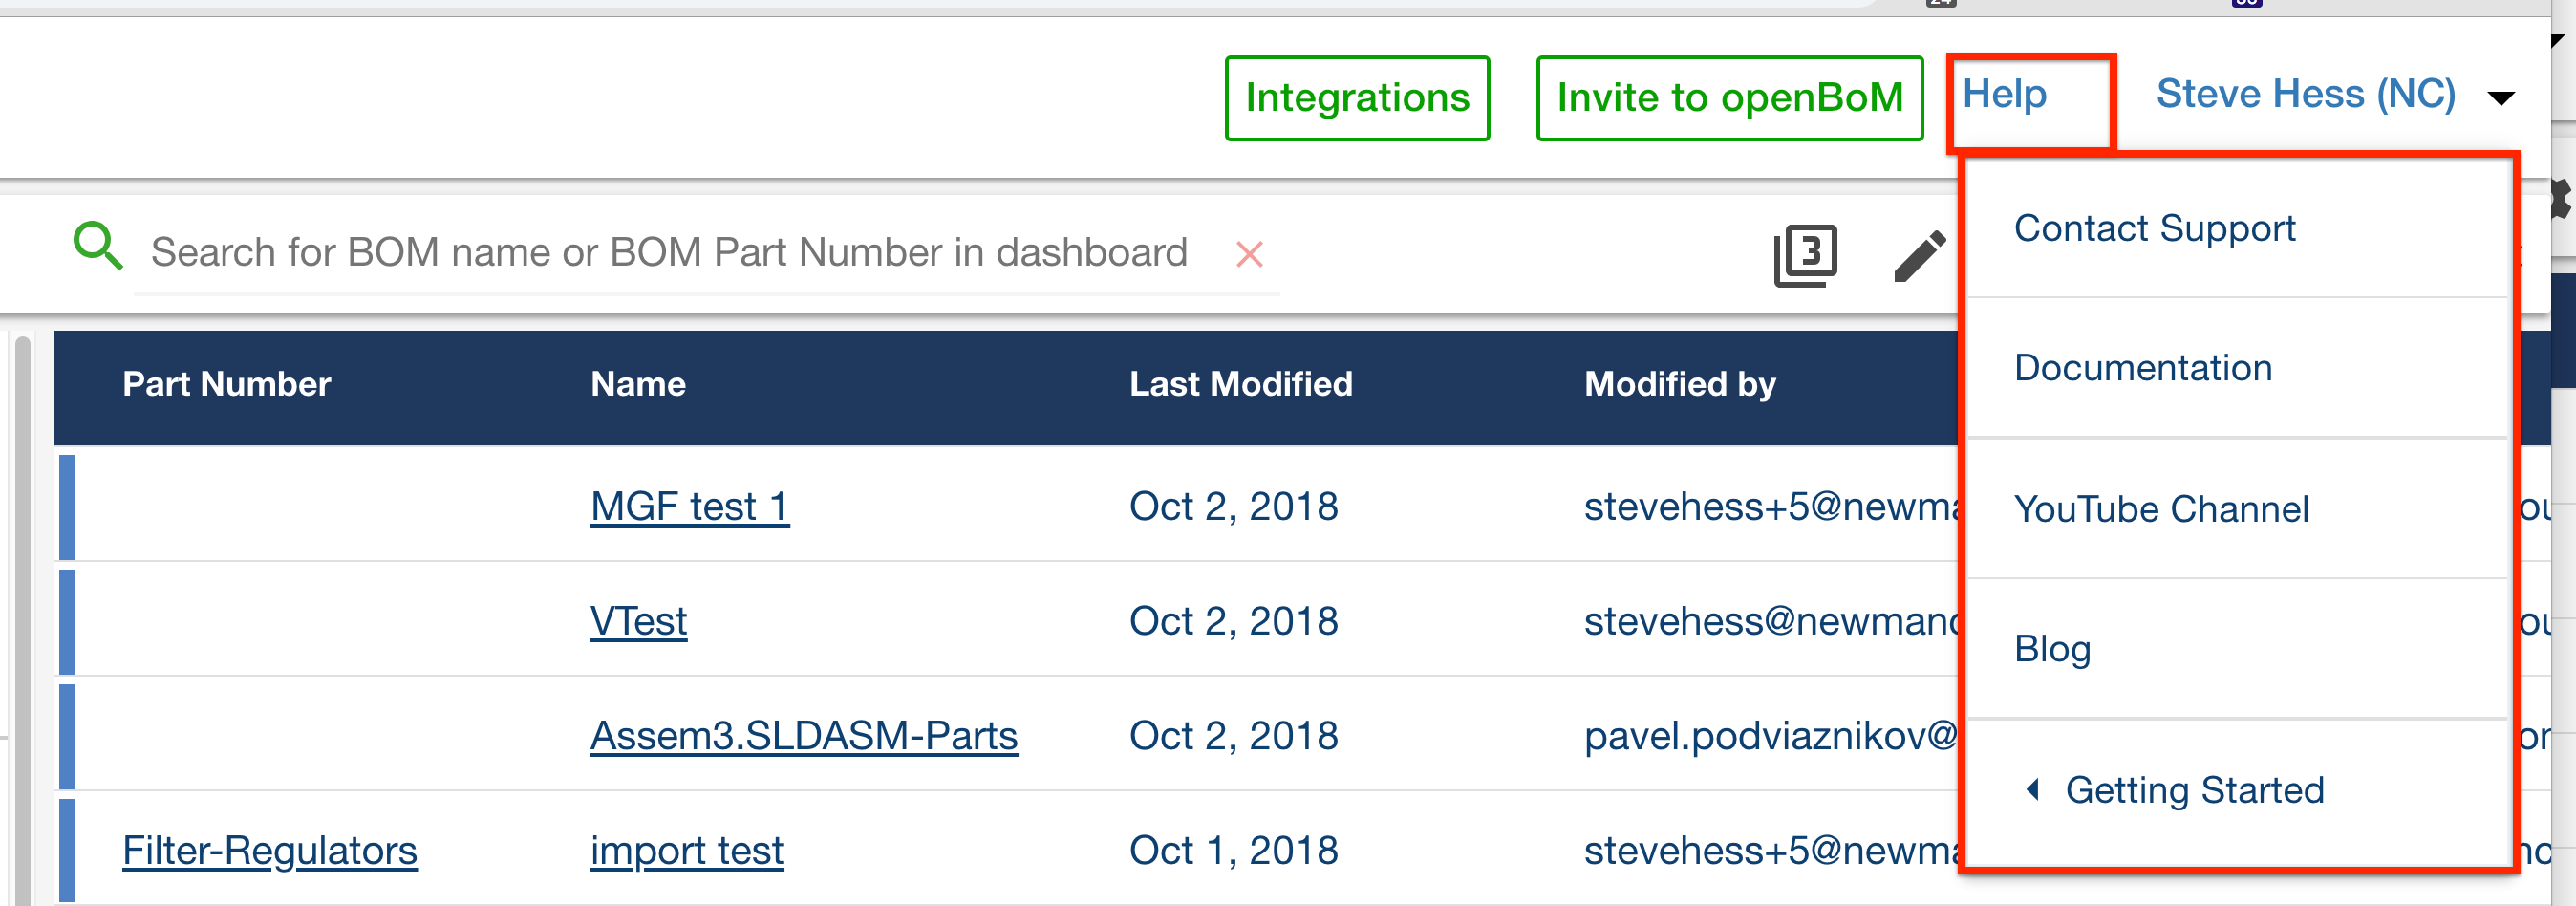
Contact support open user interface to capture screenshot and submit it directly to our support (We answer quick!!!)

Getting Started
- Add demo data: Creates a demo BOM and Catalog in your account
- Delete demo data: Delete the demo data even if you have edited it
- Play getting started video – view the short video which plays for new users